필요한 것
-
-
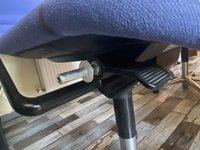
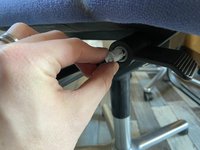
Remove the two screws on one side of the armchair, at the ends of the armrest using the T25 screwdriver
-
The upper screw is a short one
-
The lower screw is a long one
-
-
-
-
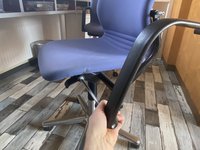
With a decent amount of force, pull the armrest parallel to the screws.
-
-
-
Remove the two screws from the other side of the chair (on the other, remaining armrest)
-
Remove the armrest similarly to the other side, along the screw axis
-
Mind the two circular plastic washers on the lower axes
-
Mind the two plastic inner washers (that are parallel to the axes
-
Finally, the shaft may be removed from the other armrest as well, however, it can be stuck sometimes (you could possibly use a plier, but it can damage the shaft's surface)
-


To reassemble your device, follow these instructions in reverse order.
다른 한 분이 해당 안내서를 완성하였습니다.
4가이드 댓글
Love this guide, its fantastic! Not many places on the internet that reference repair or disassembly of the Wilkhahn FS line chairs. You sir are a brilliant person.
Side note, does anyone know how to replace/dissemble the gas strut/lift for this Wilkhahn FS line chair?
my FS 211/8 is from the mid-1980s, newer models have different levers to adjust the resistance of the syncro mechanism.
0 get a replacement gas strut
1 pull the seat to the highest position and turn chair upside down
2 remove the plastic covers at the bottom of the column and around the levers under the seat with a screwdriver.
3 at floor end of column: slide retaining clip off the plunger with a flat blade screw driver. plunger will drop into column.
4 lift / remove entire wheel assembly with the column. do not lose bearing, washers and rubber end stop inside column.
5 remove hex nut connecting the up/down lever to the gas strut (under seat).
6 remove gas strut from seat. it is only pushed into the seat and held by friction. it's a TIGHT fit. use water pump pliers, grip firm. losen strut from seat with small cw/ccw movements. eventually it will come off.
7 put replacement gas strut into place. pushi it into seat FIRMLY. reassemble in reverse order.