소개
This guide will show you how to replace the charging port. You will need a plastic opening tool, tweezers, and a Phillips #00 screwdriver.
필요한 것
-
-
Flip the phone over so that the back panel of the phone is facing up.
-
Wedge the plastic opening tool between the black outer panel and the silver side panel.
-
Push down on the plastic opening tool to separate the back panel from the rest of the phone.
-
Continue to do this around all sides of the phone until the back panel has popped all the way off.
 FixBot에 문의하기
-
-
이 단계에 사용된 도구:Tweezers$4.99
-
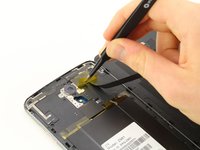
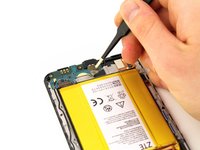
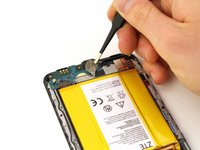
Remove the yellow Kapton tape by using the tweezers to peel it up and away from the device.
-
-
-
Using the Phillips #00 screwdriver, remove the two 3.0 mm screws located near the top of the phone, next to the rear camera.
-
-
-
-
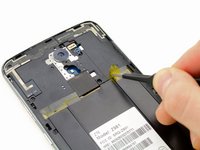
Remove the fingerprint sensor flex cable, using the plastic opening tool to lift it out.
-
-
-
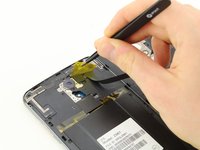
Using the tweezers, peel back the yellow Kapton tape located on the right side of the phone.
-
-
-
Using the Phillips #00 screwdriver, remove the 15, 3.0 mm rear panel screws located around the perimeter of the phone.
-
-
-
Flip the phone over so that the screen is facing up.
-
Wedge the plastic opening tool between the screen and the rear panel.
-
Push up on the opening tool to separate the panel from the phone.
-
Continue to do this around the entire phone until the rear panel is no longer connected to the device.
-
-
이 단계에 사용된 도구:Tweezers$4.99
-
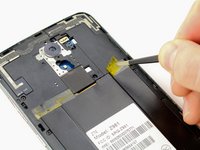
Use tweezers to remove the antenna.
-
-
-
Wedge the plastic opening tool under the charging port board at the bottom of the phone.
-
Push down on the plastic opening tool so the board pulls away from the phone.
-
Continue to do this around the charging port board until it comes all the way off the phone.
-


To reassemble your device, follow these instructions in reverse order.
다른 11명이 해당 안내서를 완성하였습니다.

팀

Cal Poly, Team S17-G3, Livingston Spring 2018 Cal Poly, Team S17-G3, Livingston Spring 2018 회원
CPSU-LIVINGSTON-S18S17G3
4 회원들
안내서 24개를 작성함
11가이드 댓글
Very nice BUT where do you get the replacement charging port?
Where can I bye the parts
“Buy” as in purchase not “Bye” as in see you later.