이 버전에는 잘못된 편집 사항이 있을 수 있습니다. 최신 확인된 스냅샷으로 전환하십시오.
필요한 것
-
이 단계는 번역되지 않았습니다. 번역을 도와주십시오
-
Line up the SSD connectors with the metal enclosure's sockets.
-
Press the drive against the enclosure sockets until the SSD is firmly seated.
-
-
이 단계는 번역되지 않았습니다. 번역을 도와주십시오
-
Use a Phillips screwdriver to install the four silver screws (two on each side) along the edges of the SSD to secure it to the enclosure.
-
-
이 단계는 번역되지 않았습니다. 번역을 도와주십시오
-
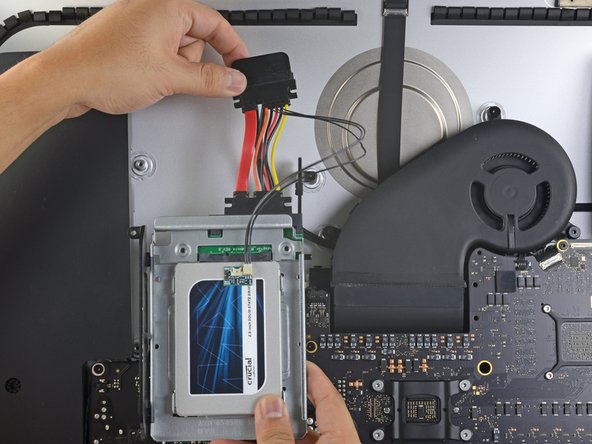
Plug the included sensor-enabled SATA power cable into the enclosure's port.
-
-
이 단계는 번역되지 않았습니다. 번역을 도와주십시오
-
Peel the white liner off the back of the small temperature sensor board in order to expose the adhesive.
-
Adhere the temperature sensor board to an exposed, metal surface of the SSD, close to the SATA connector.
-
Fold the excess temperature sensor wires so that they are out of the way while you install the enclosure.
-
-
-
이 단계는 번역되지 않았습니다. 번역을 도와주십시오
-
Use a T8 driver to install the mounting pins from the old hard drive onto the sides of the enclosure.
-
-
이 단계는 번역되지 않았습니다. 번역을 도와주십시오
-
Attach any mounting brackets removed from the old hard drive onto the enclosure.
-
-
이 단계는 번역되지 않았습니다. 번역을 도와주십시오
-
Connect the iMac's SATA power cable to the other end of the new sensor-enabled SATA cable.
-
-
이 단계는 번역되지 않았습니다. 번역을 도와주십시오
-
Slide the SSD enclosure into the space previously occupied by the hard drive.
-
Route the SATA cables so that they will not interfere with any other components.
-
-
이 단계는 번역되지 않았습니다. 번역을 도와주십시오
-
Find the connector on the motherboard labeled HD TMP or HDD TEMP.
-
If the previous temperature cable is still connected to the board here, disconnect and remove it. You will no longer need it.
-
Connect the temperature sensor's two-wire red-black cable to the motherboard plug labeled HD TMP or HDD TEMP.
-
Route the excess wire so it does not interfere with any other components.
-
다른 4명이 해당 안내서를 완성하였습니다.


