필요한 것
동영상 개요
-
-
Today, REWA LAB will share with you a repair case of an iPhone camera and walk you through some knowledge of iPhone camera repair.
-
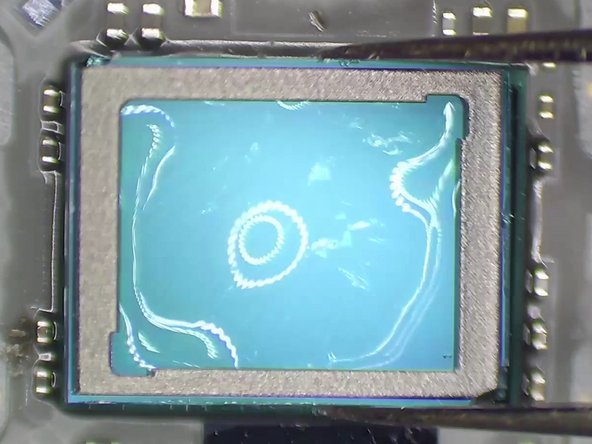
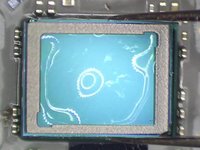
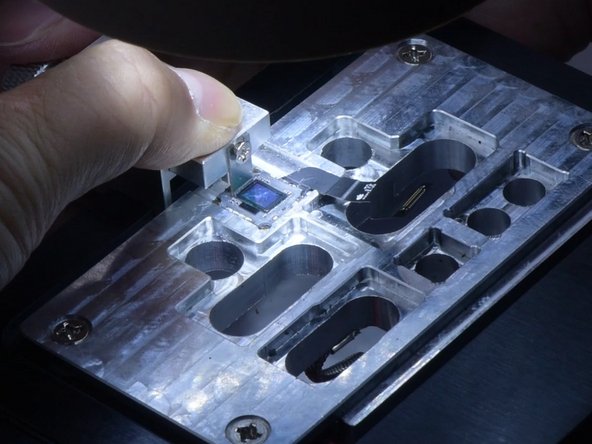
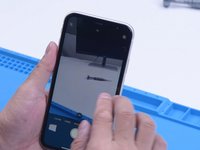
Open the phone camera. When taking photos with the wide-angle camera, cracks appear. The ultra-wide camera works fine. We can judge that the optical filter of the wide-angle camera is damaged.
 FixBot에 문의하기
-
-
-
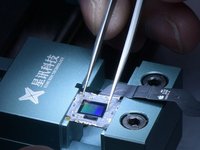
We can judge that the optical filter of the wide-angle camera is damaged. Then we disassemble the phone and try to repair the camera. First of all, put the camera on the specialized Heating Platform at 100 °C.
-
When the temperature reaches 100 °C, remove black adhesive around the camera with a Sculpture Knife. Then pry up the wide-angle camera.
-
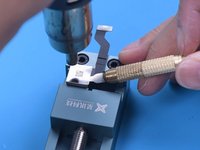
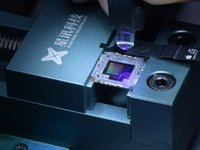
Attach the camera to the specialized holder. Before repair, apply protection tape to the camera.
-
-
이 단계에 사용된 도구:Tweezers$4.99
-
Separate the camera edges with a Sculpture Knife. Next, remove the metal cover with Hot Air Gun at 120 °C.
-
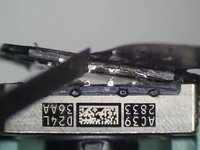
Keep heating with Hot Air Gun at 120 °C. Remove black adhesive with Tweezers. Apply some Paste Flux.
-
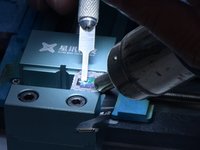
Separate the motor from the CMOS with ultrathin Soldering Iron at 380 °C
-
-
-
-
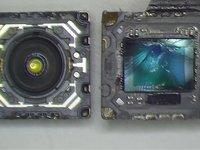
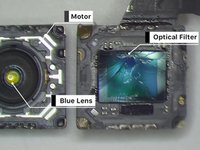
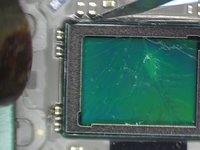
It can be seen that the optical filter is broken while the motor and blue lens are good. If the motor is damaged, the camera will fail to focus or shake. A motor replacement can help you solve the problem.
-
The middle part of the motor is the blue lens. If the blue lens is damaged, the camera will become blurry. The solution is to replace the blue lens.
-
Then we replace the cracked optical filter with a new one.
-
-
-
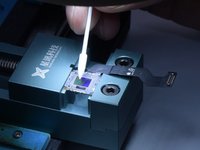
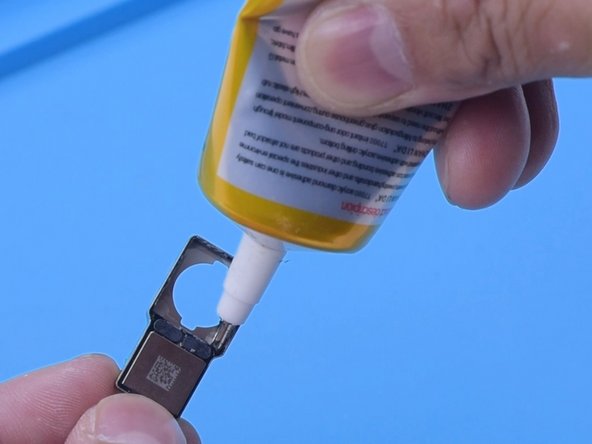
Apply some UV adhesive to the broken optical filter.
-
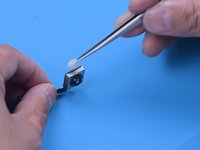
Put the new optical filter in position.
-
Solidify with a UV Lamp.
-
-
-
Remove side adhesive with Hot Air Gun.
-
Then push the cracked optical filter out with the specialized holder.
-
Remove residual shards and black adhesive with Hot Air Gun.
-
-
-
Then remove dust spots with a specialized swab. Please be extremely careful not to damage the CMOS during operation. If the CMOS is damaged, the camera will be unrepairable.
-
Then apply some UV adhesive and a new optical filter. Solidify with UV Lamp.
-
-
-
Then we assemble the camera. Apply some Paste Flux around the motor. Solder the motor with the CMOS with Soldering Iron. Clean the camera with alcohol.
-
Next, we install the wide-angle camera for testing. The camera works fine. Apply B7000 to fix the wide-angle camera. That’s all for the optical filter replacement of iPhone camera.
-


To reassemble your device, follow these instructions in reverse order.
다른 9명이 해당 안내서를 완성하였습니다.

2가이드 댓글
Good job! But, the cost of labor and material is not economical. It is still wise to buy the whole camera module as a replacement. Easier and more practical.
On the other hand, if the viewer opted to do the filter replacement, this is a great reference since Rewa is a reputable company. Thank you for sharing this useful guide.