주요 콘텐츠로 건너뛰기

2010년 4월 출시 / 2.4, 2.53 GHz Core i5 또는 2.66, 2.8 GHz Core i7 프로세서

591 질문 전체 보기

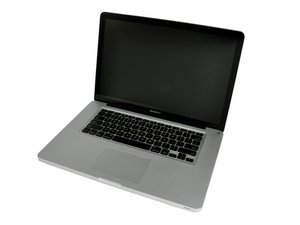
How to replace trackpad on MacBook Pro (15-inch, Mid 2010)

I have a MacBook Pro (15-inch, Mid 2010) and the track pad is on the fritz.

Many of my single clicks are acting as right clicks.

I'm interested in replacing it - planning to purchase this:

MacBook Pro 15" Unibody (Mid 2009-Mid 2012) Trackpad

However - I have not been able to find a guide or instructions on how to replace the trackpad in this model.

Does anyone have a guide or can recommend a similar guide I can use?

Thanks

MacBook Pro 15" Unibody (Mid 2009-Mid 2012) Trackpad 이미지

상품

MacBook Pro 15" Unibody (Mid 2009-Mid 2012) Trackpad

$59.99

답변되었습니다! 답변 보기 저도 같은 문제를 겪고 있습니다

좋은 질문 입니까?

점수 2
댓글 달기

답변 3개

선택된 답변

Using the "MacBook Pro 15" Unibody Early 2011 Trackpad Replacement" guide (MacBook Pro 15" Unibody Early 2011 Trackpad Replacement) was not perfect as there are a few things different in that model than the mid-2010.

I was able to make it work using a combination of that guide (mostly for the trackpad specific stuff ) and the "MacBook Pro 15" Unibody Mid 2010 Upper Case Replacement" guide (MacBook Pro 15" Unibody Mid 2010 Upper Case Replacement) through step 26 for getting the Logic Board off to give me access to the track pad.

A single guide for replacing the trackpad for the MacBook Pro 15" Unibody Mid 2010 would have been helpful but I was able to get this job done with the combination of the two existing guides.

MacBook Pro 15" Unibody Mid 2010 Upper Case 이미지

안내서

MacBook Pro 15" Unibody Mid 2010 Upper Case Replacement

난이도:

어려움

2 - 3 hours

MacBook Pro 15" Unibody Early 2011 Trackpad 이미지

안내서

MacBook Pro 15" Unibody Early 2011 Trackpad Replacement

난이도:

운영

45 minutes - 2 hours

해당 답변은 도움이 되었습니까?

점수 1
댓글 달기
가장 유용한 답변

Check this guide out. It's for a 2011 MacBook Pro. I know it's a different year but it's the same model. See if it helps.

MacBook Pro 15" Unibody Early 2011 Trackpad Replacement

해당 답변은 도움이 되었습니까?

점수 1

댓글 1개:

Thanks - looks like this should to it

I just placed order - will give this guide a try when the package arrives

댓글 달기

It’s often possible to do it more quickly

I’ve replaced the trackpad on my Mid-2010 15” MacBook Pro two or three times. But because my trackpad’s ribbon cable has never been damaged (my trackpad damage was always caused by liquid spills), I’ve never needed to use the lengthy process that has been posted by @bfrosty and by @mrwhitesf.

Here’s how I do it:

1) Shut down the computer

2) Remove the 10 screws from the bottom of laptop. (Using a Phillips 00 screwdriver.) Remove the bottom of the laptop.

3) Remove the 3 screws holding the battery. (Using a tri-lobe screwdriver.) I think I remember, from the first time I did this, that the screw that is closest to the hard drive was initially hidden under tape or something.

4) Lift the battery PARTWAY by pulling on the plastic tab. Then unplug the battery by sliding out the dark plastic plug from the metal socket. I use my fingernails. Remove the battery. The trackpad is underneath.

5) Because my trackpad’s ribbon cable isn’t damaged, I leave it installed and unplug the trackpad from it by sliding the exposed end of the ribbon cable towards the RAM (that is, away from the front edge). If I do this carefully, I avoid a lengthy repair.

6) Remove the four silvery screws from the trackpad. (Using a Phillips 00 screwdriver.) Remove the trackpad towards the screen. (It does not come out through the bottom of the laptop.)

7) Install the new trackpad and tighten the screws just enough so that there is a little friction to keep it from sliding around easily. Look at the front side of the trackpad and center it. Then tighten the screws fully, which doesn’t take much torque. (Too much torque can damage the screw heads.) Bending the tabs adjusts the height of the trackpad. If the trackpad sticks up too far, I’ve been able to pop it down later.

8) Attach the trackpad’s ribbon cable.

9) Plug in the battery cable (tightly, so that the battery doesn’t catch on it), lower the battery in, and put the screws in. (I put electrical tape across the screw that is closest to the hard drive.)

10) Attach the bottom cover.
해당 답변은 도움이 되었습니까?

점수 0
댓글 달기

귀하의 답변을 추가하세요

Colin White 님은 대단히 고마워 할 것입니다.
조회 통계:

24 시간 전: 1

7일 전: 3

30일 전: 9

전체 시간: 1,711