

If your radio has stopped working or you are looking to upgrade your factory radio, you can use this guide to remove the factory radio from your 1995-2001 Honda CRV. Follow these steps to remove the radio.
필요한 것

-
-
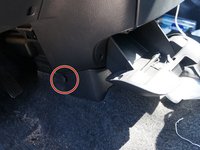
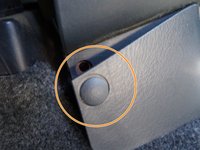
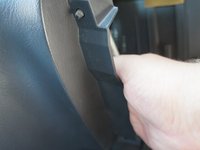
Remove the clips in the glovebox by pushing them in.
-
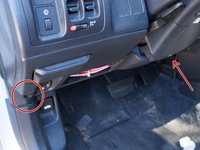
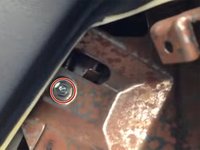
Using a Phillips #0 screwdriver, remove one screw on left side of the glovebox frame and one screw on the right side of the glove box.
-
-


To reassemble your device, follow these instructions in reverse order.
To reassemble your device, follow these instructions in reverse order.
다른 9명이 해당 안내서를 완성하였습니다.

팀

USF Sarasota-Manatee, Team 1-1, Stewart Spring 2017 USF Sarasota-Manatee, Team 1-1, Stewart Spring 2017 회원
USFSM-STEWART-S17S1G1
19 회원들
안내서 22개를 작성함
댓글 4개
I had a single DIN ALPINE stereo “professionally” installed in my late dad’s 2001 CRV. Two weeks after the install, it starts to rattle, had a broken aftermarket single DIN radio already installed, NEVER rattled! Now, I just discovered that if I put my hand in the tray under the new radio, the whole console piece with the radio and HVAC knobs just slides out! Did they forget the 13mm side screws that hold it in??? Or, damaged something else back there? Very upset!!! Any ideas??
After the removal you may need Honda radio code that will help you unlock your original radio (if you decide to use it). I had the same problem before a month. I solve it using the guide from this unlock Honda page: https://www.hondaradiocodebyvin.com/!
Following the removal, you might require the Honda radio code to facilitate unlocking your original radio should you choose to reinstall it. I encountered a similar issue a month ago and successfully resolved it by referring to the instructions provided on this Honda unlocking page: CAR RADIO CODE UNLOCK SERVICE
.
After removing the radio, you might need the Honda radio code to unlock and use your original radio. I encountered the same issue a month ago and resolved it using the guide on this unlock Honda page: https://radiounlocked.com/