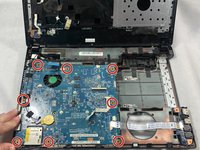
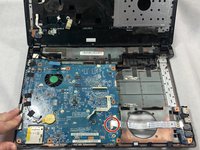
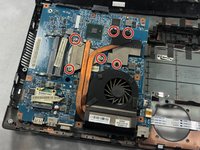
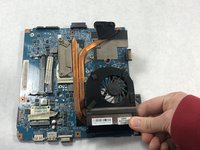
주요 콘텐츠로 건너뛰기

Acer Aspire 4741G-332G32Mn Fan Replacement

필요한 것

  1. Acer Aspire 4741G-332G32Mn Fan Replacement, Battery: 1 단계, 이미지 1/1
    • Flip the lock latch to unlock battery.

  2. Acer Aspire 4741G-332G32Mn Fan Replacement: 2 단계, 이미지 1/1
    • Slide the middle latch and remove the battery.

  3. Acer Aspire 4741G-332G32Mn Fan Replacement, Backplate: 3 단계, 이미지 1/3 Acer Aspire 4741G-332G32Mn Fan Replacement, Backplate: 3 단계, 이미지 2/3 Acer Aspire 4741G-332G32Mn Fan Replacement, Backplate: 3 단계, 이미지 3/3
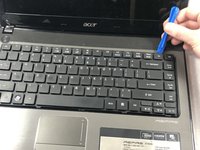
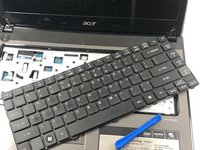
    • Pry off the keyboard using the opening tool.

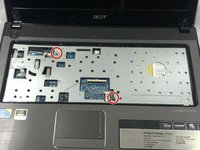
    • Remove the two screws that are connected to the motherboard using a Phillips #0 screwdriver.

  4. Acer Aspire 4741G-332G32Mn Fan Replacement: 4 단계, 이미지 1/1
    • Remove all 12 screws from the backplate using a Phillips #0 screwdriver.

  5. Acer Aspire 4741G-332G32Mn Fan Replacement: 5 단계, 이미지 1/1
    • Using the prying tool to remove the bottom of the laptop.

  6. Acer Aspire 4741G-332G32Mn Fan Replacement, Fan: 6 단계, 이미지 1/2 Acer Aspire 4741G-332G32Mn Fan Replacement, Fan: 6 단계, 이미지 2/2
    • Using a Phillips #0 screwdriver, remove the eight screws that hold the motherboard to the frame of the laptop.

    • Disconnect the USB port from the motherboard.

  7. Acer Aspire 4741G-332G32Mn Fan Replacement: 7 단계, 이미지 1/2 Acer Aspire 4741G-332G32Mn Fan Replacement: 7 단계, 이미지 2/2
    • Unscrew the 6 screws that hold the fan to the motherboard using the same screwdriver.

결론

To reassemble your device, follow these instructions in reverse order.

다른 한 분이 해당 안내서를 완성하였습니다.

Tu Nguyen

회원 가입일: 03/21/19

150 평판

안내서 1개 작성함

UMass Dartmouth, Team S2-G6, Simcock Spring 2019 UMass Dartmouth, Team S2-G6, Simcock Spring 2019 회원

UMASSD-SIMCOCK-S19S2G6

4 회원들

안내서 8개 작성하였습니다

댓글 0개

댓글 쓰기

조회 통계:

24 시간 전: 0

7일 전: 2

30일 전: 3

전체 시간: 683