주요 콘텐츠로 건너뛰기
Acer Aspire 5734z-4836 Keyboard Replacement

Acer Aspire 5734z-4836 Keyboard Replacement

Holly Steininger

Holly Steininger5 다른 기여자

최종 수정일 July 26, 2018

3 분
쉬움

The keyboard replacement is a simple replacement guide, but to remove the panel some force may be necessary.

  1. Acer Aspire 5734z-4836 Keyboard Replacement, Battery: 1 단계, 이미지 1개 중 1개
    • Before removing the battery, power off your laptop and disconnect the AC adapter.

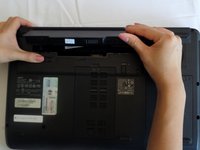
    • Flip your laptop on its back so the battery is facing up and the hinges are facing away from you.

  2. Acer Aspire 5734z-4836 Keyboard Replacement: 2 단계, 이미지 1개 중 1개
    • Slide the right latch down to unlock the battery.

  3. Acer Aspire 5734z-4836 Keyboard Replacement: 3 단계, 이미지 2개 중 1개 Acer Aspire 5734z-4836 Keyboard Replacement: 3 단계, 이미지 2개 중 2개
    • Slide and hold the left latch below the battery.

    • While holding this latch in place, pry the battery up from its bottom edge.

    • Lift the old battery out of its compartment.

  4. Acer Aspire 5734z-4836 Keyboard Replacement, Keyboard: 4 단계, 이미지 3개 중 1개 Acer Aspire 5734z-4836 Keyboard Replacement, Keyboard: 4 단계, 이미지 3개 중 2개 Acer Aspire 5734z-4836 Keyboard Replacement, Keyboard: 4 단계, 이미지 3개 중 3개
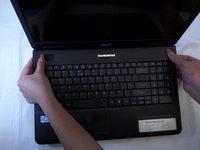
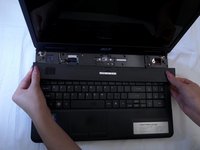
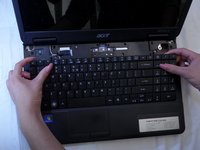
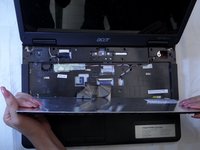
    • Pinch the edges of the plastic covering above the keyboard, and pull away from the laptop until the covering pops off.

    • By using a bit of force some clicks will be heard when removing the cover.

  5. Acer Aspire 5734z-4836 Keyboard Replacement: 5 단계, 이미지 2개 중 1개 Acer Aspire 5734z-4836 Keyboard Replacement: 5 단계, 이미지 2개 중 2개
    • Pull the keyboard off gently so not to damage the keyboard ribbon cable.

    • Multiple clicks may be heard as you pull the keyboard off.

  6. Acer Aspire 5734z-4836 Keyboard Replacement: 6 단계, 이미지 3개 중 1개 Acer Aspire 5734z-4836 Keyboard Replacement: 6 단계, 이미지 3개 중 2개 Acer Aspire 5734z-4836 Keyboard Replacement: 6 단계, 이미지 3개 중 3개
    • Using a spudger or your finger, unlock the ZIF connector holding the keyboard ribbon in place by lifting the black locking lever.

    • Pull the blue keyboard ribbon cable from the ZIF connector.

    • When reinstalling a new keyboard, insert the ribbon in the same way the old keyboard's ribbon was removed.

결론

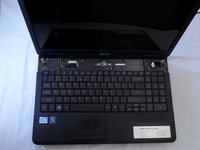
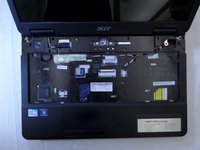
To reassemble your device, follow these instructions in reverse order.

다른 2명이 해당 안내서를 완성하였습니다.

작성자

5다른 기여자 명과 함께

Holly Steininger

회원 가입일: 09/12/16

258 평판

안내서 2개를 작성함

CSU Fullerton, Team 2-3, Bruce Fall 2016 CSU Fullerton, Team 2-3, Bruce Fall 2016 회원

CSUF-BRUCE-F16S2G3

4 회원들

안내서 6개를 작성함

댓글 0개

댓글 쓰기

조회 통계:

지난 24시간: 0

지난 7일: 0

지난 30일: 5

전체 시간: 1,534