주요 콘텐츠로 건너뛰기
Acer Aspire 7736Z-4809 CPU Fan Replacement

Acer Aspire 7736Z-4809 CPU Fan Replacement

Pnithan Jantarakolica

Pnithan Jantarakolica5 다른 기여자

최종 수정일 May 7, 2024

30 - 45 분
조정

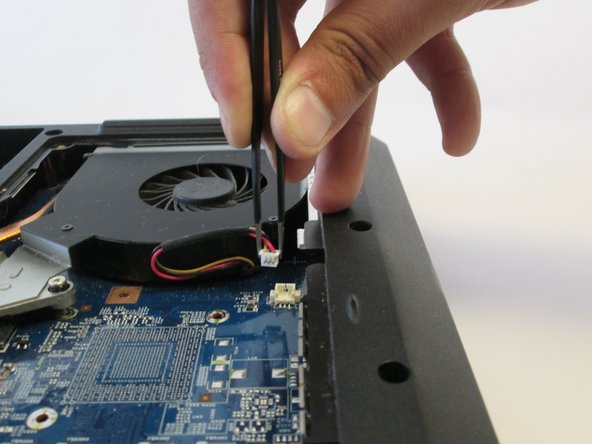
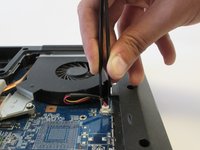
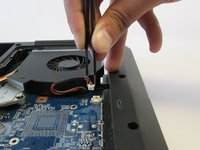
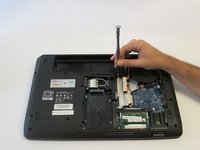
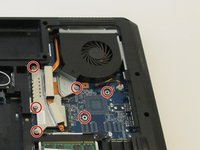
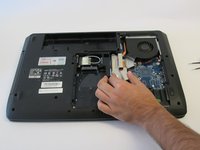
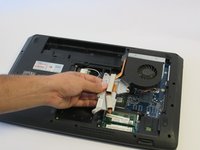
To remove the CPU cooling fan for replacement, we must disassemble the laptop and deal with sensitive electrical components. Please carefully follow these procedures.

필요한 것

도구

  1. Acer Aspire 7736Z-4809 CPU Fan Replacement, Acer Aspire 7736Z-4809 Repair Preparation: 1 단계, 이미지 1개 중 1개
    • Unplug and power off the laptop.

    • If the battery is still connected to the laptop, remove the battery.

  2. Acer Aspire 7736Z-4809 CPU Fan Replacement: 2 단계, 이미지 1개 중 1개
    • Flip over the laptop so that the back panel of the laptop is facing up.

  3. Acer Aspire 7736Z-4809 CPU Fan Replacement, Back Panel: 3 단계, 이미지 2개 중 1개 Acer Aspire 7736Z-4809 CPU Fan Replacement, Back Panel: 3 단계, 이미지 2개 중 2개
    • Use the Phillips #1 screwdriver to remove the eight 6.5 mm Phillips #1 screws.

    • Only the four screws in the center are removable, the four along the edges are held in by rivets but can be loosened.

  4. Acer Aspire 7736Z-4809 CPU Fan Replacement: 4 단계, 이미지 3개 중 1개 Acer Aspire 7736Z-4809 CPU Fan Replacement: 4 단계, 이미지 3개 중 2개 Acer Aspire 7736Z-4809 CPU Fan Replacement: 4 단계, 이미지 3개 중 3개
    • Remove the back panel of the laptop.

  5. Acer Aspire 7736Z-4809 CPU Fan Replacement: 5 단계, 이미지 1개 중 1개
    • Connect a grounding cord to a metal interface on the laptop.

    • Ground the laptop to prevent static electricity from damaging the electrical components inside the laptop.

  6. Acer Aspire 7736Z-4809 CPU Fan Replacement, CPU Fan: 6 단계, 이미지 3개 중 1개 Acer Aspire 7736Z-4809 CPU Fan Replacement, CPU Fan: 6 단계, 이미지 3개 중 2개 Acer Aspire 7736Z-4809 CPU Fan Replacement, CPU Fan: 6 단계, 이미지 3개 중 3개
    이 단계에 사용된 도구:
    Tweezers
    $4.99
    • Use tweezers to remove the fan cable from its slot.

    • The cables consist of red, black, and yellow wires.

  7. Acer Aspire 7736Z-4809 CPU Fan Replacement: 7 단계, 이미지 2개 중 1개 Acer Aspire 7736Z-4809 CPU Fan Replacement: 7 단계, 이미지 2개 중 2개
    • Use the Phillips #1 screwdriver to unscrew the four Phillips #1 screws that connect the cooling fan from the panel.

    • These screws are held in the unit via springs. You cannot remove them. They can only be loosened.

  8. Acer Aspire 7736Z-4809 CPU Fan Replacement: 8 단계, 이미지 3개 중 1개 Acer Aspire 7736Z-4809 CPU Fan Replacement: 8 단계, 이미지 3개 중 2개 Acer Aspire 7736Z-4809 CPU Fan Replacement: 8 단계, 이미지 3개 중 3개
    • Carefully remove the cooling fan from the motherboard.

    • Slightly lift up the fan, gradually slide it towards you and then fully remove it from the case.

  9. Acer Aspire 7736Z-4809 CPU Fan Replacement: 9 단계, 이미지 1개 중 1개
    • Install the modified or new cooling fan.

결론

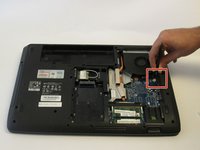
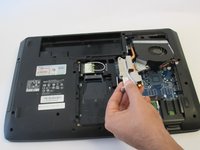
To reassemble your device, follow these instructions in reverse order.

다른 2명이 해당 안내서를 완성하였습니다.

작성자

5다른 기여자 명과 함께

Pnithan Jantarakolica

회원 가입일: 09/22/16

1,153 평판

안내서 10개를 작성함

UC Davis, Team 2-4, Oliver Fall 2016 UC Davis, Team 2-4, Oliver Fall 2016 회원

UCD-OLIVER-F16S2G4

5 회원들

안내서 10개를 작성함

댓글 한 개

You’ll need some thermal compound when reinstalling for the heat syncs under the copper tube.

Minks - 답글

댓글 쓰기

조회 통계:

지난 24시간: 17

지난 7일: 19

지난 30일: 27

전체 시간: 944