주요 콘텐츠로 건너뛰기
Acer Aspire 774G-58GS Thermal Paste Replacement

Acer Aspire 774G-58GS Thermal Paste Replacement

Abdul Munam Khan

Abdul Munam Khan2 다른 기여자

최종 수정일 March 29, 2024

10 분
조정
더 많은 이미지가 필요함

This is a beginner friendly guide to replacing thermal paste in an Acer Aspire 774G-58GS laptop.

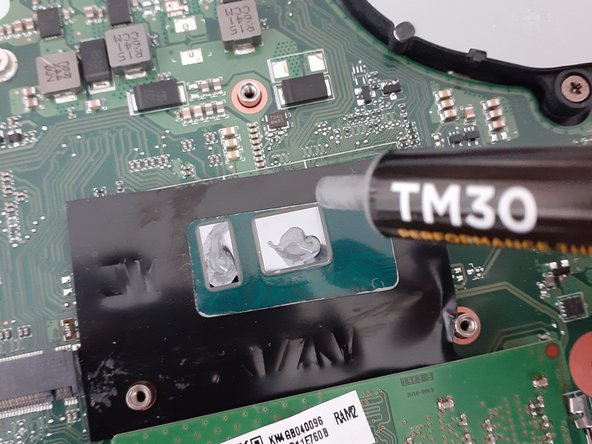
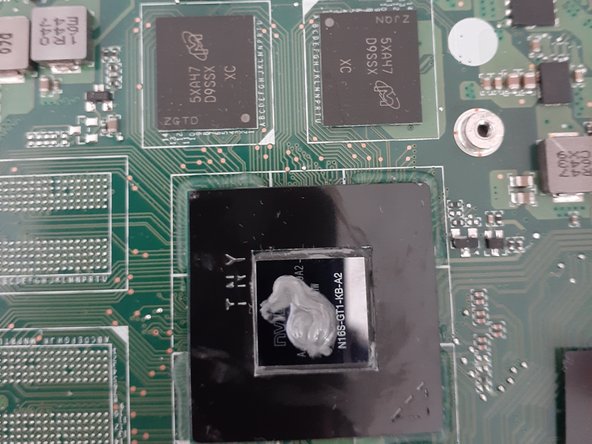
Overheating in a laptop can cause lagging or automatic shutdowns which can be very frustrating. It is a very common problem, and one important way to keep temperatures cool is by applying new thermal paste.

Before using this guide, please ensure that you have removed all the dust from the laptop air vents using compressed air. You may note that the laptop functions better after cleaning it. If you feel that there is no improvement, continue to follow this guide to learn how to apply thermal paste.

No prior knowledge or experience is required to perform this task. Following this guide will help guarantee that you get the job done easily and without creating any mess or damaging parts!

필요한 것

iFixit은 귀하가 이 링크를 통해 구매할 때 커미션을 받습니다.
  1. Acer Aspire 774G-58GS Thermal Paste Replacement, Thermal Paste: 1 단계, 이미지 3개 중 1개 Acer Aspire 774G-58GS Thermal Paste Replacement, Thermal Paste: 1 단계, 이미지 3개 중 2개 Acer Aspire 774G-58GS Thermal Paste Replacement, Thermal Paste: 1 단계, 이미지 3개 중 3개
    • Remove the three screws from the plate that covers the RAM and HDD using a Phillips #0 screwdriver.

    • Remove the plate from the laptop.

  2. Acer Aspire 774G-58GS Thermal Paste Replacement: 2 단계, 이미지 2개 중 1개 Acer Aspire 774G-58GS Thermal Paste Replacement: 2 단계, 이미지 2개 중 2개
    • Remove the DVD drive and the three screws that are underneath it.

    • Remove all the screws surrounding the backplate.

  3. Acer Aspire 774G-58GS Thermal Paste Replacement: 3 단계, 이미지 3개 중 1개 Acer Aspire 774G-58GS Thermal Paste Replacement: 3 단계, 이미지 3개 중 2개 Acer Aspire 774G-58GS Thermal Paste Replacement: 3 단계, 이미지 3개 중 3개
    • Disconnect the speaker wire beneath the RAM.

    • Gently remove the backplate from the laptop.

  4. Acer Aspire 774G-58GS Thermal Paste Replacement: 4 단계, 이미지 2개 중 1개 Acer Aspire 774G-58GS Thermal Paste Replacement: 4 단계, 이미지 2개 중 2개
    • Remove the five screws from the heat sink.

    • Take a cotton ball and dab it with isopropyl alcohol.

    • Use the cotton ball to wipe the old thermal paste from the heat sink.

  5. Acer Aspire 774G-58GS Thermal Paste Replacement: 5 단계, 이미지 3개 중 1개 Acer Aspire 774G-58GS Thermal Paste Replacement: 5 단계, 이미지 3개 중 2개 Acer Aspire 774G-58GS Thermal Paste Replacement: 5 단계, 이미지 3개 중 3개
    • Take another cotton ball, dab it with isopropyl alcohol, and gently wipe the thermal paste off of the GPU and CPU.

    • There is no need to rub hard as it should come off with ease.

    • Once the thermal paste is completely off, let the heat sink dry for a couple of minutes.

    • Apply a dab of new thermal paste in the middle of the CPU and GPU.

    • Corsair TM30 thermal paste is used in this guide.

  6. Acer Aspire 774G-58GS Thermal Paste Replacement: 6 단계, 이미지 1개 중 1개
    • Put the heatsink back on and screw it in place.

결론

To reassemble your device, follow these instructions in reverse order.

작성자

2다른 기여자 명과 함께

Abdul Munam Khan

회원 가입일: 01/13/22

133 평판

안내서 1개를 작성함

댓글 0개

댓글 쓰기

조회 통계:

지난 24시간: 0

지난 7일: 6

지난 30일: 19

전체 시간: 856