
Acer Aspire E5-721-64T8 Hard Drive Replacement
예상시간 없음
조정
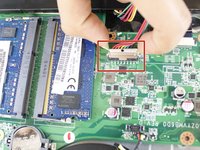
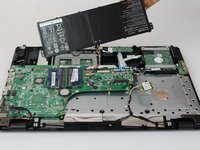
If your laptop wont boot, it may be because of a corrupted hard drive. This simple guide will show you how to remove the hard drive for this laptop. Be sure to fallow the steps in order. In the end you will be able to remove and replace the current hard drive.
필요한 것


거의 끝나갑니다!
To reassemble your device, follow these instructions in reverse order.
결론
To reassemble your device, follow these instructions in reverse order.
팀

USF Tampa, Team S7-G3, Passmore Spring 2018 USF Tampa, Team S7-G3, Passmore Spring 2018 회원
USFT-PASSMORE-S18S7G3
4 회원들
안내서 6개를 작성함