주요 콘텐츠로 건너뛰기

Acer Aspire V5-122P-0889 Touch pad Replacement

필요한 것

  1. Acer Aspire V5-122P-0889 Touch pad Replacement, Battery: 1 단계, 이미지 1/2 Acer Aspire V5-122P-0889 Touch pad Replacement, Battery: 1 단계, 이미지 2/2
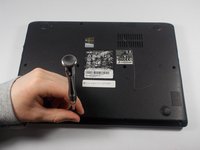
    • Start the process of removing the bottom cover of the laptop by unscrewing the 8mm screws in the top right and left corners.

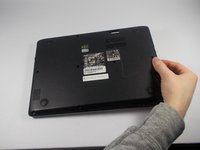
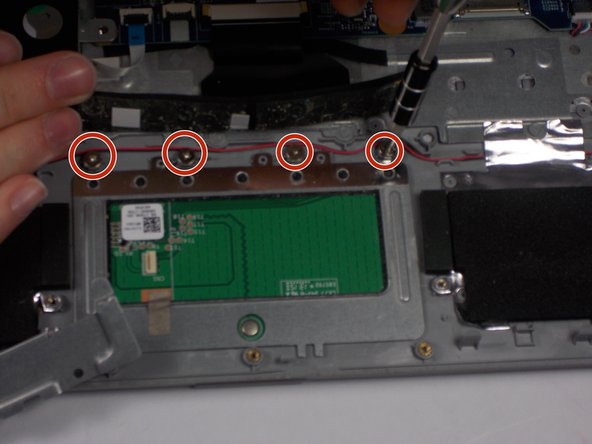
    • Remove the remaining 9 visible screws, which are 5mm in length.

    • Every screw in this laptop can be removed with a Phillips #0 screwdriver.

  2. Acer Aspire V5-122P-0889 Touch pad Replacement: 2 단계, 이미지 1/2 Acer Aspire V5-122P-0889 Touch pad Replacement: 2 단계, 이미지 2/2
    • Towards the top right corner of the laptop, there is a rubber piece covering the final screw holding the cover on, as well as a set of pins. Use your fingernail to remove this piece of rubber, and then unscrew the hidden 5mm screw.

  3. Acer Aspire V5-122P-0889 Touch pad Replacement: 3 단계, 이미지 1/2 Acer Aspire V5-122P-0889 Touch pad Replacement: 3 단계, 이미지 2/2
    • Going around the edges of the laptop, apply light to moderate amounts of pressure away from the laptop to unseat the cover so that it can be removed. Once you have removed the cover, place it face-up in a safe place to avoid getting the inside of the cover dirty.

    • If you are having trouble unseating the cover by hand, a nylon spudger can be run around the perimeter of the laptop to help lift the cover away from the case.

  4. Acer Aspire V5-122P-0889 Touch pad Replacement: 4 단계, 이미지 1/2 Acer Aspire V5-122P-0889 Touch pad Replacement: 4 단계, 이미지 2/2
    • Carefully unscrew the two 5mm screws holding the battery in place.

  5. Acer Aspire V5-122P-0889 Touch pad Replacement: 5 단계, 이미지 1/1
    • Carefully use light upward pressure to unseat the battery from the case, but do not pull on the cord or try and completely remove the battery from the case.

  6. Acer Aspire V5-122P-0889 Touch pad Replacement: 6 단계, 이미지 1/2 Acer Aspire V5-122P-0889 Touch pad Replacement: 6 단계, 이미지 2/2
    • Finally, disconnect the battery from the motherboard by undoing the power connector. To undo the connector, simply apply light to moderate pull on the sides of the connector.

  7. Acer Aspire V5-122P-0889 Touch pad Replacement, Touch pad: 7 단계, 이미지 1/2 Acer Aspire V5-122P-0889 Touch pad Replacement, Touch pad: 7 단계, 이미지 2/2
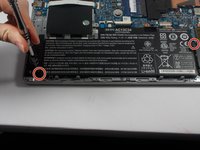
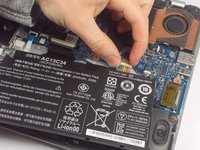
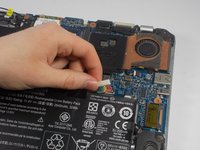
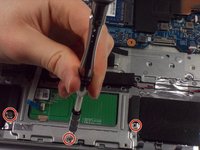
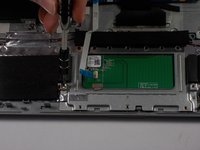
    • Start by carefully removing the ribbon cable that is plugged into the touch pad.

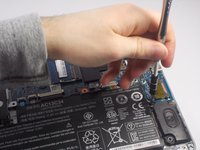
    • To remove it, gently pull the ribbon cable away from the slot that it is seated in.

  8. Acer Aspire V5-122P-0889 Touch pad Replacement: 8 단계, 이미지 1/2 Acer Aspire V5-122P-0889 Touch pad Replacement: 8 단계, 이미지 2/2
    • Remove the three visible screws below the touch pad that hold the bracket in place.

  9. Acer Aspire V5-122P-0889 Touch pad Replacement: 9 단계, 이미지 1/1
    • Lift and remove the metal bracket from below the touch pad.

  10. Acer Aspire V5-122P-0889 Touch pad Replacement: 10 단계, 이미지 1/2 Acer Aspire V5-122P-0889 Touch pad Replacement: 10 단계, 이미지 2/2
    • Lift and remove the foam-like piece that is located above the touch pad. Note that it is secured by adhesives, and can be reattached after replacing the touch pad.

    • Remove the last four screws that hold the touch pad in place.

  11. Acer Aspire V5-122P-0889 Touch pad Replacement: 11 단계, 이미지 1/1
    • Finally, remove the touch pad from the laptop.

결론

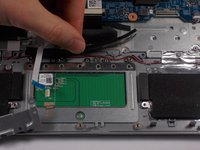
To reassemble your device, follow these instructions in reverse order.

다른 한 분이 해당 안내서를 완성하였습니다.

Katelynn couto

회원 가입일: 03/07/16

693 평판

안내서 5개 작성하였습니다

UMass Dartmouth, Team 5-1, Landers Spring 2016 UMass Dartmouth, Team 5-1, Landers Spring 2016 회원

UMASSD-LANDERS-S16S5G1

3 회원들

안내서 10개 작성하였습니다

댓글 0개

댓글 쓰기

조회 통계:

24 시간 전: 1

7일 전: 6

30일 전: 11

전체 시간: 974