
Acer Aspire V5-552PG-X469 Hard Drive Replacement
This is a step-by-step guide on how to replace the hard drive in your Acer Aspire V5-552PG-X469 laptop. Whether looking to upgrade for more storage or replace a broken drive, this guide will walk you through the process.
Before you begin, gather the necessary tools and replacements as well as back up your data to prevent any loss during the process.
Follow along with this short and easy guide to ensure everything is working correctly!
필요한 것

-
-
-
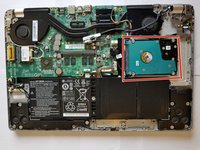
First locate the the hard drive as outlined
-
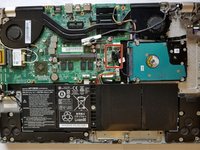
Pull the black bundle cable from its slot by its purple tab
-
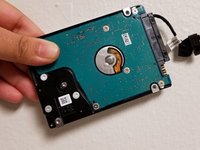
Finally, lift and remove the hard drive
-


To reassemble your device, follow these instructions in reverse order.
To reassemble your device, follow these instructions in reverse order.
다른 한 분이 해당 안내서를 완성하였습니다.
팀

University of North Texas, Team S5-G2, Thomas Fall 2017 University of North Texas, Team S5-G2, Thomas Fall 2017 회원
UNT-THOMAS-F17S5G2
4 회원들
안내서 7개를 작성함