주요 콘텐츠로 건너뛰기
Acer Nitro 5 AN515-55-56GN HDD Replacement

Acer Nitro 5 AN515-55-56GN HDD Replacement

Duy Nguyen

Duy Nguyen다른 한 명의 기여자

최종 수정일 September 8, 2022

20 - 35 분
조정

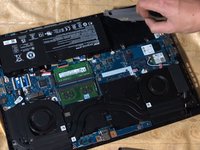
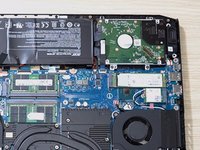
This guide will show you how to replace or install an HDD for your Acer Nitro 5 AN515-55-56GN.

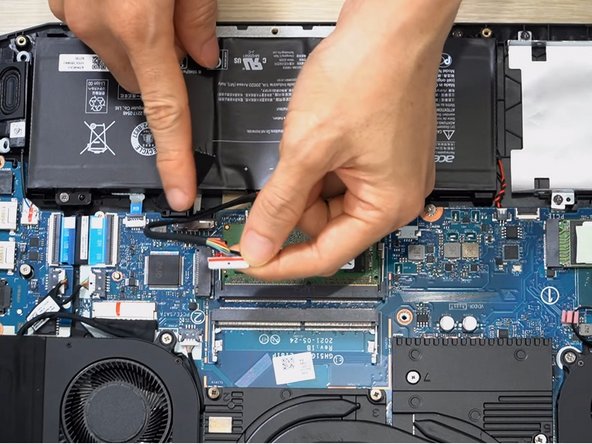
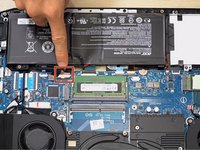
Before opening and updating the laptop, it is important to sync the necessary files to the cloud or storage in order to back up data to avoid losing it. Additionally, prior to beginning this repair or upgrade, power off your device and physically unplug your laptop, don't just switch it off.

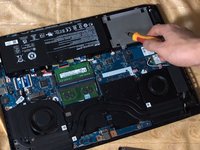
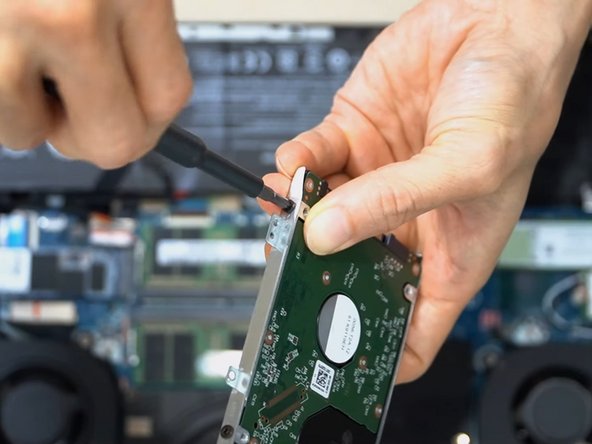
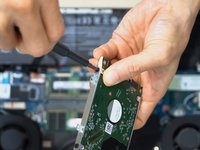
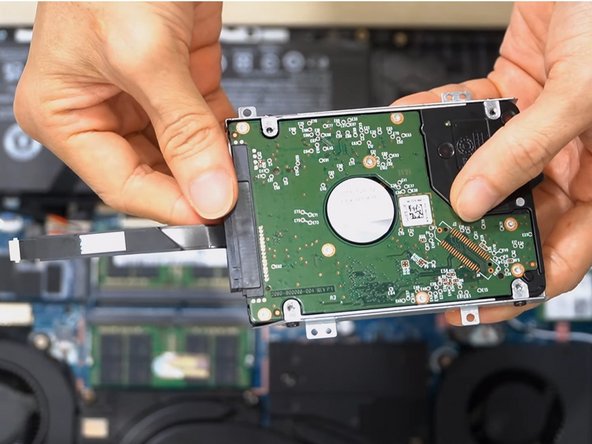
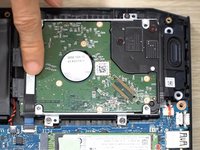
HDD is used for traditional storage devices that read and write data.

The purpose of installing the HDD (Hard Disk Drive) is to gain additional storage space, especially during the pandemic, when people have to work from home and use a laptop more frequently than usual.

필요한 것

도구

  1. Acer Nitro 5 AN515-55-56GN HDD Replacement, HDD: 1 단계, 이미지 3개 중 1개 Acer Nitro 5 AN515-55-56GN HDD Replacement, HDD: 1 단계, 이미지 3개 중 2개 Acer Nitro 5 AN515-55-56GN HDD Replacement, HDD: 1 단계, 이미지 3개 중 3개
    • Turn off the laptop and unplug it from the charging cord.

    • Flip the laptop over so the backside is facing up.

    • Use a Phillips #0 screwdriver to remove ten 9 mm screws.

  2. Acer Nitro 5 AN515-55-56GN HDD Replacement: 2 단계, 이미지 3개 중 1개 Acer Nitro 5 AN515-55-56GN HDD Replacement: 2 단계, 이미지 3개 중 2개 Acer Nitro 5 AN515-55-56GN HDD Replacement: 2 단계, 이미지 3개 중 3개
    • Use your fingers or an opening tool to remove the back case by separating it at the seam.

    • Work your way gently around the perimeter to undo the clips.

    • Remove the back case.

  3. Acer Nitro 5 AN515-55-56GN HDD Replacement: 3 단계, 이미지 3개 중 1개 Acer Nitro 5 AN515-55-56GN HDD Replacement: 3 단계, 이미지 3개 중 2개 Acer Nitro 5 AN515-55-56GN HDD Replacement: 3 단계, 이미지 3개 중 3개
    • Unplug the battery cable from the connector attaching the battery to the motherboard.

    • Make sure that the laptop battery is unplugged or remove the battery before installing the HDD.

  4. Acer Nitro 5 AN515-55-56GN HDD Replacement: 4 단계, 이미지 3개 중 1개 Acer Nitro 5 AN515-55-56GN HDD Replacement: 4 단계, 이미지 3개 중 2개 Acer Nitro 5 AN515-55-56GN HDD Replacement: 4 단계, 이미지 3개 중 3개
    • Use the Phillips #0 screwdriver to remove four 3 mm screws from the hard drive bracket.

    • Remove the bracket from the device.

  5. Acer Nitro 5 AN515-55-56GN HDD Replacement: 5 단계, 이미지 3개 중 1개 Acer Nitro 5 AN515-55-56GN HDD Replacement: 5 단계, 이미지 3개 중 2개 Acer Nitro 5 AN515-55-56GN HDD Replacement: 5 단계, 이미지 3개 중 3개
    • Place the HDD 1TB in the bracket.

    • Use the Phillips #0 screwdriver to secure the 2 mm screws that hold the HDD in the bracket.

    • The 2 mm screws are included with the new HDD.

  6. Acer Nitro 5 AN515-55-56GN HDD Replacement: 6 단계, 이미지 2개 중 1개 Acer Nitro 5 AN515-55-56GN HDD Replacement: 6 단계, 이미지 2개 중 2개
    • Attach the SATA connector to the HDD.

  7. Acer Nitro 5 AN515-55-56GN HDD Replacement: 7 단계, 이미지 2개 중 1개 Acer Nitro 5 AN515-55-56GN HDD Replacement: 7 단계, 이미지 2개 중 2개
    • Slide the HDD into the socket on the motherboard.

    • Replace the four 3 mm screws using the Phillips #0 screwdriver.

  8. Acer Nitro 5 AN515-55-56GN HDD Replacement: 8 단계, 이미지 3개 중 1개 Acer Nitro 5 AN515-55-56GN HDD Replacement: 8 단계, 이미지 3개 중 2개 Acer Nitro 5 AN515-55-56GN HDD Replacement: 8 단계, 이미지 3개 중 3개
    • Slide the hard drive cable into the connector on the motherboard.

    • Flip the black lock down to secure the cable.

결론

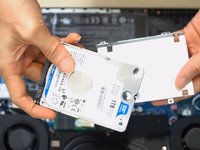
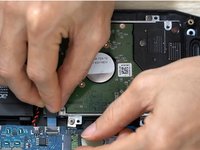
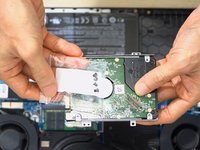
To reassemble your device, follow these instructions in reverse order.

That is all step-to-step on how to Install the new HDD to the laptop Acer Nitro 5 (AN515-55-56GN)

다른 6명이 해당 안내서를 완성하였습니다.

작성자

1다른 기여자 명과 함께

Duy Nguyen

회원 가입일: 09/16/21

277 평판

안내서 1개를 작성함

댓글 0개

댓글 쓰기

조회 통계:

지난 24시간: 6

지난 7일: 49

지난 30일: 186

전체 시간: 6,704