주요 콘텐츠로 건너뛰기

Analogue Pocket Battery Cell Replacement

필요한 것

  1. Analogue Pocket Battery Cell Replacement, Prepare your device for disassembly: 1 단계, 이미지 1/3 Analogue Pocket Battery Cell Replacement, Prepare your device for disassembly: 1 단계, 이미지 2/3 Analogue Pocket Battery Cell Replacement, Prepare your device for disassembly: 1 단계, 이미지 3/3
    • Allow your Analogue Pocket's battery to drain below 25% before starting this repair—a charged battery may catch fire if damaged.

    • Unplug all cables and fully power off your device.

    • Working on your device requires laying it screen-side down. To prevent damage, lay it on a soft surface such as a towel.

  2. Analogue Pocket Battery Cell Replacement, Unfasten the battery shell: 2 단계, 이미지 1/2 Analogue Pocket Battery Cell Replacement, Unfasten the battery shell: 2 단계, 이미지 2/2
    • Use a T6 Torx screwdriver to remove the four 13.4 mm‑long screws securing the battery shell.

  3. Analogue Pocket Battery Cell Replacement, Remove the battery shell: 3 단계, 이미지 1/3 Analogue Pocket Battery Cell Replacement, Remove the battery shell: 3 단계, 이미지 2/3 Analogue Pocket Battery Cell Replacement, Remove the battery shell: 3 단계, 이미지 3/3
  4. Analogue Pocket Battery Cell Replacement, Disconnect the battery: 4 단계, 이미지 1/3 Analogue Pocket Battery Cell Replacement, Disconnect the battery: 4 단계, 이미지 2/3 Analogue Pocket Battery Cell Replacement, Disconnect the battery: 4 단계, 이미지 3/3
    이 단계에 사용된 도구:
    Tweezers
    $4.99
    구매
    • Use blunt nose tweezers to pull the battery connector out of its socket on the bottom right corner of your device.

    • If you're having trouble, try rocking the connector side-to-side to help loosen it.

    • During reassembly, use the flat end of a spudger to push down on the edges of the connector until it's secure in the socket.

  5. Analogue Pocket Battery Cell Replacement, Remove the battery: 5 단계, 이미지 1/3 Analogue Pocket Battery Cell Replacement, Remove the battery: 5 단계, 이미지 2/3 Analogue Pocket Battery Cell Replacement, Remove the battery: 5 단계, 이미지 3/3
    • Lift one of the battery's short edges until the clips release.

    • Remove the battery.

    • During reassembly, push the battery into its recess until the clips engage.

  6. Analogue Pocket Battery Cell Replacement, Heat the battery housing: 6 단계, 이미지 1/3 Analogue Pocket Battery Cell Replacement, Heat the battery housing: 6 단계, 이미지 2/3 Analogue Pocket Battery Cell Replacement, Heat the battery housing: 6 단계, 이미지 3/3
    • Strong adhesive secures the battery cell to its housing.

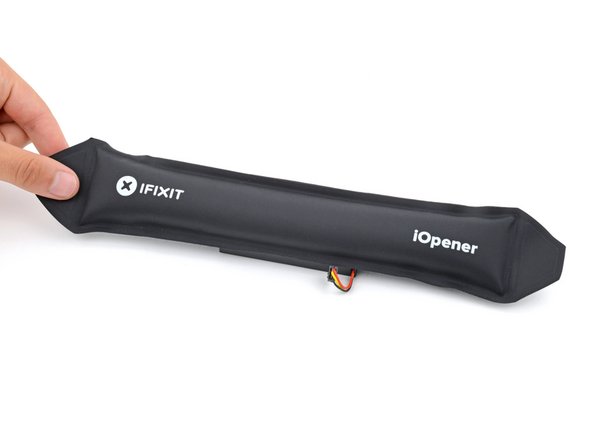
    • Heat an iOpener and apply it to the top of the plastic battery housing for two minutes to soften the adhesive.

    • Alternatively, you can use a hair dryer to heat the battery.

  7. Analogue Pocket Battery Cell Replacement, Separate the battery cell adhesive: 7 단계, 이미지 1/3 Analogue Pocket Battery Cell Replacement, Separate the battery cell adhesive: 7 단계, 이미지 2/3 Analogue Pocket Battery Cell Replacement, Separate the battery cell adhesive: 7 단계, 이미지 3/3
    이 단계에 사용된 도구:
    Plastic Cards
    $2.99
    구매
    • Take care not to bend the battery—it can leak dangerous chemicals and/or catch fire.

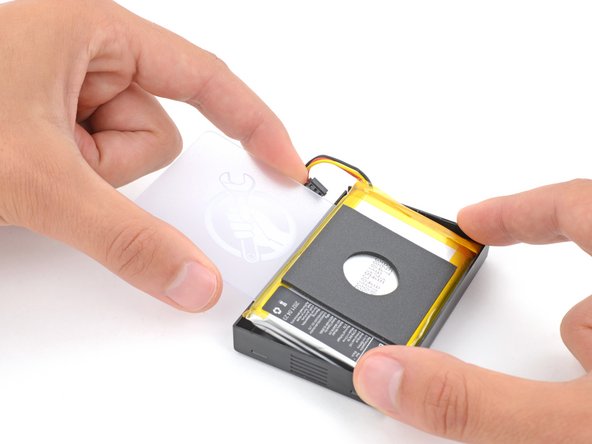
    • Firmly secure the battery with one hand.

    • With your free hand, insert a plastic card between one of the long edges of the battery cell and its housing.

    • Pry up with the plastic card and apply steady pressure until a gap forms.

    • Be patient and allow plenty of time for the adhesive to separate. If you're having trouble creating a gap, apply more heat and try again.

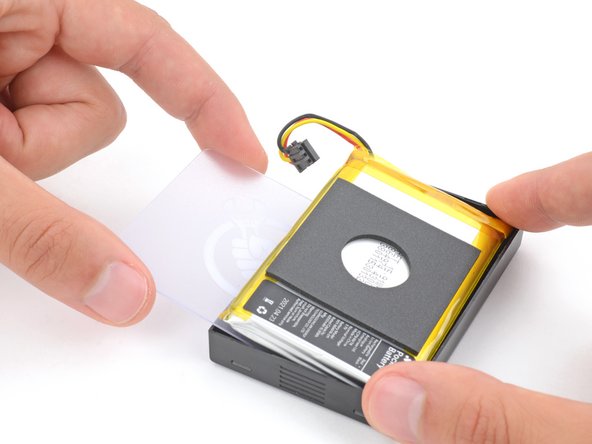
    • Slide the card under the battery cell.

  8. Analogue Pocket Battery Cell Replacement: 8 단계, 이미지 1/2 Analogue Pocket Battery Cell Replacement: 8 단계, 이미지 2/2
    • Slide the plastic card back and forth under the battery cell to separate the adhesive.

  9. Analogue Pocket Battery Cell Replacement, Remove the battery: 9 단계, 이미지 1/3 Analogue Pocket Battery Cell Replacement, Remove the battery: 9 단계, 이미지 2/3 Analogue Pocket Battery Cell Replacement, Remove the battery: 9 단계, 이미지 3/3
    이 단계에 사용된 도구:
    Tesa 61395 Tape
    $5.99
    구매
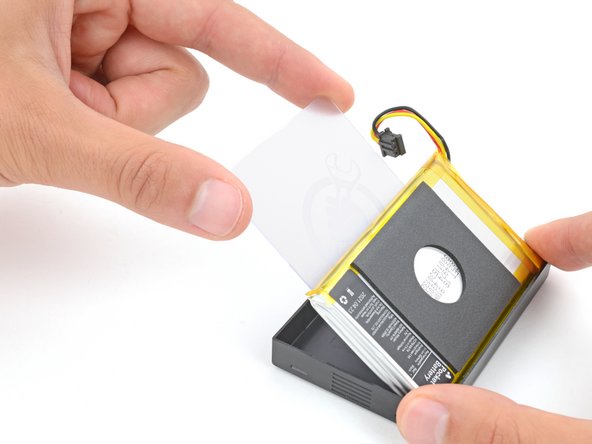
    • Use the plastic card to lift the battery cell out of its housing and remove it.

    • During reassembly:

    • When installing a battery cell, make sure its cable goes into its cutout in the housing.

    • If your new battery cell comes with pre-installed adhesive, remove the plastic backing and firmly press the cell into place in its housing.

    • If your new battery cell doesn't have adhesive, use strips of double-sided tape such as Tesa Tape to secure it in the housing.

결론

To reassemble your device, follow these instructions in reverse order.

For optimal performance, calibrate your newly installed battery after completing this guide.

Take your e-waste to an R2 or e-Stewards certified recycler.

Repair didn’t go as planned? Try some basic troubleshooting, or ask our Answers community for help.

Spencer Day

회원 가입일: 09/14/22

55,203 평판

안내서 408개 작성하였습니다

iFixit iFixit 회원

Staff

136 회원들

안내서 17,432개 작성하였습니다

댓글 한 개

Where do I get the battery?

Ale Gan - 답글

댓글 쓰기

조회 통계:

24 시간 전: 5

7일 전: 30

30일 전: 96

전체 시간: 1,155