소개
This replacement guide will be showing how to replace the heatsink of an Asus CM1745, this happens for many reasons but in general, if your heatsink isn’t performing to your standards anymore then it's a good time to replace it. A heatsink is there in your computer in order to absorb heat in times of great thermal load so that your fans or other cooling devices catch up with the thermal output of your computer. This also allows your computer to run at full throttle without damaging your internal computer parts. Furthermore, by replacing your heat sink it should perform as new meaning that your computer should deal with heat better.
This guide also requires close proximity to exposed electronics. Please ensure that the PC is both powered off and disconnected from the wall. Be careful with moisture and make sure to ground yourself before working on the internals by touching any sort of metal. It would be advised to use an anti-static wristband and you should look into what this is if you don’t know what it is, this link is a good resource for learning about this https://www.staticsolutions.com/anti-sta....
필요한 것
-
-
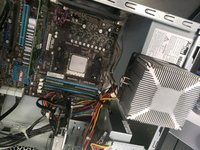
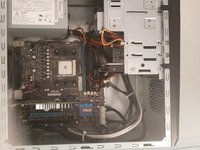
Remove the sidepanel by unscrewing the two screws fastening the panel on the rear. Once unscrewed, slide the panel towards the rear until it releases then lift away.
-
-
-
-
Clean both the CPU top and the heatsink bottom by slightly moistening a paper towel with rubbing alcohol and rubbing lightly.
-
Grab your thermal paste and put a pea-sized amount in the middle of the CPU top.
-
Gently replace the heatsink on top of the CPU and re-lock the heatsink fasteners.
-
Replug the CPU Fan connector to the motherboard header.
-


Replug the computer and turn it on. If the fan spins, reattach the sidepanels and the replacement is complete.
팀

University of Memphis, Team S4-G2, Kim Fall 2019 University of Memphis, Team S4-G2, Kim Fall 2019 회원
UM-KIM-F19S4G2
4 회원들
안내서 10개를 작성함