소개
Upgrading or replacing the RAM (memory) on the Asus ROG G20CB can help boost system performance, especially for gaming, multitasking, or professional workloads.This guide will walk you through how to safely access, remove, and install RAM in the G20CB's compact chassis.
Important:
- The G20CB uses DDR4 SODIMM (laptop-style) RAM, not standard desktop DIMMs.
- Maximum supported memory depends on your CPU and motherboard model, but generally caps around 32GB (2x16GB).
필요한 것
-
-
-
Disconnect the cable carefully by pulling gently on both sides of the connector.
-
-
-
Remove the five 4.6 mm Phillips screws holding down the fan tray and then pull the fan tray out of the system.
-
-
-
-
Carefully unplug the two fan cables from the motherboard by pulling straight up from the base of the connector.
-
-
-
-
Pull back the tape on the heat sink and use a long-neck Phillips screwdriver to remove the four screws securing the heat sink.
-
-
-
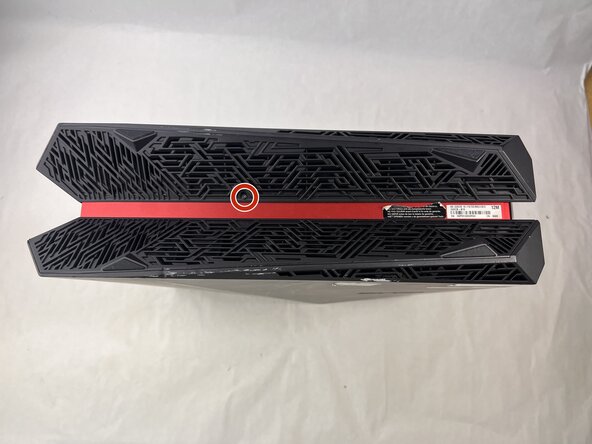
Remove the 4.6 mm Phillips screw from the heatsink at the top of the case.
-
Lift the CPU cooler out of the system.
-
Be sure to apply fresh thermal paste before reinstalling a cooler.
-
-
-
-
Gently push outward on the two retaining clips on either side of the RAM stick.
-
-



 FixBot에 문의하기


To reassemble your device, follow the above steps in reverse order.
Take your e-waste to an R2 or e-Stewards certified recycler.
Repair didn’t go as planned? Try some basic troubleshooting or ask our Answers community for help.
다른 한 분이 해당 안내서를 완성하였습니다.

팀

UMass Dartmouth, Team 3-3, Botvin Spring 2025 UMass Dartmouth, Team 3-3, Botvin Spring 2025 회원
UMASSD-BOTVIN-S25S3G3
3 회원들
안내서 10개를 작성함
