소개
If your Beats Studio 2 Wireless headphones will not turn on or charge, it's possible the battery needs to be replaced. Use this guide to remove and replace the battery of your headphones.
For additional information on troubleshooting this issue, refer to the Beats Studio 2 Wireless troubleshooting page.
필요한 것
-
-
Using a spudger, remove the panel circling the ‘b’ Beats logo on the right earphone by applying pressure upwards under the panel until it is removed.
 FixBot에 문의하기
-
-
-
-
Use a spudger to release the clip in the seam under the silver “studio” label.
-
Remove the right side of the headband.
-
-
-
Gently remove the right earphone speaker from the headband by sliding the speaker downwards.
-
-
-
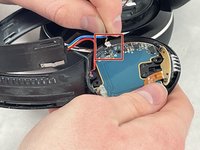
Use the pointed tip of a spudger to carefully push on each side of the connector to release it from the socket on the motherboard.
-
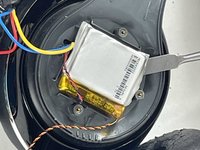
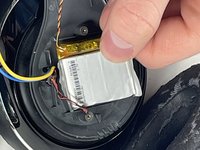
Use a nylon spudger to remove the battery from the headphones.
-


To reassemble your device, follow these instructions in reverse order.
다른 5명이 해당 안내서를 완성하였습니다.

팀

UMass Dartmouth, Team 5-3, Ramos Spring 2023 UMass Dartmouth, Team 5-3, Ramos Spring 2023 회원
UMASSD-RAMOS-S23S5G3
3 회원들
안내서 8개를 작성함