소개
Is your Cuisinart coffee maker producing cold coffee even though all internal connections are intact? If so, this guide will provide instructions on how to replace the heating element in the bottom of the machine. To complete this task all you will need is a soldering iron, a PH1 driver bit and a T10 driver bit.
필요한 것
-
-
Flip the coffee maker over so the bottom is facing up.
-
Use the screwdriver with size 4 extension with the T10 Torx bit to remove all four 17 mm long screws.
-
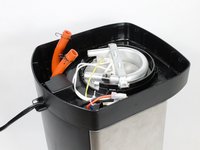
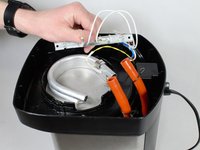
Lift the bottom cover off the bottom of the coffee maker.
 FixBot에 문의하기
-
-
-
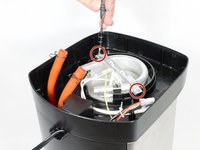
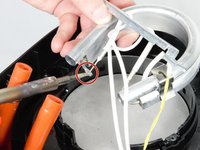
Squeeze the hose clamps together and begin moving the metal clamp away from the heating element.
-
Gently pull on the loose hose to remove it from the heating element.
-
-
-
-
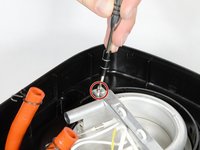
Use the bit driver with the extension attachment with the PH1 Phillips bit to remove the two 18mm long screws on heating element plate.
-
-
-
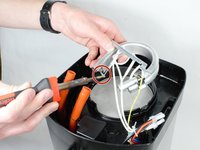
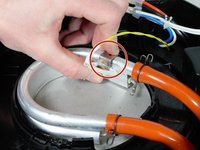
If heating contacts are connected, use a soldering iron to desolder the bond between metal contact points.
-
-
-
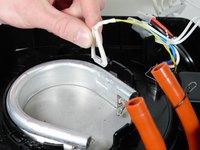
Remove the heating element clamp and set aside to access the heating element.
-
Gently squeeze and pull up on metal clamp attached to the heating element.
-


To reassemble your device, follow these instructions in reverse order.
다른 9명이 해당 안내서를 완성하였습니다.
팀

UW Stout, Team S8-G1, Ogden Spring 2018 UW Stout, Team S8-G1, Ogden Spring 2018 회원
UWSTOUT-OGDEN-S18S8G1
4 회원들
안내서 20개를 작성함
20가이드 댓글
Where do you find a replacement heating element?
I have a Cusinart DCC-2600 coffee maker that has stopped heating. I suspect the heating element needs replacing. The bottom of the maker looks very similar to the DCC-1200 shown above, but the 4 screws that hold the bottom on my model do not have any torx heads. They feel more like a rivet?!
Is this to make it not serviceable or am I missing something? If anyone has a suggestion, please respond
Dave Schultz - 답글 공유
Agree - any assistance in finding the replacement heating element would be most helpful. I have this coffee maker, and the metal clamp holding the heating element in place corroded through. Now the hotplate falls away from the bottom of the coffee maker. I’d like to replace the heating element and I assume it comes with the clamp in place - but cuisinart does not make any internal parts available to online parts retailers. Thanks!
David Miller - 답글 공유