주요 콘텐츠로 건너뛰기
Dell Inspiron 15-5548 Hard Drive  Replacement

Dell Inspiron 15-5548 Hard Drive Replacement

Waleed ALamri

Waleed ALamri3 다른 기여자

최종 수정일 July 20, 2024

5 분
조정

This guide will be helpful for those who want to replace their hard drive.

필요한 것

수리 키트

이 키트는 이 안내서를 완료하는데 필요한 모든 부품과 도구를 포함하고 있습니다.

부품

도구

더보기...

  1. Dell Inspiron 15-5548 Hard Drive  Replacement, Hard Drive: 1 단계, 이미지 3개 중 1개 Dell Inspiron 15-5548 Hard Drive  Replacement, Hard Drive: 1 단계, 이미지 3개 중 2개 Dell Inspiron 15-5548 Hard Drive  Replacement, Hard Drive: 1 단계, 이미지 3개 중 3개
    • Make sure the computer is unplugged and turned off before you start this procedure.

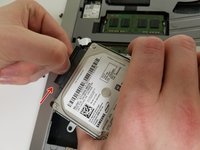
    • Look on the bottom of the computer. Locate the 2 screws. (Picture 1)

    • Using the Phillips 00 Screwdriver, unscrew both screws, and remove the bottom cover. The bottom cover can be hard to pull off, so you may need to pry it off with a pry tool.

  2. Dell Inspiron 15-5548 Hard Drive  Replacement: 2 단계, 이미지 3개 중 1개 Dell Inspiron 15-5548 Hard Drive  Replacement: 2 단계, 이미지 3개 중 2개 Dell Inspiron 15-5548 Hard Drive  Replacement: 2 단계, 이미지 3개 중 3개
    • Remove the 4 - M2.5 x 5mm screws.

    • Using the tab, lift the Hard Drive out of the laptop. (picture 3)

  3. Dell Inspiron 15-5548 Hard Drive  Replacement: 3 단계, 이미지 2개 중 1개 Dell Inspiron 15-5548 Hard Drive  Replacement: 3 단계, 이미지 2개 중 2개
    • After lifting the Hard Drive, unplug the Hard Drive connector.

    • Now the hard drive is ready to be replaced.

결론

To reassemble your device, follow these instructions in reverse order.

다른 6명이 해당 안내서를 완성하였습니다.

작성자

3다른 기여자 명과 함께

Waleed ALamri

회원 가입일: 09/20/17

242 평판

안내서 1개를 작성함

댓글 0개

댓글 쓰기

조회 통계:

지난 24시간: 0

지난 7일: 6

지난 30일: 17

전체 시간: 3,715