
Dell Inspiron 7306 P125 Battery Replacement

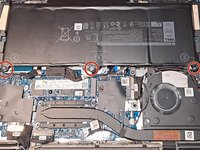
If your Dell Inspiron 7306 P125G or Inspiron 7306 2-in-1 won't power on, this guide will help replace the battery as a solution for power problems with the laptop. Before continuing, consult the swollen battery and removing power/disconnecting tips to ensure your safety.


-
-
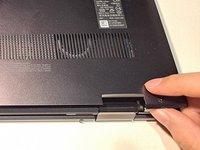
Turn off the laptop with the power button and close it.
-
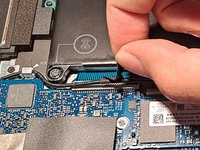
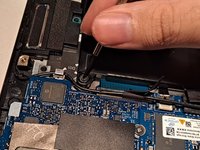
Disconnect any power sources from the laptop.
-
-


To reassemble your device, follow these instructions in reverse order.
To reassemble your device, follow these instructions in reverse order.
다른 한 분이 해당 안내서를 완성하였습니다.

팀

CSU Los Angeles, Team 2-73, Briggs Spring 2023 CSU Los Angeles, Team 2-73, Briggs Spring 2023 회원
CSULA-BRIGGS-S23S2G73
1 회원
안내서 1개 작성