
Dell XPS 15 9510 Speakers Replacement

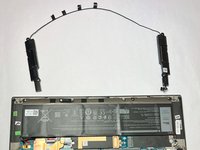
Audio issues or sound failure in the Dell XPS 15 9510 indicates that the speakers located on either side of the laptop may need replacement. There are no special skills involved in the removal of the speakers.
Before using this guide, make sure to review the troubleshooting page to ensure that the speaker doesn't have any driver or any other issues.
Make sure to power off your laptop completely and disconnect from any external power source before beginning the process.


-
-
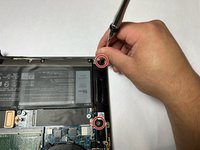
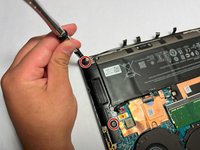
Remove eight 3 mm screws from the underside of the case using a T5 Torx screwdriver.
-
-


To reassemble your device, follow the above steps in reverse order.
Take your e-waste to an R2 or e-Stewards certified recycler.
Repair didn’t go as planned? Try some basic troubleshooting or ask our Answers community for help.
To reassemble your device, follow the above steps in reverse order.
Take your e-waste to an R2 or e-Stewards certified recycler.
Repair didn’t go as planned? Try some basic troubleshooting or ask our Answers community for help.
다른 2명이 해당 안내서를 완성하였습니다.

팀

IUPUI, Team 2-1, Harley Summer 2023 IUPUI, Team 2-1, Harley Summer 2023 회원
IUPUI-HARLEY-SU23S2G1
4 회원들
안내서 3개를 작성함