
Dell XPS 9720 SSD Replacement

필요한 것
수리 키트
이 키트는 이 안내서를 완료하는데 필요한 모든 부품과 도구를 포함하고 있습니다.


부품


도구


더보기...
-
-
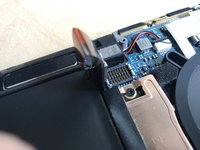
Use a spudger to pry the back panel off of the carbon fiber upper assembly. Slide it into the crack between the carbon-fiber and aluminum housings, and slide the tool around the perimeter of the device to release the plastic clips holding the two together.
-
-
-
-
Insert your finger in the translucent loop, and pull straight away from the motherboard.
-
-
-
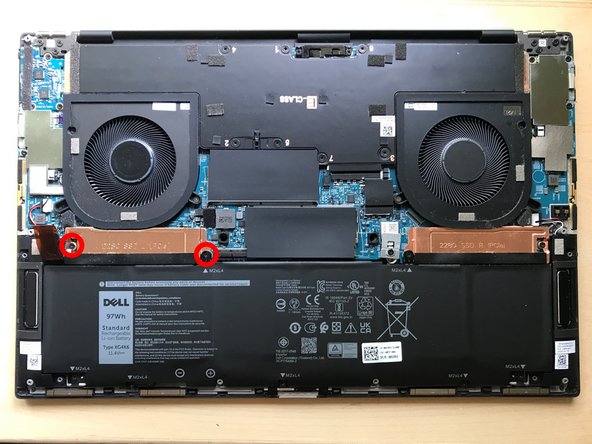
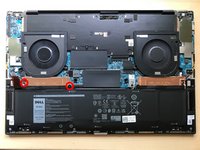
Remove the 2 PH1 screws which retain the SSD and heat spreader. The innermost screw also retains the battery, you will have to gently lift the plastic battery mounting tab with your fingernail or a pry tool, allowing the copper heat spreader to be slid out from underneath.
-
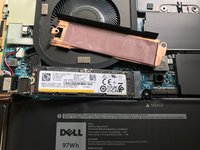
The SSD is now free to spring up from the slot. Pull it in a straight line in the direction which it points at rest. Gently insert your replacement drive. Reverse the above steps to reassemble.
-


To reassemble your device, follow these instructions in reverse order.
To reassemble your device, follow these instructions in reverse order.
