
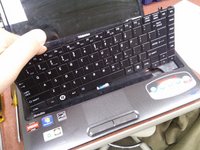
Disassembling the Toshiba Satellite L645D-S4056
Accessing and disassembling the bottom half of the Toshiba Satellite L645D-S4056 for repairs, replacements, and upgrades.
This guide does not include the LCD display.

-
-
We will disassemble the Toshiba Satellite L645D-S4056 and remove the motherboard.
-
Have a small flathead screwdriver and Phillips head screwdriver available.
-
An anti-static wristband is recommended.
-
Have a way to keep your screws organized. I use an ice cube tray. I tear off pieces of scratch paper, and label them to where the screws came from.
-
NOTE: The screws are magnetized, reducing the risk of them falling into the machine and being lost. They will stick to the screwdriver upon removal.
-
Here is the link to the Toshiba support site for this model: http://support.toshiba.com/support/model...
-
-
-
Flip the laptop over so that you are working on the bottom of the machine.
-
Unplug the A/C adapter from the laptop and the wall outlet.
-
Remove the battery - pull the slides that lock the battery in place, on the bottom of the laptop, on either side of the battery.
-
Unplug any other devices that are connected to the computer - wireless adapters, Ethernet cables, etc...
-
-
-
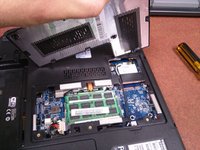
Next, we are going to remove the memory modules.
-
With the laptop still flipped over, locate the "L" shaped panel.
-
There are 3 screws that hold this panel in. Use your Phillips head screwdriver to remove them.
-
Once the screws are removed, used a flat head screwdriver or fingernail to lift up on the notch and remove the panel, exposing the memory modules.
-
NOTE: The screws holding the panel in do not come out the whole way. They just loosen up enough to remove the panel.
-
-
-
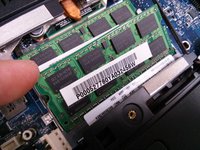
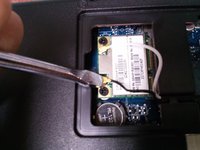
On each side of the memory module, there are silver arms locked into notches on each side of the memory.
-
Pull them away from the memory module to unlock it.
-
Your memory stick will stand up at an angle, once both sides are unlocked.
-
Pull up on the middle of the memory module and remove it from the slot.
-
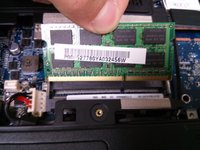
Repeat this process to remove the second memory stick.
-
-
-
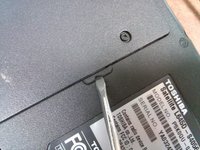
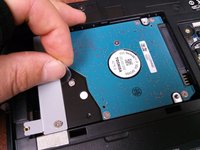
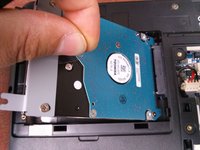
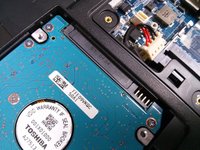
The hard drive comes out next.
-
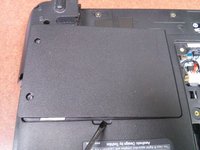
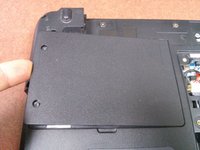
Locate the rectangular panel on the bottom of the laptop.
-
Unscrew the two screws holding the panel in place.
-
NOTE: The screws holding the panel in do not come out the whole way. They just loosen up enough to remove the panel.
-
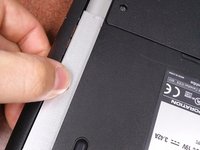
Use a flathead screwdriver or fingernail and pop the panel up from the notch, exposing the hard drive.
-
-
-
-
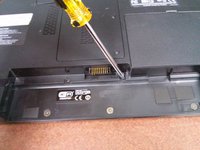
There are 3 flat screws on the chassis where you pulled the battery from. Remove them with your Phillips head screwdriver.
-
There are two more screws, one on each side of the battery connection that also need removed.
-
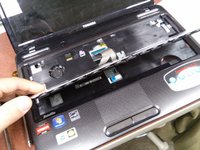
These sets of screws will allow you to remove the keyboard bezel and the surrounding chassis.
-
-
-
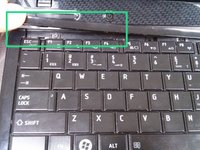
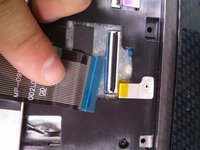
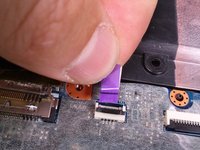
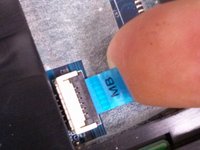
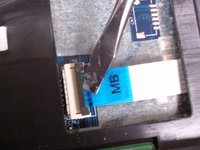
Follow the ribbin cable to the blue connector on the laptop.
-
There is a black bar that runs across the top of the cable.
-
You should be able to flip this up with the tip of your finger into the unlocked position. If not, gently flip it upward using your flathead screwdriver.
-
Gently pull the ribbon cable from the connector.
-
The keyboard is now disconnected.
-
-
-
Close the screen, and flip the computer over so that you can work from the bottom once again.
-
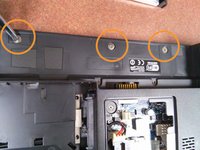
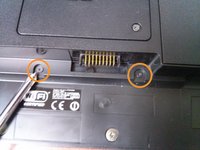
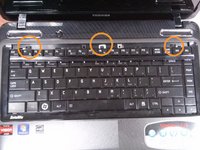
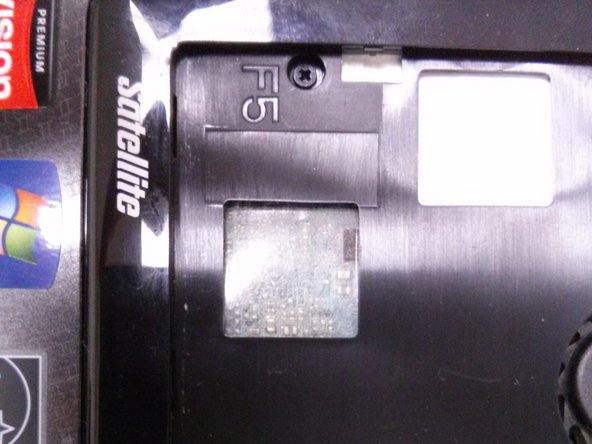
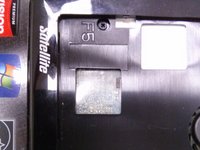
Notice the holes labeled with "F5".
-
Remove all screws in these holes.
-
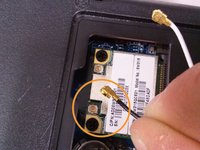
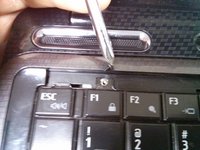
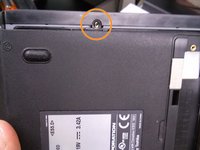
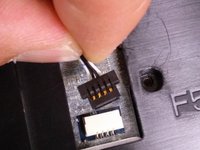
NOTE: You may have to move the wireless antenna. Notice the track to the right of my finger that the wire is fed through. Be sure it is out of this track.
-
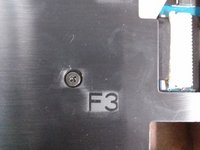
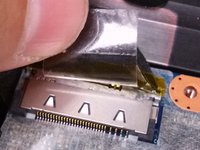
NOTE: There is a hidden screw on the outside of the slot where where you pulled the optical drive from, which is referenced for you in the 3rd picture.
-
There are 13 total screws.
-
-
-
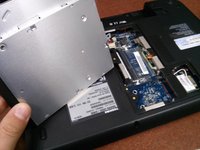
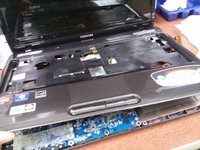
Lift and remove the top cover.
-
NOTE: Do not pull hard or pry at first. If the cover is difficult to remove, be sure that you removed all screws. If so, then do not be afraid to GENTLY pry with your flathead screwdriver. You may have to tug or apply gentle force to get this piece off.
-
For me, working one of the corners up, then sliding my finger between the top and bottom pieces of the chassis along the edges worked flawlessly. Try not to scrape any internal parts when you do this.
-
-
-
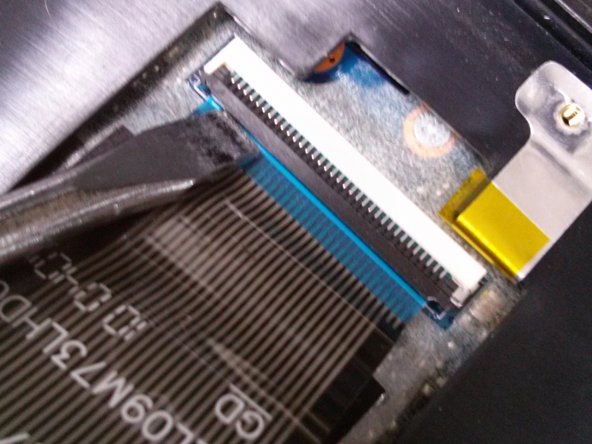
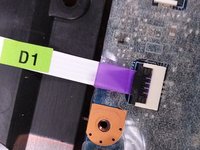
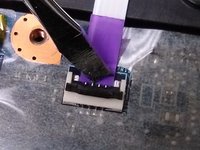
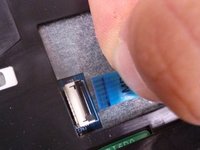
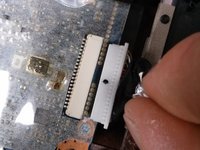
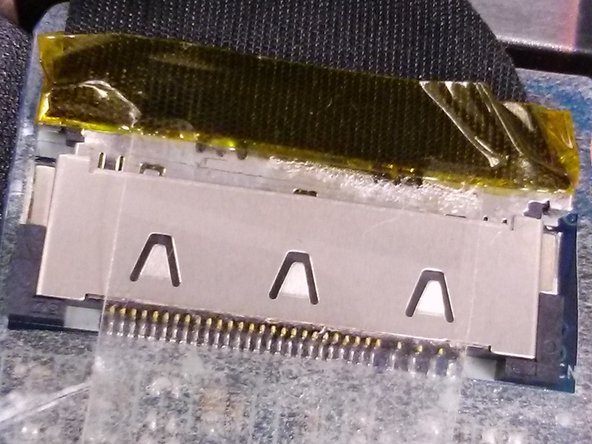
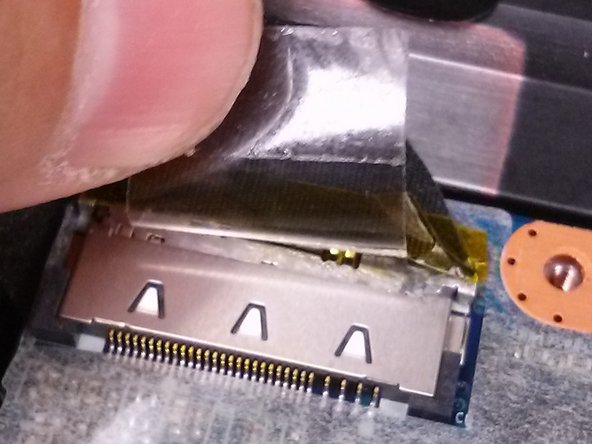
Identify the video connection.
-
There is a piece of clear tape that secures the connection to the plastic sheath over the motherboard. Peel it back.
-
Gently remove the cable from its connection to the motherboard.
-
NOTE: This cable was somewhat difficult to remove. It was very tight in its connection. Be patient and gentle when removing it if you have the same experience.
-
-
-
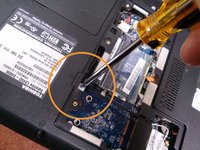
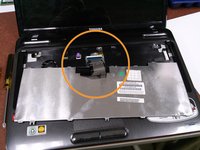
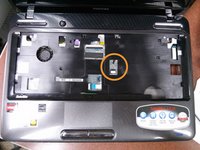
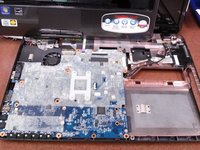
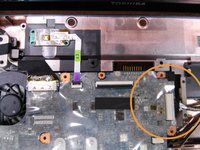
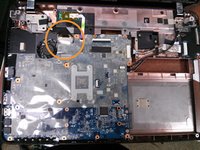
Ensure that all screws holding down the motherboard are removed.
-
The circles show where my last few screws were located, before removing the motherboard.
-
Depending on which version of the laptop you have, there may be a screw toward the top left holding the fan to the case that needs to be removed also.
-
Lift the motherboard up gently at the notch on the right, identified by the green box.
-
Once it is lifted up, pull gently to the right and lift up to dislodge it.
-


To reassemble your device, follow these instructions in reverse order.
To reassemble your device, follow these instructions in reverse order.
다른 27명이 해당 안내서를 완성하였습니다.
댓글 9개
You are very welcome. I am glad you found some value here :)
-Matt M
Nice write up and picture! Very helpful.
Jake Rando - 답글
Great write up. One recommendation: overview photos of the case disassembly showing where screws are on the case, in addition to the close-up photos you provide. Otherwise, an excellent teardown article.
Jeff Smith - 답글
Thank you so much! This guide helped a lot. I would probably tear a ribbon cable and the casing if I didn't know there were hidden screws to remove the keyboard.