이 번역은 기계에 의해 생성된 것이며, 아직 사람이 검토하지 않았습니다. 이 언어를 아세요? 리뷰 보기.
소개
Durofix RV332 무선 드라이버가 작동하지 않거나 이전처럼 강력한 토크를 내지 못한다면, 내부 모터 어셈블리가 마모되었거나 고장 났을 가능성이 큽니다.
이 단계별 수리 안내서는 기존 모터를 제거하고 새 모터로 교체하여 공구를 원래의 성능으로 복원하는 방법을 알려줍니다.
시작하기 전에 깨끗하고 조명이 밝은 작업 공간을 확보하세요.
이 수리 작업에는 납땜이 필요합니다. 납땜이 익숙하지 않거나 다시 확인이 필요하다면 커넥터 납땜 및 납땜 제거 방법 안내서를 참고하세요. 납땜 인두는 매우 뜨거워 피부에 화상을 입기 쉬우니 주의해서 사용하세요. 무선 공구 내부에서 작업하게 되므로, 먼저 배터리를 분리하거나 전원을 차단하여 우발적인 작동을 방지하고, 내부 배선과 PCB 구성품을 다룰 때 합선이나 손상이 발생하지 않도록 주의해야 합니다.
새 모터를 설치한 후 드라이버를 테스트해 보세요. 모든 과정이 계획대로 진행되었다면, RV332가 새 제품이었을 때의 회전력을 되찾을 것입니다. 인내심을 갖고 세심하게 작업한다면, 모터 교체는 기기 전체를 새로 구매하는 대신 무선 드라이버에 새 생명을 불어넣는 실용적인 방법이 될 것입니다.
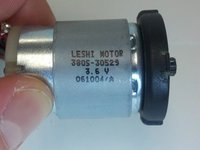
부품 번호 3805-30529
필요한 것
-
-
-
플라스틱 분해 도구(또는 지렛대 도구)를 사용하여 드라이버의 플라스틱 하우징 상단과 하단을 부드럽게 벌려 주세요.
-
플라스틱이 깨지거나 내부 클립이 손상되지 않도록 가장자리를 따라 천천히 작업하세요.
-
-
-
-
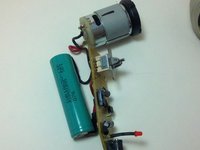
하우징이 열리면 회로 기판(PCB), 배터리, LED, 기존 모터 어셈블리를 하나의 유닛으로 들어 올려 하우징 내부에서 분리하세요.
-
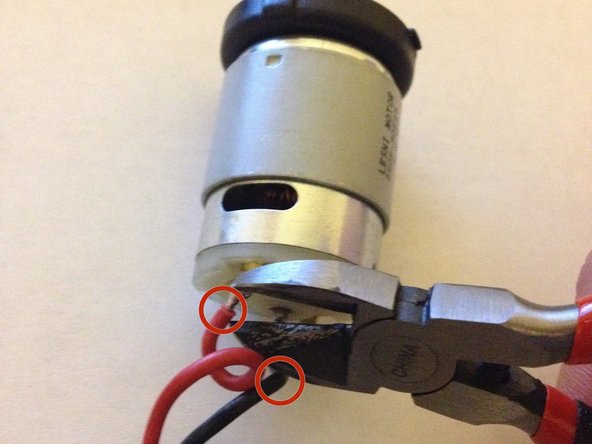
와이어 커터를 사용하여 모터와 연결된 검은색 및 빨간색 모터 배선을 자르세요. (나중에 새 모터에 다시 납땜하게 됩니다.)
-
-
-
빨간색 선과 검은색 선 양쪽 끝에서 절연 피복을 약 6 mm(1/4인치) 정도 벗겨내세요.
-
노출된 배선이 깨끗하고(산화되지 않았으며) 납땜할 준비가 되었는지 확인하세요.
-
-
-
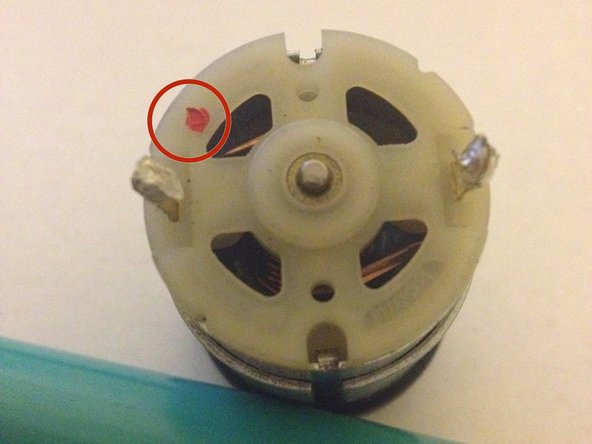
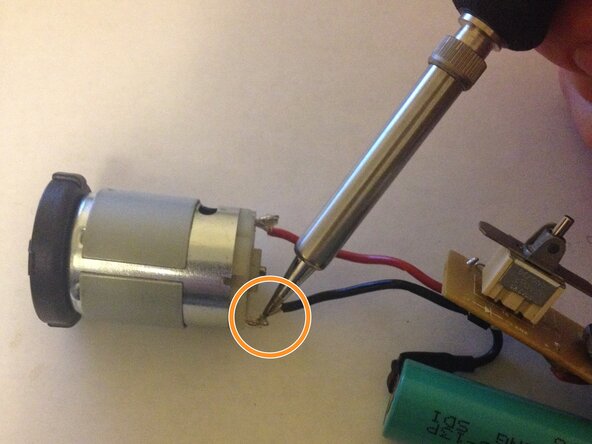
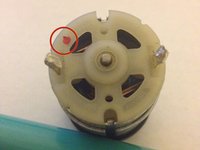
빨간색 배선을 모터의 양극 단자(보통 “+” 표시나 빨간색 원으로 표시됨)에 납땜하세요.
-
검은색 배선을 모터의 음극 단자(또는 남은 단자)에 납땜하세요.
-
-
-
모터와 PCB, LED, 배터리를 올바른 방향으로 플라스틱 하우징 안에 다시 넣으세요.
-
클립과 정렬 상태가 올바른지 확인하며 케이스의 양쪽을 닫으세요.
-
이전에 제거했던 나사 6개를 다시 끼우고 조이세요.
-
마지막으로 기기를 테스트하여 모터가 정상 작동하는지 확인하세요.
-
모든 기능이 정상 작동한다면 완료된 것입니다. 그렇지 않다면, 다시 열어서 납땜 연결 상태를 확인하세요.
-

 FixBot에 문의하기





기기를 재조립하려면 이 지침을 역순으로 따르세요. R2 또는 e-Stewards 인증 재활용 업체에 전자 폐기물을 가져가세요.

팀

Michigan Tech, Team 5-5, Lauer Spring 2014 Michigan Tech, Team 5-5, Lauer Spring 2014 회원
MTU-LAUER-S14S5G5
3 회원들
안내서 60개를 작성함
1가이드 댓글
Too late finding this (although self-explanatory). I was wondering when I tried this - WHERE does one find the spare component motor to replace? I searched the internet, but for something so specific, I just couldn't locate the right channels. For future reference, is there a typical store of small motors, etc... to locate these things?
