주요 콘텐츠로 건너뛰기

Fujitsu LIFEBOOK P7010D Audio Speakers Replacement

필요한 것

  1. Fujitsu LIFEBOOK P7010D Audio Speakers Replacement, Battery: 1 단계, 이미지 1/1
    • Place the laptop upside down on a table.

  2. Fujitsu LIFEBOOK P7010D Audio Speakers Replacement: 2 단계, 이미지 1/1
    • Locate the battery (the grey block). Find the two tabs on one end of the battery near the side of the laptop.

    • Using your fingers, press both tabs down at once until they are fully depressed.

  3. Fujitsu LIFEBOOK P7010D Audio Speakers Replacement: 3 단계, 이미지 1/1
    • While holding the tabs down, slowly pivot the battery up.

    • The battery is now free and safe to pull out.

  4. Fujitsu LIFEBOOK P7010D Audio Speakers Replacement, Keyboard: 4 단계, 이미지 1/2 Fujitsu LIFEBOOK P7010D Audio Speakers Replacement, Keyboard: 4 단계, 이미지 2/2
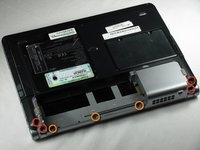
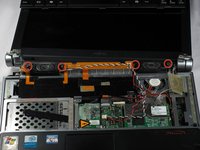
    • Unscrew three 2.4mm and one 5.7mm screws using a Phillips # 0.

    • Unscrew three 1.9mm screws in the battery compartment still using a Phillips # 0

  5. Fujitsu LIFEBOOK P7010D Audio Speakers Replacement: 5 단계, 이미지 1/3 Fujitsu LIFEBOOK P7010D Audio Speakers Replacement: 5 단계, 이미지 2/3 Fujitsu LIFEBOOK P7010D Audio Speakers Replacement: 5 단계, 이미지 3/3
    • Mind the wire connections on the bottom right side of the monitor. They are still connected between the monitor and computer.

    • Raise the monitor as you normally would until it pops out by itself. Rotate the left side up and to the right to unhook hinges that may catch on the computer.

    • Lay the monitor flat next to the computer.

  6. Fujitsu LIFEBOOK P7010D Audio Speakers Replacement: 6 단계, 이미지 1/2 Fujitsu LIFEBOOK P7010D Audio Speakers Replacement: 6 단계, 이미지 2/2
    이 단계에 사용된 도구:
    Anti-Static Wrist Strap
    $7.95
    구매
    • Using a smaller spudger (like a PX3688), pivot the sound case out above the "F2" and "Insert" buttons.

    • Lift the case out and set it aside.

    • For the proceeding steps, put on your anti-static wrist strap and attach the metal clip to something metal and grounded in order to protect the delicate circuitry inside the computer.

  7. Fujitsu LIFEBOOK P7010D Audio Speakers Replacement: 7 단계, 이미지 1/3 Fujitsu LIFEBOOK P7010D Audio Speakers Replacement: 7 단계, 이미지 2/3 Fujitsu LIFEBOOK P7010D Audio Speakers Replacement: 7 단계, 이미지 3/3
    • Using the same spudger, pry the top of the keyboard up above the "F2" key.

    • Turn the computer so that the bottom is facing you.

    • The keyboard is connected to a black plastic strip, slowly pull the keyboard and place it to the side.

  8. Fujitsu LIFEBOOK P7010D Audio Speakers Replacement: 8 단계, 이미지 1/2 Fujitsu LIFEBOOK P7010D Audio Speakers Replacement: 8 단계, 이미지 2/2
    • Disconnect the keyboard by gently pulling on the hard plastic square straight up from the white connector.

  9. Fujitsu LIFEBOOK P7010D Audio Speakers Replacement, Audio Speakers: 9 단계, 이미지 1/3 Fujitsu LIFEBOOK P7010D Audio Speakers Replacement, Audio Speakers: 9 단계, 이미지 2/3 Fujitsu LIFEBOOK P7010D Audio Speakers Replacement, Audio Speakers: 9 단계, 이미지 3/3
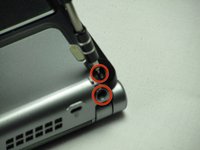
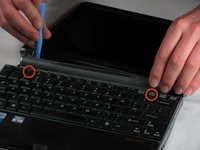
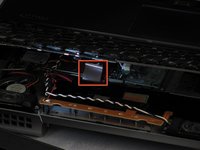
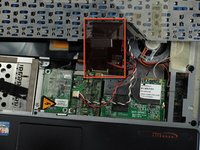
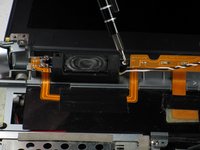
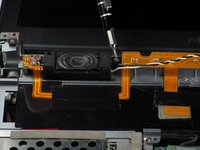
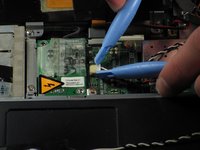
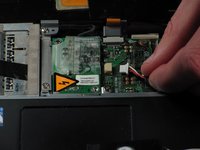
    • Remove four 2.4mm screws using the Phillips #0 screwdriver from each side of the audio speakers.

    • Note that the speaker with the white and black wires are on the left and the red and black wires are on the right.

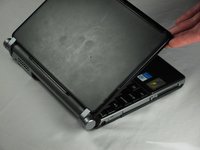
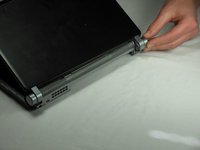
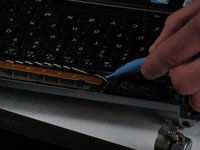
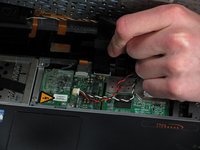
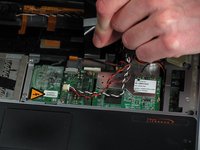
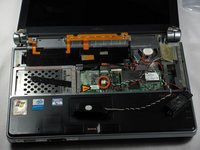
    • Place the speakers to the side of the computer.

  10. Fujitsu LIFEBOOK P7010D Audio Speakers Replacement: 10 단계, 이미지 1/3 Fujitsu LIFEBOOK P7010D Audio Speakers Replacement: 10 단계, 이미지 2/3 Fujitsu LIFEBOOK P7010D Audio Speakers Replacement: 10 단계, 이미지 3/3
    • Use your fingers or a spudger to remove the white connector from its port.

결론

To reassemble your device, follow these instructions in reverse order.

다른 한 분이 해당 안내서를 완성하였습니다.

Nicholas Ross

회원 가입일: 01/20/12

186 평판

안내서 7개 작성하였습니다

Cal Poly, Team 10-31, Amido Winter 2012 Cal Poly, Team 10-31, Amido Winter 2012 회원

CPSU-AMIDO-W12S10G31

5 회원들

안내서 18개 작성하였습니다

댓글 0개

댓글 쓰기

조회 통계:

24 시간 전: 3

7일 전: 6

30일 전: 21

전체 시간: 3,514