주요 콘텐츠로 건너뛰기
Gateway W350I Heatsink Fan Replacement

Gateway W350I Heatsink Fan Replacement

Aaron Austin

Aaron Austin5 다른 기여자

최종 수정일 May 7, 2024

15 - 20 분
조정

This repair will be needed in circumstances where the heatsink fan is not turning on and causing the computer to power itself down. Replacing the heatsink fan with a new one should correct the overheating power downs.

필요한 것

도구

더보기...

  1. Gateway W350I Heatsink Fan Replacement, Battery Access: 1 단계, 이미지 1개 중 1개
    • Turn the laptop upside down and position it as shown in the image.

  2. Gateway W350I Heatsink Fan Replacement, Unlocking the Battery: 2 단계, 이미지 3개 중 1개 Gateway W350I Heatsink Fan Replacement, Unlocking the Battery: 2 단계, 이미지 3개 중 2개 Gateway W350I Heatsink Fan Replacement, Unlocking the Battery: 2 단계, 이미지 3개 중 3개
    • Slide the locking switch towards the open lock picture.

    • Hold the release switch in the unlocked position while simultaneously pushing the battery away from the laptop.

    • Once the laptop is disengaged, completely remove the battery from the laptop.

  3. Gateway W350I Heatsink Fan Replacement, Remove Bottom Cover: 3 단계, 이미지 3개 중 1개 Gateway W350I Heatsink Fan Replacement, Remove Bottom Cover: 3 단계, 이미지 3개 중 2개 Gateway W350I Heatsink Fan Replacement, Remove Bottom Cover: 3 단계, 이미지 3개 중 3개
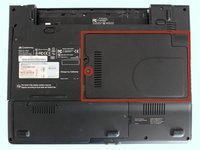
    • Remove the single 3mm Phillips #0 screw holding on the plastic cover.

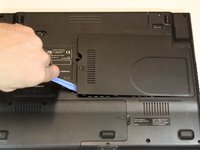
    • Use a plastic opening tool to gently pry off the plastic cover.

  4. Gateway W350I Heatsink Fan Replacement, Remove Srews & Tape: 4 단계, 이미지 3개 중 1개 Gateway W350I Heatsink Fan Replacement, Remove Srews & Tape: 4 단계, 이미지 3개 중 2개 Gateway W350I Heatsink Fan Replacement, Remove Srews & Tape: 4 단계, 이미지 3개 중 3개
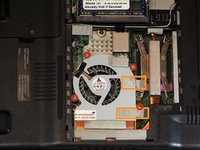
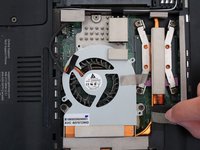
    • Remove all four 3mm Phillips #0 screws holding in the fan.

    • Remove the tape from the top of the fan

  5. Gateway W350I Heatsink Fan Replacement, Removing Heat-Sink Fan: 5 단계, 이미지 3개 중 1개 Gateway W350I Heatsink Fan Replacement, Removing Heat-Sink Fan: 5 단계, 이미지 3개 중 2개 Gateway W350I Heatsink Fan Replacement, Removing Heat-Sink Fan: 5 단계, 이미지 3개 중 3개
    이 단계에 사용된 도구:
    Tweezers
    $4.99
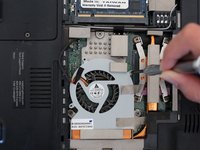
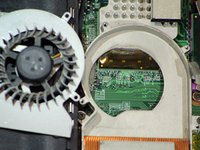
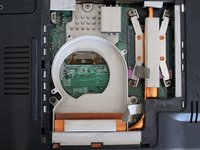
    • Gently remove the fan from the metal housing.

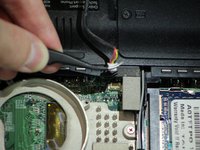
    • Disconnect the cable with tweezers.

결론

To reassemble your device, follow these instructions in reverse order.

다른 한 분이 해당 안내서를 완성하였습니다.

작성자

5다른 기여자 명과 함께

Aaron Austin

회원 가입일: 09/22/14

252 평판

안내서 2개를 작성함

USF Tampa, Team 4-1, Brown Fall 2014 USF Tampa, Team 4-1, Brown Fall 2014 회원

USFT-BROWN-F14S4G1

3 회원들

안내서 10개를 작성함

댓글 0개

댓글 쓰기

조회 통계:

지난 24시간: 0

지난 7일: 0

지난 30일: 5

전체 시간: 1,061