주요 콘텐츠로 건너뛰기
HP Pavilion 15-b109wm Fan Replacement

HP Pavilion 15-b109wm Fan Replacement

Stephen Gacioch

Stephen Gacioch2 다른 기여자

최종 수정일 December 21, 2018

30 분
어려움

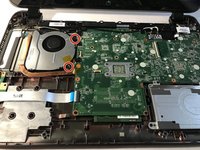
This replacement guide will show how to replace the fan inside of a HP Pavilion 15-b109wm. This process will take between 30-45 minutes, if done correctly. Remember to take your time and do the steps correctly since you are working near the motherboard.

필요한 것

도구

  • JIS #1
  • Spudger
    Spudger
  • iFixit Opening Tool
    iFixit Opening Tool

더보기...

  1. HP Pavilion 15-b109wm Fan Replacement, Battery: 1 단계, 이미지 1개 중 1개
    • Power off the device and disconnect from any power source.

  2. HP Pavilion 15-b109wm Fan Replacement: 2 단계, 이미지 1개 중 1개
    • Turn the device upside down and ensure the back of the device is facing you.

  3. HP Pavilion 15-b109wm Fan Replacement: 3 단계, 이미지 3개 중 1개 HP Pavilion 15-b109wm Fan Replacement: 3 단계, 이미지 3개 중 2개 HP Pavilion 15-b109wm Fan Replacement: 3 단계, 이미지 3개 중 3개
    • Push both buttons towards one another simultaneously. The battery slightly pops out.

  4. HP Pavilion 15-b109wm Fan Replacement: 4 단계, 이미지 3개 중 1개 HP Pavilion 15-b109wm Fan Replacement: 4 단계, 이미지 3개 중 2개 HP Pavilion 15-b109wm Fan Replacement: 4 단계, 이미지 3개 중 3개
    • Pull out the battery from the device's battery slot.

  5. HP Pavilion 15-b109wm Fan Replacement, Keyboard: 5 단계, 이미지 2개 중 1개 HP Pavilion 15-b109wm Fan Replacement, Keyboard: 5 단계, 이미지 2개 중 2개
    • Use JIS #1 screwdriver to remove the eleven 6 mm screws.

  6. HP Pavilion 15-b109wm Fan Replacement: 6 단계, 이미지 1개 중 1개
    • Locate the two screw holes that allow access to removing the keyboard.

    • There is a keyboard sign beside both keyboard access holes.

  7. HP Pavilion 15-b109wm Fan Replacement: 7 단계, 이미지 1개 중 1개
    이 단계에 사용된 도구:
    Heavy-Duty Spudger
    $4.99
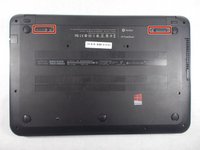
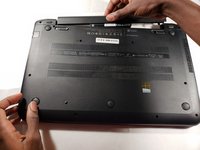
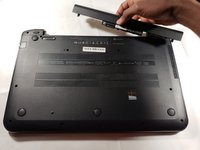
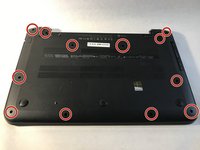
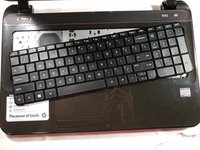
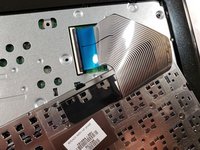
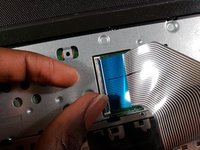
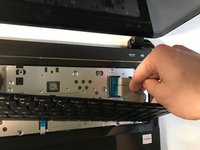
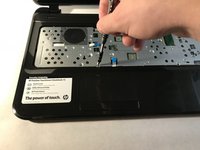
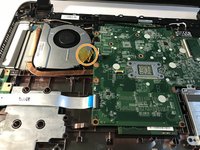
    • Turn the device onto its side.

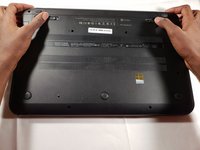
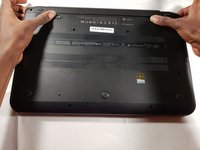
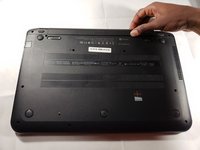
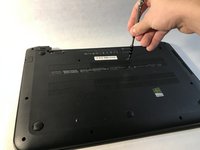
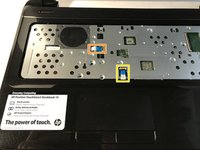
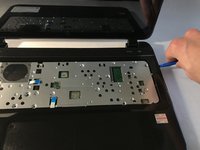
    • Using a heavy duty spudger, gently disengage the keyboard.

  8. HP Pavilion 15-b109wm Fan Replacement: 8 단계, 이미지 2개 중 1개 HP Pavilion 15-b109wm Fan Replacement: 8 단계, 이미지 2개 중 2개
    • Using a plastic opening tool, release the keyboard clips.

  9. HP Pavilion 15-b109wm Fan Replacement: 9 단계, 이미지 1개 중 1개
    • Tilt the keyboard to expose the Zero Insertion Force connector to which the keyboard cable is attached.

  10. HP Pavilion 15-b109wm Fan Replacement: 10 단계, 이미지 3개 중 1개 HP Pavilion 15-b109wm Fan Replacement: 10 단계, 이미지 3개 중 2개 HP Pavilion 15-b109wm Fan Replacement: 10 단계, 이미지 3개 중 3개
    • Disconnect the keyboard cable from the motherboard by detaching the Zero Insertion Force connector.

    • To detach the connector, release by lifting the black plastic tab up.

  11. HP Pavilion 15-b109wm Fan Replacement, Fan: 11 단계, 이미지 3개 중 1개 HP Pavilion 15-b109wm Fan Replacement, Fan: 11 단계, 이미지 3개 중 2개 HP Pavilion 15-b109wm Fan Replacement, Fan: 11 단계, 이미지 3개 중 3개
    • Using a JIS #1 screwdriver, remove the five 5mm screws.

    • Detach the power button cable.

    • Detach the touch pad cable.

  12. HP Pavilion 15-b109wm Fan Replacement: 12 단계, 이미지 3개 중 1개 HP Pavilion 15-b109wm Fan Replacement: 12 단계, 이미지 3개 중 2개 HP Pavilion 15-b109wm Fan Replacement: 12 단계, 이미지 3개 중 3개
    • Using a plastic opening tool, pry open the top cover.

    • Unscrew the two 5 mm screws using a JIS #1 screwdriver.

    • Gently, pull to detach the fan cable.

    • Be careful so you do not damage the motherboard.

  13. HP Pavilion 15-b109wm Fan Replacement: 13 단계, 이미지 1개 중 1개
    • Carefully remove the fan from its slot.

결론

To reassemble your device, follow these instructions in reverse order.

작성자

2다른 기여자 명과 함께

Stephen Gacioch

회원 가입일: 10/26/18

437 평판

안내서 3개를 작성함

UMass Dartmouth, Team S2-G2, Peak Fall 2018 UMass Dartmouth, Team S2-G2, Peak Fall 2018 회원

UMASSD-PEAK-F18S2G2

3 회원들

안내서 5개를 작성함

댓글 0개

댓글 쓰기

조회 통계:

지난 24시간: 4

지난 7일: 13

지난 30일: 16

전체 시간: 469