주요 콘텐츠로 건너뛰기

HP Pavilion zd8000 Top Cover Replacement

필요한 것

  1. HP Pavilion zd8000 Top Cover Replacement, Battery: 1 단계, 이미지 1/1
    • Slide the battery release latch towards you.

  2. HP Pavilion zd8000 Top Cover Replacement: 2 단계, 이미지 1/2 HP Pavilion zd8000 Top Cover Replacement: 2 단계, 이미지 2/2
    • Pull up on the battery to remove it.

  3. HP Pavilion zd8000 Top Cover Replacement, RAM: 3 단계, 이미지 1/2 HP Pavilion zd8000 Top Cover Replacement, RAM: 3 단계, 이미지 2/2
    • Loosen the Phillips screw labeled ‘ram’ and lift the cover.

  4. HP Pavilion zd8000 Top Cover Replacement: 4 단계, 이미지 1/2 HP Pavilion zd8000 Top Cover Replacement: 4 단계, 이미지 2/2
    • Locate the green RAM card and find the metal tabs securing the card.

    • Push outwards on the two tabs to release the card.

  5. HP Pavilion zd8000 Top Cover Replacement: 5 단계, 이미지 1/1
    • Carefully slide the card out at an upward angle away from the slot.

  6. HP Pavilion zd8000 Top Cover Replacement, WiFi Card Cables: 6 단계, 이미지 1/2 HP Pavilion zd8000 Top Cover Replacement, WiFi Card Cables: 6 단계, 이미지 2/2
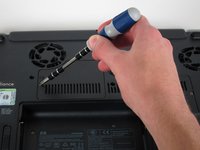
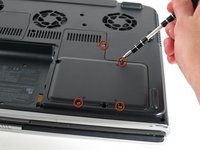
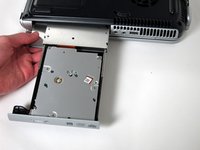
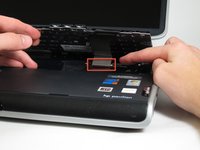
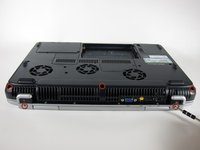
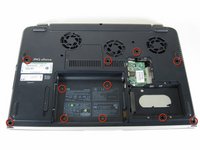
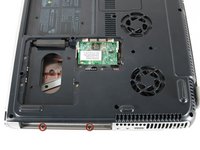
    • Unscrew the four 8mm Philips screws marked with an icon resembling a stacks of discs.

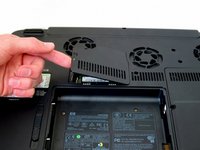
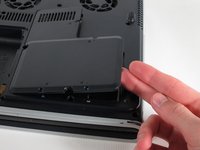
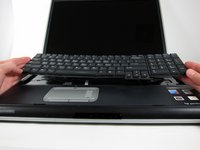
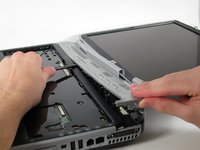
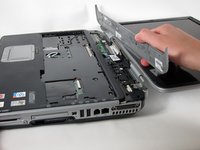
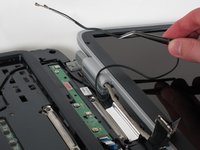
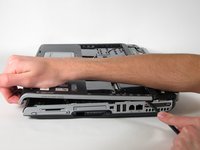
    • Lift the cover from the right to remove it.

  7. HP Pavilion zd8000 Top Cover Replacement: 7 단계, 이미지 1/2 HP Pavilion zd8000 Top Cover Replacement: 7 단계, 이미지 2/2
    • Use tweezers to detach the grey and black cables connected to the green WiFi card.

  8. HP Pavilion zd8000 Top Cover Replacement, CD/Optical Drive: 8 단계, 이미지 1/1
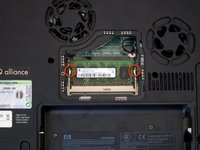
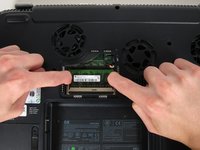
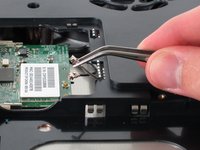
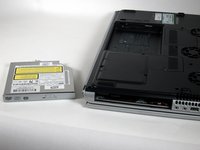
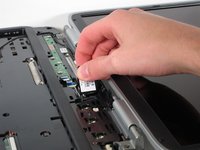
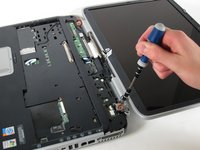
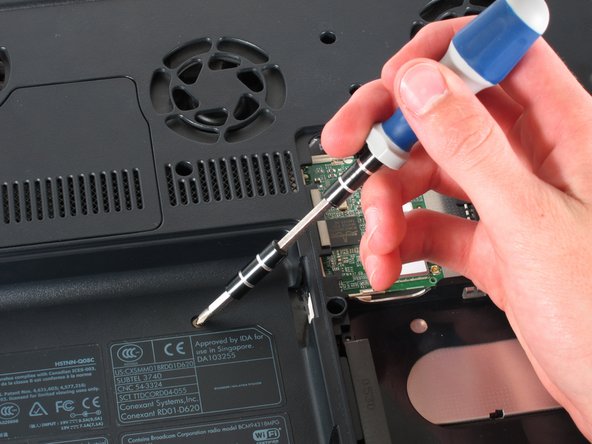
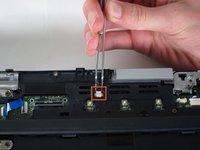
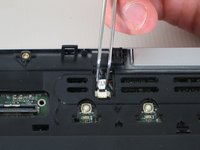
    • Remove the 8mm Philips screw located between the hard drive and the WiFi card.

  9. HP Pavilion zd8000 Top Cover Replacement: 9 단계, 이미지 1/2 HP Pavilion zd8000 Top Cover Replacement: 9 단계, 이미지 2/2
    • Turn the laptop 90 degrees clockwise so you are facing the CD drive.

    • Unbend a paperclip and insert the end into the small hole by the eject button to cause the tray to pop out towards you.

  10. HP Pavilion zd8000 Top Cover Replacement: 10 단계, 이미지 1/2 HP Pavilion zd8000 Top Cover Replacement: 10 단계, 이미지 2/2
    • Gently pull the tray away from the laptop and the rest of the optical drive will follow.

  11. HP Pavilion zd8000 Top Cover Replacement, Keyboard: 11 단계, 이미지 1/1
    • Remove the two 8mm Philips screws marked “K” on the bottom of the laptop.

  12. HP Pavilion zd8000 Top Cover Replacement: 12 단계, 이미지 1/2 HP Pavilion zd8000 Top Cover Replacement: 12 단계, 이미지 2/2
    • Flip the laptop over and open the screen.

    • Push up on the four latches located at the top of the keyboard with the spudger to release them.

  13. HP Pavilion zd8000 Top Cover Replacement: 13 단계, 이미지 1/2 HP Pavilion zd8000 Top Cover Replacement: 13 단계, 이미지 2/2
    • Lift the keyboard carefully because it is attached to the motherboard by a ribbon cable.

    • Lift the top of the keyboard towards you. Then, while keeping the keyboard at an angle, lift it towards the display.

  14. HP Pavilion zd8000 Top Cover Replacement: 14 단계, 이미지 1/2 HP Pavilion zd8000 Top Cover Replacement: 14 단계, 이미지 2/2
    • Rotate the keyboard so that the bottom is visible.

    • With the keyboard lifted, locate the blue-striped tab on the underside of the black ribbon cable.

    • Pull the tab towards you to release the keyboard from the laptop.

  15. HP Pavilion zd8000 Top Cover Replacement, Switch Cover: 15 단계, 이미지 1/2 HP Pavilion zd8000 Top Cover Replacement, Switch Cover: 15 단계, 이미지 2/2
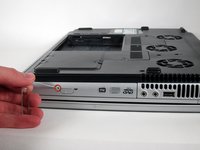
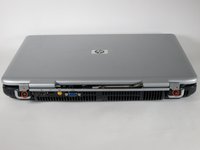
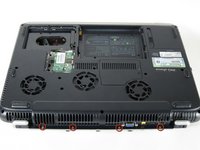
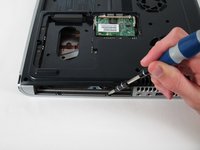
    • Place the laptop face-down and rotate it 180 degrees so the vents are facing you.

    • Remove the five 8mm Philips screws. Three are on the black base and two are near the hinges.

  16. HP Pavilion zd8000 Top Cover Replacement: 16 단계, 이미지 1/1
    • Flip the laptop over.

    • Fully open the laptop.

  17. HP Pavilion zd8000 Top Cover Replacement: 17 단계, 이미지 1/3 HP Pavilion zd8000 Top Cover Replacement: 17 단계, 이미지 2/3 HP Pavilion zd8000 Top Cover Replacement: 17 단계, 이미지 3/3
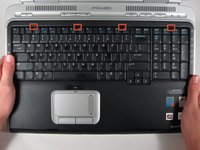
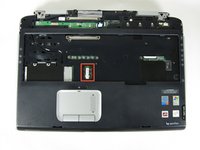
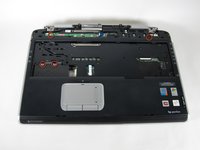
    • Rotate it so the display is on your right and the keyboard is on your left.

    • Lift the switch cover firmly but slowly so you do not snap it.

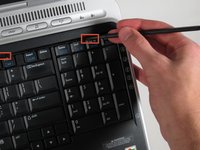
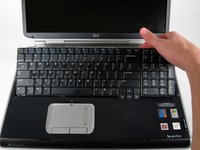
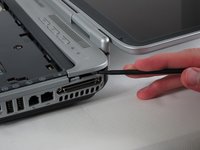
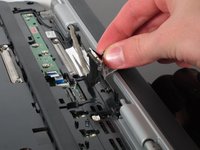
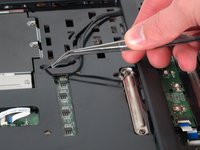
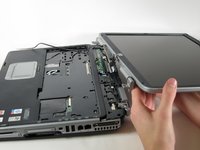
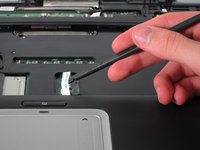
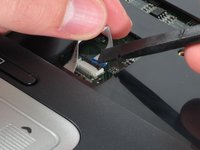
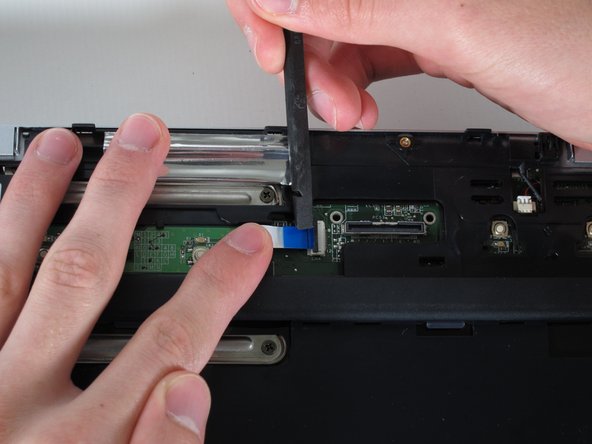
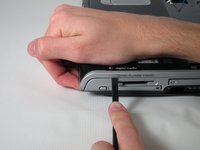
    • Lift the switch cover carefully from one end while sliding the spudger between the switch cover and the laptop to separate them.

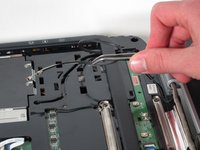
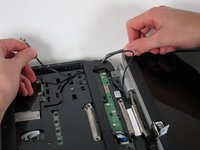
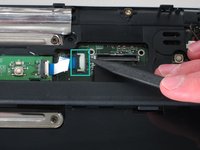
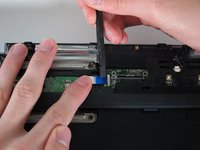
    • The switch cover should easily separate from the laptop as you run the spudger through.

  18. HP Pavilion zd8000 Top Cover Replacement, Screen: 18 단계, 이미지 1/2 HP Pavilion zd8000 Top Cover Replacement, Screen: 18 단계, 이미지 2/2
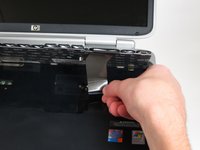
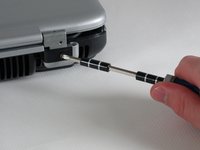
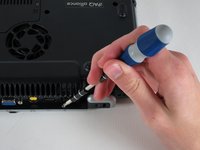
    • Close the lid and rotate the laptop so that the vents are facing you.

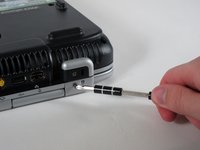
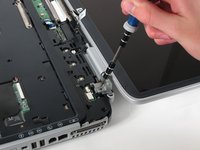
    • Unscrew the two 8mm Philips screws below the hinges.

  19. HP Pavilion zd8000 Top Cover Replacement: 19 단계, 이미지 1/2 HP Pavilion zd8000 Top Cover Replacement: 19 단계, 이미지 2/2
    • Carefully rotate the laptop 90 degrees counter-clockwise and open the screen.

    • Pull on the black tab with the HP service sticker to unplug the display from the motherboard.

  20. HP Pavilion zd8000 Top Cover Replacement: 20 단계, 이미지 1/2 HP Pavilion zd8000 Top Cover Replacement: 20 단계, 이미지 2/2
    • Using tweezers, remove the black cable from the hole leading to the WiFi enclosure.

    • Pull gently to remove the black and grey cables from the case.

    • Check the surface beneath the laptop to ensure the cables do not catch on anything when you flip the laptop over.

  21. HP Pavilion zd8000 Top Cover Replacement: 21 단계, 이미지 1/2 HP Pavilion zd8000 Top Cover Replacement: 21 단계, 이미지 2/2
    • Using tweezers, pull the black cable towards the display and through the hole in the casing.

  22. HP Pavilion zd8000 Top Cover Replacement: 22 단계, 이미지 1/3 HP Pavilion zd8000 Top Cover Replacement: 22 단계, 이미지 2/3 HP Pavilion zd8000 Top Cover Replacement: 22 단계, 이미지 3/3
    • Unscrew the two 8mm Philips screws that attach the hinge to the laptop's display.

    • Lift the screen upwards to detach it from the laptop.

  23. HP Pavilion zd8000 Top Cover Replacement, Top Cover: 23 단계, 이미지 1/2 HP Pavilion zd8000 Top Cover Replacement, Top Cover: 23 단계, 이미지 2/2
    • With the laptop face-down, remove the eleven 8mm Philips screws.

  24. HP Pavilion zd8000 Top Cover Replacement: 24 단계, 이미지 1/2 HP Pavilion zd8000 Top Cover Replacement: 24 단계, 이미지 2/2
    • Rotate the laptop 180 degrees so the vents are facing you.

    • Unscrew the four 3mm Philips screws below the vents.

  25. HP Pavilion zd8000 Top Cover Replacement: 25 단계, 이미지 1/2 HP Pavilion zd8000 Top Cover Replacement: 25 단계, 이미지 2/2
    • Rotate the laptop 90 degrees counter-clockwise.

    • Unscrew the two 3mm Philips screws from the optical drive bay.

  26. HP Pavilion zd8000 Top Cover Replacement: 26 단계, 이미지 1/3 HP Pavilion zd8000 Top Cover Replacement: 26 단계, 이미지 2/3 HP Pavilion zd8000 Top Cover Replacement: 26 단계, 이미지 3/3
    • Flip the laptop over so it is face-up with the trackpad closest to you.

    • Locate the ribbon cable directly above the track pad.

    • Find the black latch at the end of the ribbon cable and unlatch it with a spudger to release it.

  27. HP Pavilion zd8000 Top Cover Replacement: 27 단계, 이미지 1/3 HP Pavilion zd8000 Top Cover Replacement: 27 단계, 이미지 2/3 HP Pavilion zd8000 Top Cover Replacement: 27 단계, 이미지 3/3
    • Find the ribbon cable on the LED board located at the top of the laptop.

    • You will notice that the ribbon cable is connected to two levels - you will be dealing with the one on the lower level.

    • Find the black latch at the end of the ribbon cable and unlatch it with a spudger to release it.

  28. HP Pavilion zd8000 Top Cover Replacement: 28 단계, 이미지 1/2 HP Pavilion zd8000 Top Cover Replacement: 28 단계, 이미지 2/2
    • Locate the white connector attached to a red and black cable to the right of the LED board.

    • Using tweezers, pull the white connector away from you.

  29. HP Pavilion zd8000 Top Cover Replacement: 29 단계, 이미지 1/2 HP Pavilion zd8000 Top Cover Replacement: 29 단계, 이미지 2/2
    • Unscrew the four 8mm Philips screws from the top cover.

  30. HP Pavilion zd8000 Top Cover Replacement: 30 단계, 이미지 1/2 HP Pavilion zd8000 Top Cover Replacement: 30 단계, 이미지 2/2
    • Rotate the computer 90 degrees clockwise and insert the spudger at the seam above the card reader.

    • While lifting the front end of the top cover, slide the spudger across the seam.

    • When you have reached the firewire port, it should click open.

  31. HP Pavilion zd8000 Top Cover Replacement: 31 단계, 이미지 1/1
    • Lift the top cover from the left side to remove it completely.

결론

To reassemble your device, follow these instructions in reverse order.

다른 2명이 해당 안내서를 완성하였습니다.

Allie Menard

회원 가입일: 04/12/11

820 평판

안내서 13개 작성하였습니다

Cal Poly, Team 24-56, Amido Spring 2011 Cal Poly, Team 24-56, Amido Spring 2011 회원

CPSU-AMIDO-S11S24G56

4 회원들

안내서 13개 작성하였습니다

댓글 0개

댓글 쓰기

조회 통계:

24 시간 전: 0

7일 전: 0

30일 전: 2

전체 시간: 3,220