소개
Does the battery of your HP ProBook 440 G6 need inspection or replacing? This guide is here to help you safely replace your laptop's battery step-by-step. The battery is an essential part of your device as it supplies portable, untethered power that allows the device to operate without needing to be plugged in to an outlet. Restoring the faulty battery can restore safe and smooth power into your device, but how can you know if the battery is the issue?
Common Symptoms that may arise due to a faulty battery may include:
- Rapid battery drain
- Device shuts down unexpectedly even though the battery isn't fully depleted
- Device overheating
- Device only turns on when plugged in
- slow or no charging at all
This guide will walk you through each step to ensure a safe and smooth replacement. But before beginning this replacement, make sure to power off your device, unplug it from the charger and put it in Battery Safe mode.
필요한 것
-
-
-
Using a Phillips #0 Screwdriver, remove the two 5 mm screws on the front-facing side of the lower case.
-
Using a Phillips #0 Screwdriver, remove the remaining five 5 mm Phillips screws securing the lower case.
 FixBot에 문의하기
-
-
-
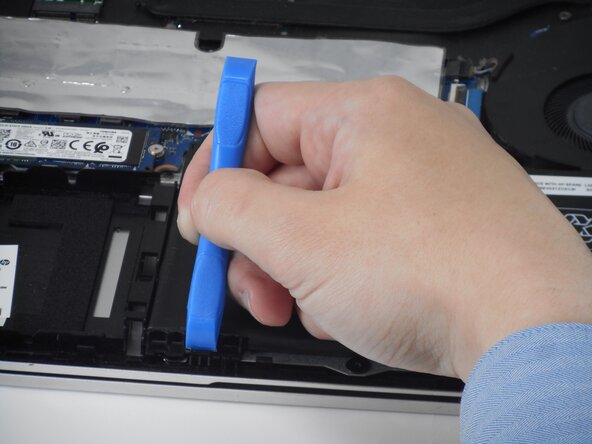
Starting under the display, carefully use a plastic prying tool (iFixit opening tool) to disengage the retaining clips.
-
Once a corner or edge starts to lift, slowly slide the tool along the edge to loosen more of the bottom panel.
-
Keep working around the edges until all the clips are loose.
-
-
-
-
Gently lift the rear of the cover to disengage it from the computer.
-
Carefully remove the bottom cover from the computer.
-
-
-
-
-
Using a Phillips #0 Screwdriver, remove the two 4mm Phillips screws that secure the battery to the computer.
-
-




To reassemble your device, follow the above steps in reverse order.
For optimal performance, after completing this guide, calibrate your newly installed battery.
Take your e-waste to an R2 or e-Stewards certified recycler.
Repair didn’t go as planned? Try some basic troubleshooting or ask our Answers community for help.

팀

University of Memphis, Team 1-4, Sneed Spring 2026 University of Memphis, Team 1-4, Sneed Spring 2026 회원
UM-SNEED-S26S1G4
3 회원들
안내서 12개를 작성함
