소개
Oftentimes one earpiece of a pair of earphones stops working. The problem is usually where the wires attach to the 3.5mm plug. This guide shows how to replace the plug and fix your earphones.
필요한 것
-
-
Using a multimeter (set in ohms to test resistance), test each terminal on the base of the plug to see which terminal corresponds to which speaker (left or right). You'll know they correspond when a value other than 1 appears on the multimeter.
-
Image 3 shows which part of the plug corresponds to each cable:
-
Left
-
Right
-
Common (or ground)
-
-
-
Using your wire cutter, remove the broken 3.5mm plug from the wire.
-
-
-
-
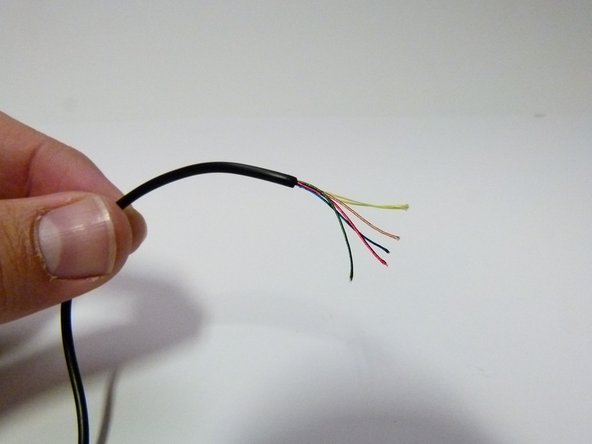
Use your wire stripper to expose about 2cm of the the wire.
-
You must also remove the coating from each smaller, individual wire by using a wire stripper, fine sandpaper, or something of that sort.
-
-
-
Slide the red wire through the hole of the terminal that corresponds to the right speaker. Wrap the wire around the terminal a few times, then solder it in place.
-
Repeat this step for the terminal that corresponds to the left speaker. Note that the left audio wire is often white or green.
-
Finally, solder the common/ground wire (often copper colored) and any multicolored wires through the remaining hole.
-


If the fix did not work, make sure the wires are in direct contact with the terminals. Also make sure that they are not in contact with each other. If done correctly, your trusty pair of earphones (or headphones) can be trusted for quite a while longer!
If the fix did not work, make sure the wires are in direct contact with the terminals. Also make sure that they are not in contact with each other. If done correctly, your trusty pair of earphones (or headphones) can be trusted for quite a while longer!
다른 26명이 해당 안내서를 완성하였습니다.
팀

Cal Poly, Team 28-4, Green Spring 2015 Cal Poly, Team 28-4, Green Spring 2015 회원
CPSU-GREEN-S15S28G4
6 회원들
안내서 14개 작성하였습니다
댓글 2개
The first sentence in your introduction can maybe be changed to: "Often times one earpiece of the earphones stop working."
Your description is well-written and thoroughly describes the process. I would just add pictures specifically pointing to the different parts you mention in your steps.
Otherwise it's all good! :)
Is there a special fix for earphones with a control unit embedded?