주요 콘텐츠로 건너뛰기
Honeywell HY-204 Febreze Dial Replacement

Honeywell HY-204 Febreze Dial Replacement

Armando Jacob Espinoza

Armando Jacob Espinoza3 다른 기여자

최종 수정일 December 19, 2014

15 - 20 분
조정

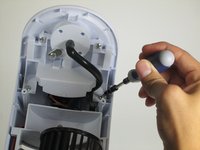
If you are having trouble with your Febreze scent settings, and you are sure that your scent cartridge is full, this is the guide for you! This guide will walk you through replacing the Febreze settings dial. Although this is a quick process, you need to be careful not to accidentally separate the wires from the dial.

필요한 것

도구

  1. Honeywell HY-204 Febreze Dial Replacement, Case: 1 단계, 이미지 2개 중 1개 Honeywell HY-204 Febreze Dial Replacement, Case: 1 단계, 이미지 2개 중 2개
    • Before you begin, be sure to unplug the fan.

    • Remove the four 14 mm screws from the back of the device using the Phillips #0 Screwdriver.

  2. Honeywell HY-204 Febreze Dial Replacement: 2 단계, 이미지 2개 중 1개 Honeywell HY-204 Febreze Dial Replacement: 2 단계, 이미지 2개 중 2개
    • Pull the front and back parts of the case away from each other until the back is free from the front. This may require a large amount of force.

  3. Honeywell HY-204 Febreze Dial Replacement, Control Panel: 3 단계, 이미지 2개 중 1개 Honeywell HY-204 Febreze Dial Replacement, Control Panel: 3 단계, 이미지 2개 중 2개
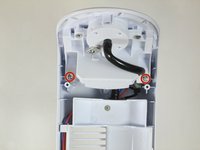
    • Remove the two 3mm screws found just below the top of the device using the Phillips #0 Screwdriver.

  4. Honeywell HY-204 Febreze Dial Replacement: 4 단계, 이미지 1개 중 1개
    • Pry off the control panel by forcefully lifting the tab located inside the front of the fan with the plastic opening tool.

  5. Honeywell HY-204 Febreze Dial Replacement, Febreze Dial: 5 단계, 이미지 1개 중 1개
    • Remove the two 3mm Phillips #0 screws from the back of the black dial box.

  6. Honeywell HY-204 Febreze Dial Replacement: 6 단계, 이미지 2개 중 1개 Honeywell HY-204 Febreze Dial Replacement: 6 단계, 이미지 2개 중 2개
    • Be careful not to separate the wires from the black dial box during separation, or you will have to re-solder them.

    • Pull the dial carefully, but forcefully, straight away from the black dial box. Do not twist the dial button while removing it.

    • When reassembling, screw the black box on first, line up the hole on the dial with the shaft on the black box, and push the dial into place.

결론

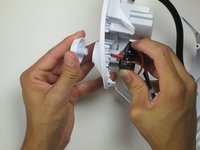
To reassemble your device, follow these instructions in reverse order.

작성자

3다른 기여자 명과 함께

Armando Jacob Espinoza

회원 가입일: 10/14/14

503 평판

안내서 3개를 작성함

Cal Poly, Team 10-40, Amido Fall 2014 Cal Poly, Team 10-40, Amido Fall 2014 회원

CPSU-AMIDO-F14S10G40

3 회원들

안내서 7개를 작성함

댓글 0개

댓글 쓰기

조회 통계:

지난 24시간: 0

지난 7일: 8

지난 30일: 9

전체 시간: 313