소개
If your Hover-1 Charger (H1-COL) is having problems powering on or retaining a charge, there may be an issue with its battery. Before you begin disassembling your hoverboard, check out our troubleshooting pages that address powering on and problems with charging. Make sure to examine your hoverboard’s charger as well. If the problem persists, this guide will help you replace your hoverboard’s battery.
The battery is held in place with adhesive; some force is required to remove it. Make sure to wear an anti-static wrist strap to protect the electronics against buildup of static electricity. Some screw housings are fragile; they may fall apart when the screw is removed.
필요한 것
-
-
Flip the hoverboard over so that the warning label is facing up.
-
Remove the twelve 12 mm screws with a Phillips #2 screwdriver.
-
Remove the four 10 mm screws with a Phillips #2 screwdriver.
 FixBot에 문의하기
-
-
-
-
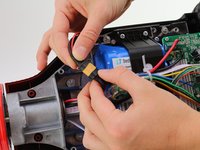
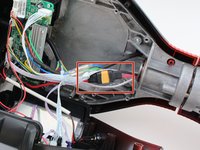
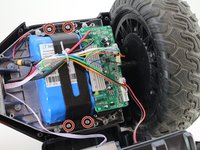
Disconnect the two pronged black and yellow cable.
-
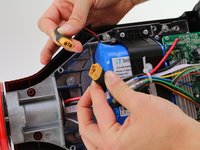
Thread the cable through the middle cylinder of the hoverboard.
-
-
-
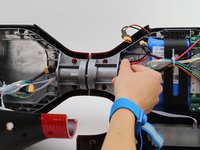
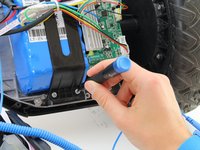
Unscrew the four 10mm screws that are holding the battery casing in place. Use a Phillips #2 screwdriver.
-
-
-
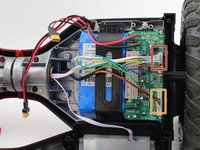
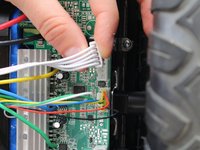
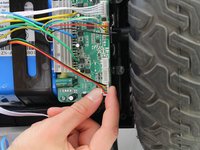
On the battery side, unplug the white five pin connector on the circuitboard.
-
Unplug the black, yellow, green and red connector on the circuitboard.
-
-
-
Move all the loose cables to the side. Pull the battery casing away from the battery.
-


To reassemble your device, follow these instructions in reverse order.
다른 3명이 해당 안내서를 완성하였습니다.

팀

Cal Poly, Team S12-G1, Regan Fall 2019 Cal Poly, Team S12-G1, Regan Fall 2019 회원
CPSU-REGAN-F19S12G1
4 회원들
안내서 6개를 작성함