주요 콘텐츠로 건너뛰기
How To Repair a Hole in a Crochet Blanket

How To Repair a Hole in a Crochet Blanket

Aisha Ali

Aisha Ali다른 한 명의 기여자

최종 수정일 January 15, 2025

35 - 45 분
조정
추천 학생 안내서

Even the most well-made crochet blanket can start to look a little shabby after years of love and use. It's not uncommon for the yarn loops on a crochet project to unravel over time and a hole starts to form. Unless your blanket is literally hanging on by a thread, don’t throw it away yet! This guide will walk you through how to repair a hole in a crochet blanket so that it looks good as new.

Note: The exact repair method will depend on the construction of the blanket and the stitch pattern used. This guide works best for projects worked in three double-crochet clusters, also known as a granny stitch.

  1. How To Repair a Hole in a Crochet Blanket, How To Repair a Hole in a Crochet Blanket: 1 단계, 이미지 1개 중 1개
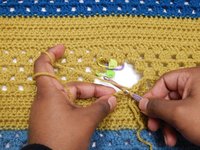
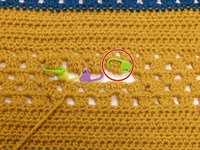
    • Carefully unpick any torn or damaged stitches that have become separated from the main body of the blanket.

    • Take your time while separating the strands. Pulling too hard may cause additional damage to the blanket.

  2. How To Repair a Hole in a Crochet Blanket: 2 단계, 이미지 2개 중 1개 How To Repair a Hole in a Crochet Blanket: 2 단계, 이미지 2개 중 2개
    • Secure any loose or dangling stitches by threading the bottom loops with stitch markers and clasping them closed.

    • This will keep the stitches from accidentally unraveling and making the hole larger.

  3. How To Repair a Hole in a Crochet Blanket: 3 단계, 이미지 1개 중 1개
    • After you’ve secured all of the loose stitches, it's time to fill in the hole. Join your new yarn to the first stitch on the bottom row.

    • If you can’t locate the exact yarn used in the blanket, try your best to match the color, material, and weight of the original yarn as closely as possible.

  4. How To Repair a Hole in a Crochet Blanket: 4 단계, 이미지 3개 중 1개 How To Repair a Hole in a Crochet Blanket: 4 단계, 이미지 3개 중 2개 How To Repair a Hole in a Crochet Blanket: 4 단계, 이미지 3개 중 3개
    • Follow the original stitch pattern, starting at the bottom row and working from right to left.

    • This example uses a three double-crochet cluster, also known as a granny cluster.

    • When you're finished with a row, join with a slip knot and fasten off. Start the next row and repeat Steps 3 and 4.

  5. How To Repair a Hole in a Crochet Blanket: 5 단계, 이미지 2개 중 1개 How To Repair a Hole in a Crochet Blanket: 5 단계, 이미지 2개 중 2개
    • When you reach the last row, take out the stitch markers in the top row of stitches.

    • Insert your hook through the bottom loops of the stitch. Yarn over and pull through all of the loops on your hook.

    • This attaches the top row of existing stitches to your new stitches below.

    • Repeat for the rest of the row.

  6. How To Repair a Hole in a Crochet Blanket: 6 단계, 이미지 1개 중 1개
    • Once you are finished, fasten off and weave in your ends.

결승점

다른 6명이 해당 안내서를 완성하였습니다.

작성자

1다른 기여자 명과 함께

Aisha Ali

회원 가입일: 04/09/22

373 평판

안내서 1개를 작성함

1가이드 댓글

Thank you for your post! This was extremely helpful as I thought I would have to discard an afghan my late mother had made after my dog decided it was his chew toy.

MRAYCLERK - 답글

댓글 쓰기

조회 통계:

지난 24시간: 4

지난 7일: 35

지난 30일: 270

전체 시간: 16,407