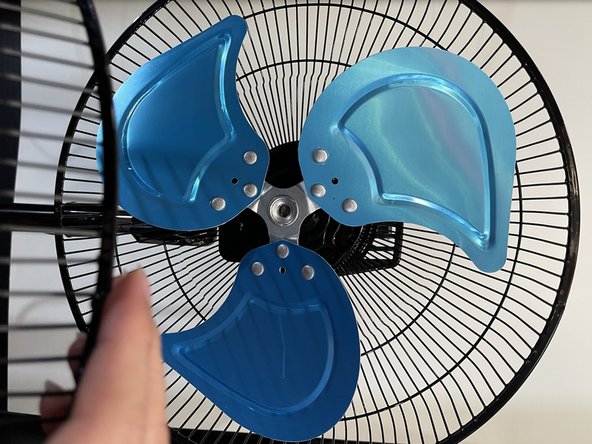
주요 콘텐츠로 건너뛰기

How to Repair a Loose Impress Mighty Mite Fan

필요한 것

  1. How to Repair a Loose Impress Mighty Mite Fan, How to Repair a Loose Impress Mighty Mite Fan: 1 단계, 이미지 1/3 How to Repair a Loose Impress Mighty Mite Fan, How to Repair a Loose Impress Mighty Mite Fan: 1 단계, 이미지 2/3 How to Repair a Loose Impress Mighty Mite Fan, How to Repair a Loose Impress Mighty Mite Fan: 1 단계, 이미지 3/3
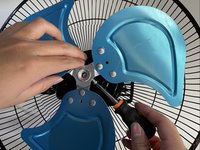
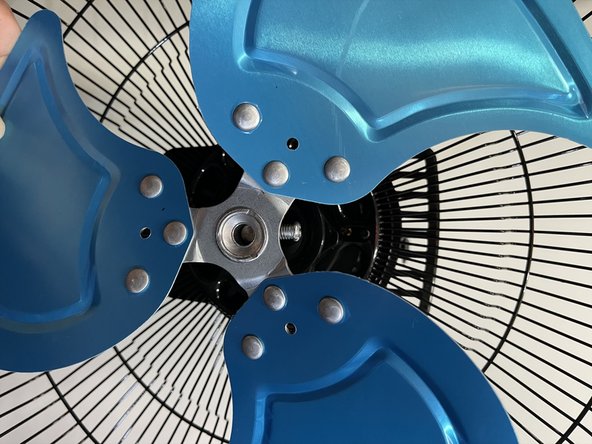
    • Remove the single 0.8 mm screw using a Phillips #2 screwdriver. Use a pair of pliers to hold the hexagon nut so that it makes the process easier.

  2. How to Repair a Loose Impress Mighty Mite Fan: 2 단계, 이미지 1/2 How to Repair a Loose Impress Mighty Mite Fan: 2 단계, 이미지 2/2
    • Disconnect the hinges that hold the fan covers together.

  3. How to Repair a Loose Impress Mighty Mite Fan: 3 단계, 이미지 1/2 How to Repair a Loose Impress Mighty Mite Fan: 3 단계, 이미지 2/2
    • Remove the front cover and set it aside.

  4. How to Repair a Loose Impress Mighty Mite Fan: 4 단계, 이미지 1/3 How to Repair a Loose Impress Mighty Mite Fan: 4 단계, 이미지 2/3 How to Repair a Loose Impress Mighty Mite Fan: 4 단계, 이미지 3/3
    • Use the Phillips #2 screwdriver to remove the 1.4 mm screw that holds the fan blades to the fan.

  5. How to Repair a Loose Impress Mighty Mite Fan: 5 단계, 이미지 1/2 How to Repair a Loose Impress Mighty Mite Fan: 5 단계, 이미지 2/2
    • Remove the fan blades and set them aside.

  6. How to Repair a Loose Impress Mighty Mite Fan: 6 단계, 이미지 1/3 How to Repair a Loose Impress Mighty Mite Fan: 6 단계, 이미지 2/3 How to Repair a Loose Impress Mighty Mite Fan: 6 단계, 이미지 3/3
    • Position the fans back cover correctly aligned with its placeholders.

    • The placeholders are small and black which are not too visible on camera. There are two placeholders and they are shaped like cylinders.

  7. How to Repair a Loose Impress Mighty Mite Fan: 7 단계, 이미지 1/3 How to Repair a Loose Impress Mighty Mite Fan: 7 단계, 이미지 2/3 How to Repair a Loose Impress Mighty Mite Fan: 7 단계, 이미지 3/3
    • Twist the big knob clockwise, that holds the back cover, until it is tight and you can no longer twist.

    • The back cover must be correctly placed on its holders before this step.

  8. How to Repair a Loose Impress Mighty Mite Fan: 8 단계, 이미지 1/3 How to Repair a Loose Impress Mighty Mite Fan: 8 단계, 이미지 2/3 How to Repair a Loose Impress Mighty Mite Fan: 8 단계, 이미지 3/3
    • Place the fan blades back onto the fan and start screwing the 1.4 mm cross head screw into the clockwise direction until it is flat and can no longer screw.

  9. How to Repair a Loose Impress Mighty Mite Fan: 9 단계, 이미지 1/3 How to Repair a Loose Impress Mighty Mite Fan: 9 단계, 이미지 2/3 How to Repair a Loose Impress Mighty Mite Fan: 9 단계, 이미지 3/3
    • Place the front cover back onto the fan with the punch-holes aligned so that the small bolt can go through.

    • These punch-holes should be aligned and you should be able to see through it.

  10. How to Repair a Loose Impress Mighty Mite Fan: 10 단계, 이미지 1/3 How to Repair a Loose Impress Mighty Mite Fan: 10 단계, 이미지 2/3 How to Repair a Loose Impress Mighty Mite Fan: 10 단계, 이미지 3/3
    • Place the .8 mm cross head screw back inside the punch-hole and start screwing the hexagon nut by hand so that this process is easier.

    • Do not tighten this too much as you might need to repeat the whole process in the future of your fans usage.

  11. How to Repair a Loose Impress Mighty Mite Fan: 11 단계, 이미지 1/2 How to Repair a Loose Impress Mighty Mite Fan: 11 단계, 이미지 2/2
    • Close the hinges so that the covers are joined back together.

결론

To repeat the process start from step 1.

Alexis S

회원 가입일: 10/05/21

193 평판

안내서 1개 작성함

CSU Los Angeles, Team 11-20, Grodsky Fall 2021 CSU Los Angeles, Team 11-20, Grodsky Fall 2021 회원

CSULA-GRODSKY-F21S11G20

1 회원

안내서 1개 작성하였습니다

댓글 0개

댓글 쓰기

조회 통계:

24 시간 전: 1

7일 전: 6

30일 전: 15

전체 시간: 622