이 버전에는 잘못된 편집 사항이 있을 수 있습니다. 최신 확인된 스냅샷으로 전환하십시오.
필요한 것
-
이 단계는 번역되지 않았습니다. 번역을 도와주십시오
-
First switch off your phone and remove the SIM card tray.
-
Unscrew the two Pentalobe P2 screws located at the bottom next to the device's USB C port.
-
-
이 단계는 번역되지 않았습니다. 번역을 도와주십시오
-
Use an iSclack or a suction handle to separate the phone assembly from the rear panel.
-
-
이 단계는 번역되지 않았습니다. 번역을 도와주십시오
-
Unplug the antenna cable.
-
Remove the sticker that sits on top of the screw.
-
-
이 단계는 번역되지 않았습니다. 번역을 도와주십시오
-
Unscrew the two Phillips #00 screws that hold the metal plate in place.
-
The plate, which is covering the battery connector, has two little hooks on each side. Use a tweezer to free them and unhinge the plate by carefully moving it upwards.
-
-
-
이 단계는 번역되지 않았습니다. 번역을 도와주십시오
-
Now you can unplug the battery connector and bend it aside.
-
The EVA-L09 model has an NFC antenna adhered onto the battery.
-
-
이 단계는 번역되지 않았습니다. 번역을 도와주십시오
-
The battery is secured with three pieces of adhesive, a removable pull-tab in the center, and on the SIM tray side. A third piece of adhesive on the button side has no pull-tab.
-
Pull the adhesive tabs in a slow constant movement to free the battery.
-
Slowly lift the battery toward the button side and free it from the remaining hidden piece of adhesive.
-
-
이 단계는 번역되지 않았습니다. 번역을 도와주십시오
-
Remove the other five Phillips #00 screws from the motherboard.
-
Disconnect the motherboard flex cable as well as the power and volume button cable.
-
-
이 단계는 번역되지 않았습니다. 번역을 도와주십시오
-
Unplug the LCD screen flex cable.
-
Now you can remove the complete motherboard easily.
-
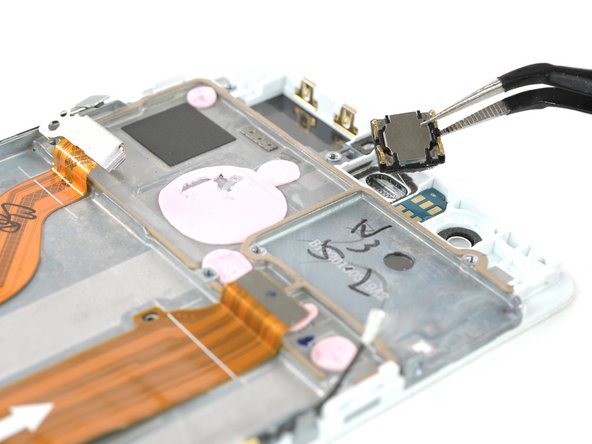
Remove the earpiece speaker (mind adhesive underneath).
-
-
이 단계는 번역되지 않았습니다. 번역을 도와주십시오
-
When the glue is softened, insert a spudger through the camera bay in the midframe and push the display away from the frame.
-
Place a plastic card or two opening picks under the display bezel at the top, between the screen and the frame. This will prevent the glue from readhering.
-
-
이 단계는 번역되지 않았습니다. 번역을 도와주십시오
-
Insert an opening pick approximately 1/16 of an inch and slide it along the side to sparate the display from the frame.
-
You might feel more resistance where the LCD ends on the lower end.
-
Stop here and take your time to reheat that part and soften the glue.
-
-
이 단계는 번역되지 않았습니다. 번역을 도와주십시오
-
When the glue is soft enough carefully move the pick around the bottom corner.
-
You can now work your way along the bottom edge.
-
Leave the opening pick on one side and flip the display over.
-
-
이 단계는 번역되지 않았습니다. 번역을 도와주십시오
-
On the back side detach the display flex cable from the frame.
-
Now you can lift the display away from the frame.
-
Check for any small parts like the rubber gasket at the top behind the speaker grill.
-


다른 46명이 해당 안내서를 완성하였습니다.


댓글 14개
While the guide shows pictures along the process it doesn't really give the whole picture.
Just one example: as a repair guide, you could easily expect the display to be cracked and you can no longer use a suction cup to open it up.
A bigger issue is that the guide doesn't show steps up to the replacement part listed.
An incomplete guide while still providing enough information to help someone with experience in repairs.
ifixit sent me screen and digitizer without the metal frame. is there a way to remove the metal frame and add it to the replacement screen? does ifixit sell screen and digitizer with the metal frame?
david cech - 답글
you guys are killing me... first you sell the display without the frame even though your instructions clearly show the frame and now it is exactly the same story with a middle frame screen... why it is not part of your display package since it is necessary for the replacement and once again showed in instructional video?
david cech - 답글
Hello David, I am very sorry for the confusion. The guide was not congruent with the spare part in the shop. Having a display assembly with the frame already attached would be more convenient and an easier repair. Though the display without the frame is a bit cheaper but makes the guide more complex (hence the rating "difficult").
What instructional video do you mean? Is it for another device?
Please sir let me know if I replace the only screen is it not effect to battery. Because someone told me if I have replace screen it should need whole cover with battery . Please tell me is it true or not