주요 콘텐츠로 건너뛰기

IBM ThinkPad T30 Wireless Card Replacement

필요한 것

  1. IBM ThinkPad T30 Wireless Card Replacement, Battery: 1 단계, 이미지 1/3 IBM ThinkPad T30 Wireless Card Replacement, Battery: 1 단계, 이미지 2/3 IBM ThinkPad T30 Wireless Card Replacement, Battery: 1 단계, 이미지 3/3
    • Make sure the ThinkPad is off and the power supply is unplugged.

    • Flip the ThinkPad upside down with the bottom facing you.

    • Slide the latch to the right into the unlock position.

    • While holding the latch in the unlock position, lift the battery out with your other hand.

  2. IBM ThinkPad T30 Wireless Card Replacement, Wireless Card: 2 단계, 이미지 1/3 IBM ThinkPad T30 Wireless Card Replacement, Wireless Card: 2 단계, 이미지 2/3 IBM ThinkPad T30 Wireless Card Replacement, Wireless Card: 2 단계, 이미지 3/3
    • Focus on the panel at the center of the Thinkpad.

    • Unscrew the three 4mm Phillips #0 screws that bind the panel cover to the Thinkpad.

    • Lift the panel from the right edge and remove the panel.

  3. IBM ThinkPad T30 Wireless Card Replacement: 3 단계, 이미지 1/3 IBM ThinkPad T30 Wireless Card Replacement: 3 단계, 이미지 2/3 IBM ThinkPad T30 Wireless Card Replacement: 3 단계, 이미지 3/3
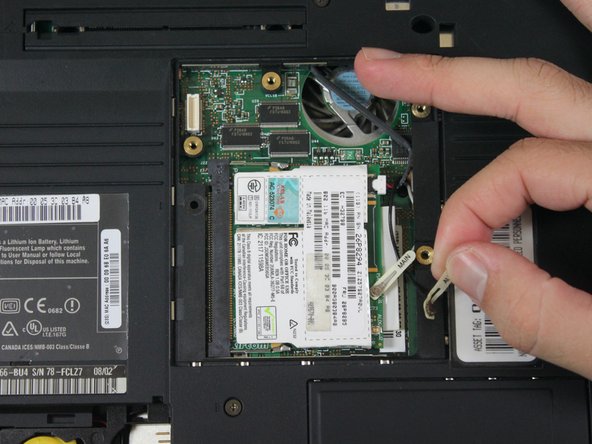
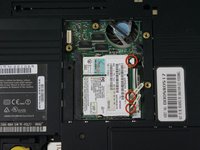
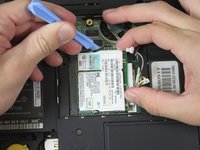
    • Before removing the wireless card, identify the three wires that need to be removed.

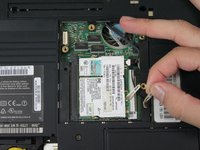
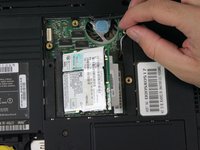
    • The first two wires that are on the bottom right can be easily unplugged with your fingers by pulling on the white label that comes with the wire.

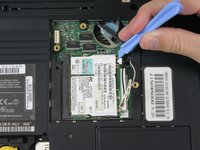
    • For the last wire on the center right, use a plastic opening tool to pry out the wire.

  4. IBM ThinkPad T30 Wireless Card Replacement: 4 단계, 이미지 1/3 IBM ThinkPad T30 Wireless Card Replacement: 4 단계, 이미지 2/3 IBM ThinkPad T30 Wireless Card Replacement: 4 단계, 이미지 3/3
    • Use the plastic opening tool to pry the hinges on the side of the wireless card. These hinges hold the wireless card in place.

    • The wireless card will pop up at an angle, and can then be easily pulled out.

    • When reinserting a new wireless card, insert the card at the angle that it popped out. Then simply push the card down to lock it back into the hatch.

결론

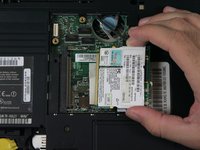
To reassemble your device, follow these instructions in reverse order.

다른 2명이 해당 안내서를 완성하였습니다.

Alex Kost

회원 가입일: 10/05/12

271 평판

안내서 5개 작성하였습니다

Cal Poly, Team 3-20, Amido Fall 2012 Cal Poly, Team 3-20, Amido Fall 2012 회원

CPSU-AMIDO-F12S3G20

3 회원들

안내서 16개 작성하였습니다

댓글 한 개

I f i take out this component will the computer act normally The computer has a car diagnostic program installed as an after thought as i wish to be normal computer Do i just remove and ever thing okay thanks Terry

Terry Dollery - 답글

댓글 쓰기

조회 통계:

24 시간 전: 0

7일 전: 1

30일 전: 7

전체 시간: 5,225