
IBM ThinkPad T41 Expansion Slot Replacement
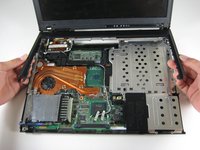
This repair guide will aid you in taking apart your IBM ThinkPad T41 laptop to reach and replace its expansion slot.


-
-
Close the screen and turn the closed laptop over.
-
Remove all 17 screws on the bottom of the computer.
-
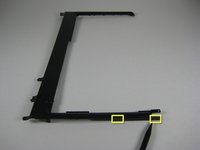
The yellow marker at the rear denotes the UltraBay device retaining screw. This screw is optional as the UltraBay mechanism will hold the drive or battery in place anyway. The yellow marker at the front denotes the hard disk caddy retaining screw.
-
-
-
Close the laptop and turn it over.
-
Remove the five plastic stickers covering the screws on the front edge of the case.
-
-
-
-
Remove the screw on the left hand side of the case, above the expansion slot.
-
-
-
Lift the black plastic border by lifting on either side.
-
Once the sides are up, pull the border towards you and away from the screen.
-
When lifting up, there are two pairs of plastic clips hooking into the fan grill. If you pull hard enough the border will come away, but it's better to push the clips with the spudger.
-


To reassemble your device, follow these instructions in reverse order.
To reassemble your device, follow these instructions in reverse order.
팀

Cal Poly, Team 7-8, Maness Spring 2010 Cal Poly, Team 7-8, Maness Spring 2010 회원
CPSU-MANESS-S10S7G8
4 회원들
안내서 29개를 작성함