소개
This repair guide will aid you in taking apart your IBM ThinkPad T41 laptop to reach and replace its screen.
필요한 것
-
-
Close the screen and turn the closed laptop over.
-
Remove all 17 screws on the bottom of the computer.
-
The yellow marker at the rear denotes the UltraBay device retaining screw. This screw is optional as the UltraBay mechanism will hold the drive or battery in place anyway. The yellow marker at the front denotes the hard disk caddy retaining screw.
 FixBot에 문의하기
-
-
-
Turn the laptop right side up and open the screen.
-
Lift the keyboard, using a spudger at the seam between the keyboard and trackpad.
-
-
-
Unplug the keyboard’s ribbon cable, by lifting up the edges of the plug.
-
Remove the keyboard.
-
-
-
Close the laptop and turn it over.
-
Remove the five plastic stickers covering the screws on the front edge of the case.
-
-
-
-
Turn the computer right side up and open the screen.
-
Lift the trackpad assembly by placing hands on both edges and then pull towards you till it is free of the case.
-
-
-
Pull off the one black and one white coaxial cables by lifting the tabs labeled main and aux (for auxiliary).
-
-
-
Close the computer screen.
-
Remove the four screws on the back of the laptop, near the right and left hinges.
-
-
-
Open the laptop screen.
-
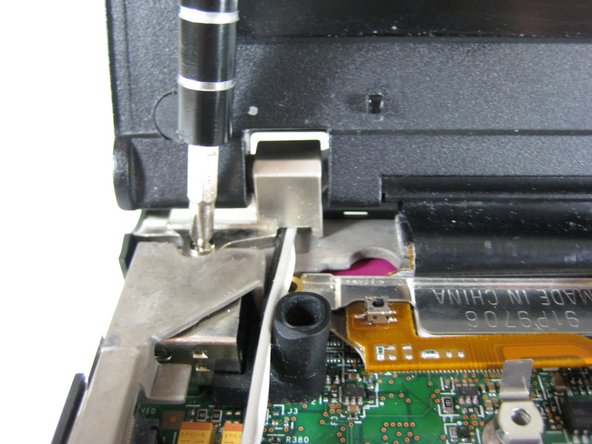
Remove the single screw that secures the left hinge to top of the computer.
-
-
-
Carefully pull up the long antenna cables that were attached to the wireless network card.
-


To reassemble your device, follow these instructions in reverse order.
다른 5명이 해당 안내서를 완성하였습니다.
팀

Cal Poly, Team 7-8, Maness Spring 2010 Cal Poly, Team 7-8, Maness Spring 2010 회원
CPSU-MANESS-S10S7G8
4 회원들
안내서 29개를 작성함