소개
You may need to replace the battery in your Kindle Paperwhite 12th Gen if your device won't hold a charge or it's suddenly shutting down. Before you begin the repair, take a look at the troubleshooting pages on the device page to determine if something else is the cause.
Replacing the battery can be hazardous if the battery is swollen. Your device battery could be swollen if you notice your device expanding, there’s a new gap between components, or buttons have become stiff or hard to push, or your device has more give than usual and feels “squishy.” If you open the Kindle and the battery looks puffy or pillow-like, it is likely swollen. You might also notice a sweet, metallic, or acetone smell. If you encounter a swollen battery be very careful as Lithium-ion batteries can catch fire or explode. Review the What to do with a swollen battery guide if the battery is swollen.
Before you begin this repair, make sure your Kindle is powered off and disconnected from the charger or other accessories.
- Although a metal spudger and Jimmy are shown being used to disconnect the battery and pry it from the device, avoid using metal tools on internal components to prevent damage or injury.
필요한 것
-
-
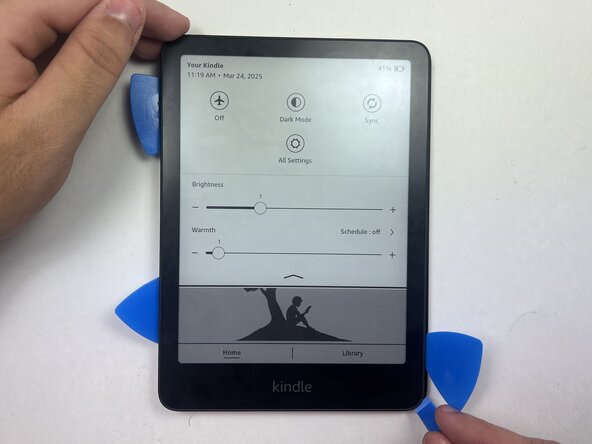
Use an opening tool or opening picks and insert the tip between the back case and screen.
-
Slide the opening tool around the edge of the tablet to release the clips holding them together and avoid damaging the connectors.
 FixBot에 문의하기
-
-
-
-
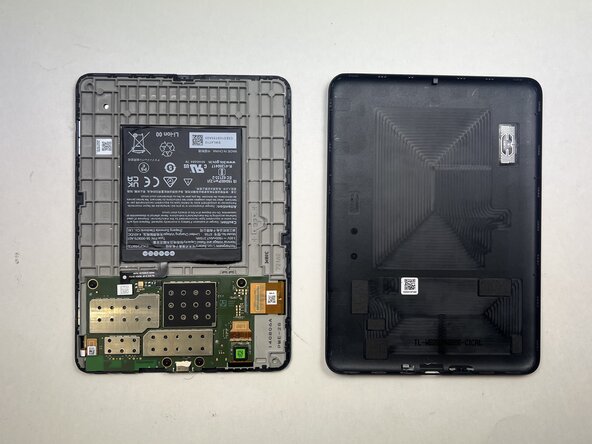
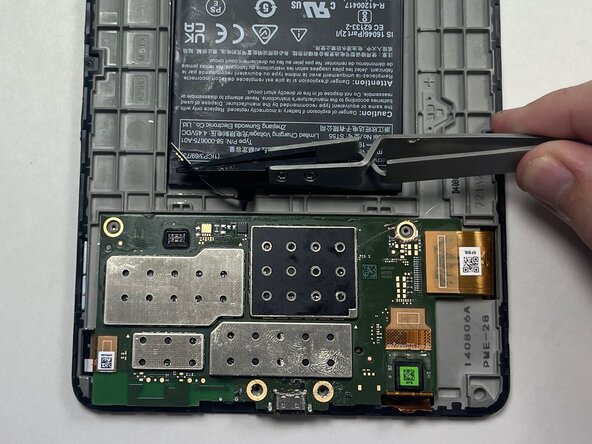
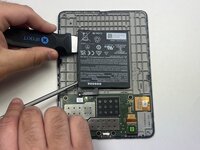
Place a spudger or an opening tool under the connector's edge and pry straight up to disconnect it.
-
-
-
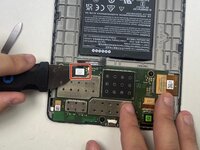
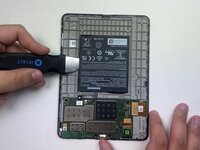
Use a black nylon spudger and slide it under the sides of the battery to create a gap between the battery and the housing.
-
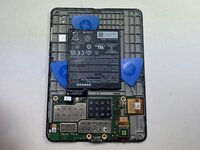
Once the battery has loosened from the adhesive, use the black nylon spudger to gently lift and fully detach it while applying light upward pressure.
-
-
-
Loosen the battery from the backing, then insert an opening pick on each side of the battery to help pry it off. Once the picks are in place, carefully peel the battery away and remove it from the device.
-


To reassemble your device, follow these instructions in reverse order. Apply new adhesive where necessary after cleaning the relevant areas with isopropyl alcohol (>90%).
Take your e-waste to an R2 or e-Stewards certified recycler.

팀

Austin Community College, Team 18-1, Watkins Spring 2025 Austin Community College, Team 18-1, Watkins Spring 2025 회원
AUSTINCC-WATKINS-S25S18G1
4 회원들
안내서 6개를 작성함