주요 콘텐츠로 건너뛰기

Kodak EasyShare CD82 Lens Assembly Replacement

필요한 것

  1. Kodak EasyShare CD82 Lens Assembly Replacement, Lens Assembly: 1 단계, 이미지 1/3 Kodak EasyShare CD82 Lens Assembly Replacement, Lens Assembly: 1 단계, 이미지 2/3 Kodak EasyShare CD82 Lens Assembly Replacement, Lens Assembly: 1 단계, 이미지 3/3
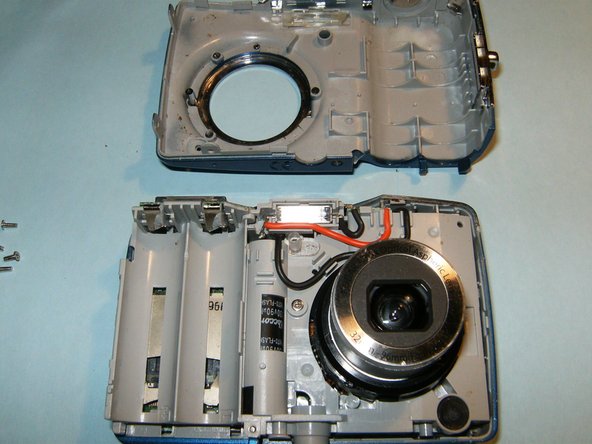
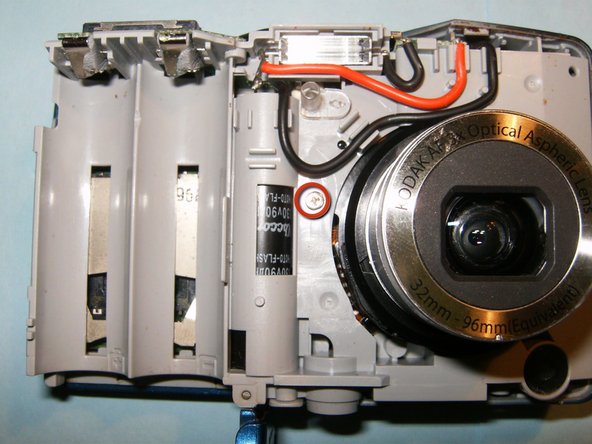
    • Remove the batteries and the memory card from the device.

    • Remove the two screws located at the bottom of the camera.

  2. Kodak EasyShare CD82 Lens Assembly Replacement: 2 단계, 이미지 1/3 Kodak EasyShare CD82 Lens Assembly Replacement: 2 단계, 이미지 2/3 Kodak EasyShare CD82 Lens Assembly Replacement: 2 단계, 이미지 3/3
    • Remove the two screws on the side of the device, to left of the camera lens.

    • Remove the two screws on side of the device, to the right of the camera lens.

    • Pry the casing apart at the seems, starting at the battery compartment.

  3. Kodak EasyShare CD82 Lens Assembly Replacement: 3 단계, 이미지 1/3 Kodak EasyShare CD82 Lens Assembly Replacement: 3 단계, 이미지 2/3 Kodak EasyShare CD82 Lens Assembly Replacement: 3 단계, 이미지 3/3
    • Remove the front casing from the mid-frame, first.

    • Continue to remove the back casing from the mid-frame.

    • Do not remove the LCD screen from the device once it becomes visible.

  4. Kodak EasyShare CD82 Lens Assembly Replacement: 4 단계, 이미지 1/3 Kodak EasyShare CD82 Lens Assembly Replacement: 4 단계, 이미지 2/3 Kodak EasyShare CD82 Lens Assembly Replacement: 4 단계, 이미지 3/3
    • Flip the LCD screen out of the holder from the top to reveal ribbon cable.

    • This camera had some obvious water damage..

    • Remove the three screws from the LCD holder

    • Dislodge the LCD screen holder from the circuit board connector.

  5. Kodak EasyShare CD82 Lens Assembly Replacement: 5 단계, 이미지 1/3 Kodak EasyShare CD82 Lens Assembly Replacement: 5 단계, 이미지 2/3 Kodak EasyShare CD82 Lens Assembly Replacement: 5 단계, 이미지 3/3
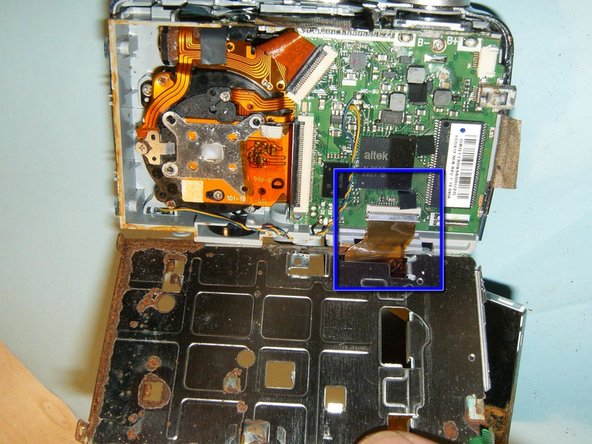
    • Disconnect the logic board from the frame on the right side of the device.

    • Remove the small ribbon cable, connecting the button board to the logic board, with small pair of tweezers or hemostat.

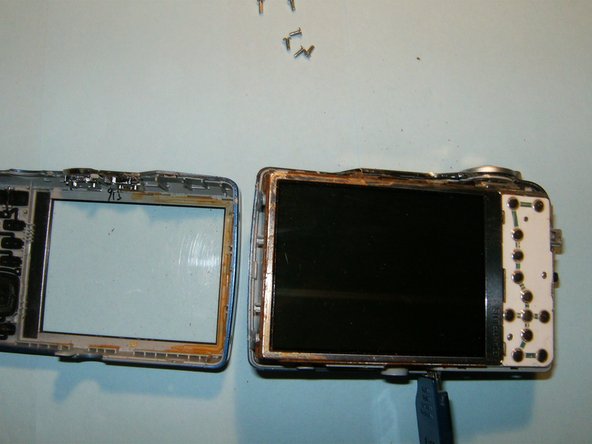
    • Remove the screw on the top right side of the device connecting the LCD screen holder to the midframe.

    • Move the black clip into the upward position to disconnect the cable.

    • You will now be able to remove the LCD screen and its holder from the device.

  6. Kodak EasyShare CD82 Lens Assembly Replacement: 6 단계, 이미지 1/3 Kodak EasyShare CD82 Lens Assembly Replacement: 6 단계, 이미지 2/3 Kodak EasyShare CD82 Lens Assembly Replacement: 6 단계, 이미지 3/3
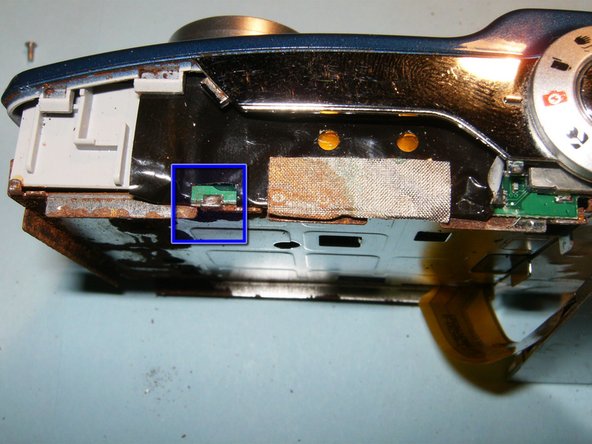
    • Flip the black clips of the connectors into the opposite direction. Remove the lens and CCD cable.

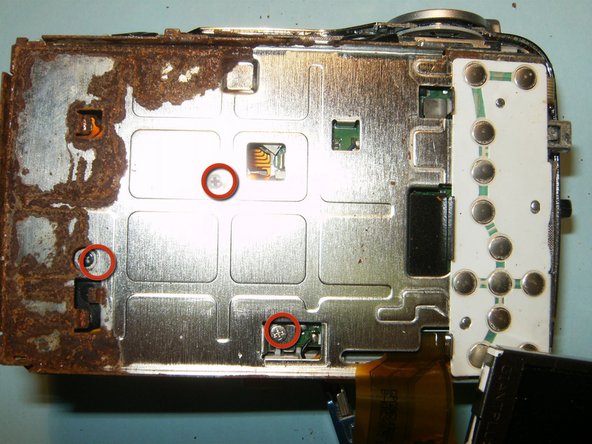
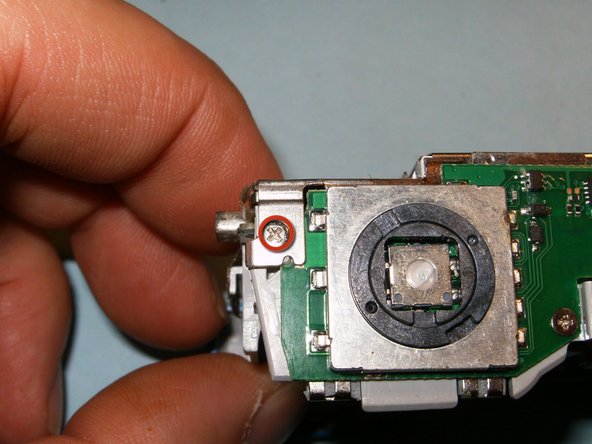
    • Remove the two screws securing the lens to the midframe.

    • These are missing screws for the CCD sensor, lost in a previous dismantling.

    • Remove the single screw securing the lens to the mid-frame. The lens will now be loose.

    • Push the lens out of the frame in an angular direction, and remove.

  7. Kodak EasyShare CD82 Lens Assembly Replacement: 7 단계, 이미지 1/1
    • Insert the new lens the same way it was removed.

    • Clean and reassemble the camera.

결론

To reassemble your device, follow these instructions in reverse order.

다른 한 분이 해당 안내서를 완성하였습니다.

oldturkey03

회원 가입일: 09/29/10

782,064 평판

안내서 119개 작성하였습니다

Global Fixers Global Fixers 회원

Community

33 회원들

안내서 537개 작성하였습니다

댓글 한 개

When it says "Dislodge the LCD screen holder from the circuit board connector" does it mean that I can break that solder without desoldering and it's okay?

Sith Siri - 답글

댓글 쓰기

조회 통계:

24 시간 전: 0

7일 전: 0

30일 전: 6

전체 시간: 1,670