주요 콘텐츠로 건너뛰기
Lenovo V14-ADA Back Panel Replacement

Lenovo V14-ADA Back Panel Replacement

Kristen Gismondi

Kristen Gismondi

최종 수정일 June 25, 2024

예상시간 없음
조정
더 나은 소개글
세부 사항 누락

필요한 것

도구

  1. Lenovo V14-ADA Back Panel Replacement, Back Panel: 1 단계, 이미지 1개 중 1개
    • Turn off the laptop.

    • Disconnect the charging cable from the laptop.

    • Failure to unplug the cable could result in electric shock.

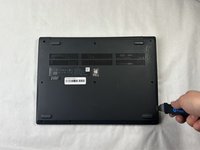
    • Flip the laptop upside down.

  2. Lenovo V14-ADA Back Panel Replacement: 2 단계, 이미지 1개 중 1개
    • Remove all ten 5 mm screws from the back panel using a JIS #0 screwdriver.

  3. Lenovo V14-ADA Back Panel Replacement: 3 단계, 이미지 2개 중 1개 Lenovo V14-ADA Back Panel Replacement: 3 단계, 이미지 2개 중 2개
    • Place the Jimmy in the small crack between the back panel and the keyboard and push down.

    • Repeat this until the panel pops off.

결론

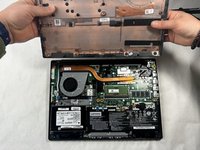
To reassemble your device, follow these instructions in reverse order.

Kristen Gismondi

회원 가입일: 11/12/14

92,197 평판

안내서 241개를 작성함

iFixit iFixit 회원

Staff

118 회원들

안내서 19,474개를 작성함

댓글 0개

댓글 쓰기

조회 통계:

지난 24시간: 4

지난 7일: 10

지난 30일: 41

전체 시간: 126