
Lite-On LightScribe SHM-165H6S Chassis Replacement
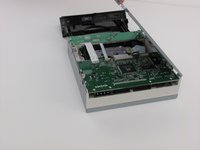
Remove the top cover of the optical drive to access the internals and replace any malfunctioning components.
필요한 것
도구


더보기...
-
-
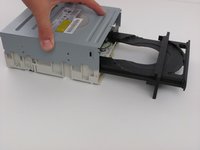
Insert an open paper clip into the small hole on the left side of the faceplate.
-
After the tray opens, extend it fully.
-
-


To reassemble your device, follow these instructions in reverse order.
To reassemble your device, follow these instructions in reverse order.
다른 2명이 해당 안내서를 완성하였습니다.
팀

Cal Poly, Team 6-5, Regan Fall 2011 Cal Poly, Team 6-5, Regan Fall 2011 회원
CPSU-REGAN-F11S6G5
2 회원들
안내서 6개를 작성함