소개
Use this guide to upgrade or replace the solid-state drive in a MacBook Air 11” Mid 2012. This MacBook Air uses a proprietary storage drive connector, and is therefore not compatible with common M.2 drives without the use of an adapter.
Before you perform this repair, if at all possible, back up your existing SSD. Then, either familiarize yourself with internet recovery or create a bootable external drive so you’ll be ready to install macOS onto your new drive and migrate your data to the new SSD.
Finally, we strongly recommend installing macOS 10.13 High Sierra (or a later macOS) before replacing the original SSD from your MacBook Air. Most new SSDs require updated storage drivers not found in versions of macOS prior to High Sierra.
필요한 것
-
-
이 단계에 사용된 도구:P5 Pentalobe Screwdriver Retina MacBook Pro and Air$5.99
-
Remove the following ten screws:
-
Two 8 mm 5-point Pentalobe screws
-
Eight 2.5 mm 5-point Pentalobe screws
 FixBot에 문의하기
-
-
-
Wedge your fingers between the display and the lower case and pull upward to pop the lower case off the Air.
-
-
-
-
-
-
Use the flat end of a spudger to pry both short sides of the battery connector upward to disconnect it from its socket on the logic board.
-
Bend the battery cable slightly away from the logic board so the connector will not accidentally contact its socket.
-
-
-
-
-
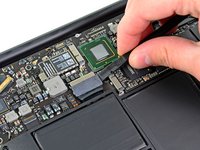
Remove the single 2.9 mm T5 Torx screw securing the SSD to the logic board.
-
-
-
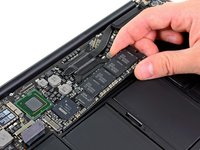
Use a spudger to help lift the free end of the SSD just enough to grab it with your other hand.
-
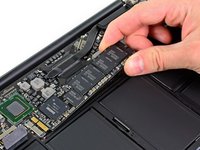
Pull the drive straight out of its socket and remove it from the logic board.
-
-




To reassemble your device, follow these instructions in reverse order.
다른 52명이 해당 안내서를 완성하였습니다.


4가이드 댓글
Excellent instructions. Very easy to do. I used this screwdriver to remove the screws from the bottom of the case: https://www.amazon.com/gp/product/B00N1R...
and I used the Pentalobe-6 from this set to remove the screw holding in the OEM SSD:
https://www.amazon.com/gp/product/B01FE2...
After removing the stock drive, I installed a Samsung M.2 EVO 850 512Gb drive. It is working quite well. I used this adapter so that the M.2 drive fit in my 2012 Macbook Air:
How do we reinstall MacOS?
I am 10 years old I fixed the mac I did this even the Geek squad couldn’t do it and now it works! without your guide.
admin free - 답글 공유
I have a MBA mid 2012 11” which no longer powers up. The battery has been in bad condition since a while and now the charging indicator remains amber no matter how long I charge it. So I assume it might be a battery issue. Unfortunately, I cannot find a supplier shipping batteries to Hawaii, but I found an identical machine on ebay (that will ship to Hawaii), except that it has 4GB RAM instead of 8GB. Provided my SSD is functional (which I assume) can I simply put my SSD into that 4GB RAM machine, and it will start up without any further modification?
Guido eMail - 답글 공유
