이 번역은 원본 안내서의 최신 업데이트를 반영하지 않을 수 있습니다. 번역 업데이트를 돕거나 아니면 원본 안내서 보기를 참조하세요.
소개
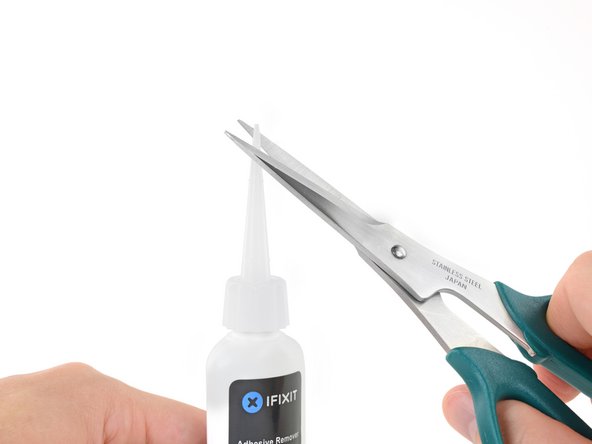
iFixit 배터리 교체 키트와 이 안내서를 사용하여 MacBook Pro의 접착된 배터리를 안전하게 분리하세요. 키트의 접착제 제거제는 배터리를 고정하는 접착제를 녹여서 배터리를 수월하게 분리할 수 있습니다. 배터리는 개별 셀 여섯 개로 구성되어 있으며 그 중 네 개는 상단 케이스에 부착되어 있습니다.
‘’’iFixit 접착제 제거제는 가연성이 매우 높습니다.’’’ 통풍이 잘되는 곳에서 이 절차를 수행하세요. 이 과정에서 담배를 피우거나 불 근처에서 작업하지 마세요.
손상 위험을 최소화하려면 이 절차를 시작하기 전에 MacBook을 켜고 배터리를 완전히 방전하세요. 충전된 리튬-이온 배터리에 실수로 구멍이 나면 위험하고 통제할 수 없는 화재를 일으킬 수 있습니다. 배터리가 부풀어 올랐다면, 추가 예방 조치를 취하세요.
참고: 배터리 접착제를 녹이는데 사용하는 용액은 MacBook Pro 플라스틱 스피커 인클로저와 같은 특정 플라스틱을 손상할 수 있습니다. 용액을 바를 때 주의하세요.
(더 이상 판매하지 않는) 별도의 병과 주사기가 있는 옛날 iFixit 접착제 제거제를 사용하는 경우 이곳을 클릭하여 약간 수정한 지침을 보세요.
필요한 것
-
-
하단 케이스를 상단 케이스에 고정하는 다음 나사 열 개를 풀어주세요:
-
2.3mm P5 Pentalobe/펜타로브/별나사 두 개
-
3.0mm P5 Pentalobe/펜타로브/별나사 여덟 개
-
-
-
-
엄지 또는 손가락을 사용하여 SSD 트레이의 플라스틱 스프링 바를 구부려 기기 전면의 클립 두 개를 해제하세요.
-
스프링 바를 누르며 SSD 어셈블리를 기울여 공간에서 꺼내세요.
-
-
-
상단 케이스에서 배터리 전체를 들어 올리고 배터리를 분리하세요.
-
운이 좋으면 손가락으로 접착제 조각을 천천히 당겨 빼낼 수 있습니다.
-
그렇지 않으면 각 접착 부분을 약간의 접착제 제거제로 2-3분 동안 적신 다음 여는 픽 또는 키트의 다른 도구 중 하나로 긁어내야 합니다. 이는 꽤 많은 노력이 필요로 합니다. 인내심을 가지세요.
-
남아있는 모든 접착제 제거제를 닦아내고 MacBook Pro를 자연 건조할 때까지 몇 분 정도 기다리세요.
-
새로 설치한 배터리를 보정하세요: 배터리를 100% 충전한 다음 최소 두 시간 더 충전하세요. 그런 다음 플러그는 뽑고 정상적으로 사용하여 배터리를 방전하세요. 배터리 부족 경고가 나타나면 작업을 저장하고 배터리 부족으로 인해 절전 모드가 활성화될 때까지 노트북을 켜놓으세요. 최소한 5시간 이상을 기다리고 나서 노트북을 중단없이 100% 충전하세요.
-


기기를 재조립하려면 이 지침을 역순으로 따르세요.
최적의 성능을 위해 새로 설치한 배터리를 보정하세요. 배터리를 100% 충전한 다음 최소 2 시간 더 충전하세요. 그런 다음 기기가 배터리 부족으로 인해 꺼질 때까지 사용하세요. 마지막으로 중단없이 100% 충전하세요.
전자 폐기물을 R2 또는 e-Stewards 인증 재활용 센터로 가져가세요.
수리가 계획대로 진행되지 않았습니까?
기본 문제 해결, 또는 자사의 MacBook Pro 13” 답변 커뮤니티에서 도움을 받으세요.
기기를 재조립하려면 이 지침을 역순으로 따르세요.
최적의 성능을 위해 새로 설치한 배터리를 보정하세요. 배터리를 100% 충전한 다음 최소 2 시간 더 충전하세요. 그런 다음 기기가 배터리 부족으로 인해 꺼질 때까지 사용하세요. 마지막으로 중단없이 100% 충전하세요.
전자 폐기물을 R2 또는 e-Stewards 인증 재활용 센터로 가져가세요.
수리가 계획대로 진행되지 않았습니까?
기본 문제 해결, 또는 자사의 MacBook Pro 13” 답변 커뮤니티에서 도움을 받으세요.
다른 247명이 해당 안내서를 완성하였습니다.
다음 번역가들에게 특별히 감사 드립니다:
93%

Christian Kim님은 저희가 세상을 수리하는데 동참하신 분입니다! 기여하시겠습니까?
번역 시작하기 ›

댓글 63개
There is a much easier way to get the batteries out. If you look at the 2 cells on either side (left and right), you will notice that they put them in an area that is slightly lowered. This is by design. To remove the batteries, pour a small amount of 90% isopropyl alcohol on both sides and let it sit for about 30 to 45 mins. It will dissolve the glue and you can gently then lift out the batteries without any prying. After you remove the batteries, simply wipe up any remaining alcohol, let it dry, buff it clean, and insert the new battery. Considerably easier and safer than potentially damaging the battery packs. If you are putting the same battery pack back, just use double sided tape. IMPORTANT NOTE: ALWAYS BE SAFE USING ISOPROPYL ALCOHOL AROUND FLAMES OR ANYTHING THAT MIGHT MAKE IT BURN. ALSO, NEVER ATTEMPT TO PRY THE BATTERIES IN ANY WAY IF ANY ALCOHOL IS STILL POTENTIALLY PRESENT!! WAIT UNTIL IT IS EVAPORATED!!
jimhoffa69 - 답글
Thank You for the hint with the alcohol, but where can I buy a spare battery?
Uli -
I poured isopropanol into those lowered areas but unfortunately it soaked up along the battery leads and got all the way under the keyboard and elsewhere where it shouldn’t. It made some other plastic parts of the computer swell which isn’t good so I would not recommend pouring any solvent in there. Add a very small amount of solvent (0.25 ml) just enough to soften the adhesive, and let it sit for about 30 min and then pry carefully and add a little more, making sure it doesn’t get soaked up by the battery leads.
Another important thing: when you buy a battery, make sure it’s new, up to 1 year from date of manufacture because they have a limited shelf life and get permanently damaged when sitting uncharged.
Prying the battery out is HARD! and VERY dangerous. I tried using a flat head screwdriver, put it under the battery and twisting the thing out. DO NOT DO THAT!! as it can punch a hole in the battery if you twist it too hard. I had a small smoke coming off by doing that and was lucky enough it didn't burn. Using isopropyl would be an ideal solution. But to bad I can't find that around here :(.
[DO THIS ON YOUR OWN RISK] What I ended up doing is using the screwdriver to gouge the underlying glue out as much as I can on the side (about 10%) and use fingers to pry it up. Good luck!
Perfect! not as difficult as it looked first, especially with the proper tools. To take the batteries out the alcohol (I used ethanol used for cleaning purposes) works like charm. I put a few ml in nearby the batteries, waited maybe 20min and was able to pry them out easily. Tried before without the alocohol and nothing moved. I ordered the battery on ebay for 70€ and it has the same numbers and text as the original it says apple japan as well. My old battery had more than a thousand cycles after 3 years and did not last vey long. Now the software shows 0 cycles and it is charging starting at 15% and will be fully charged in 2:45h. I think apple charges 249€ for the job here in Gernany. It took me about 1 hour to replace it (with waiting).