주요 콘텐츠로 건너뛰기
Motorola Droid MAXX 2 Button Assembly Replacement

Motorola Droid MAXX 2 Button Assembly Replacement

Burke Seggerman

Burke Seggerman3 다른 기여자

최종 수정일 June 19, 2018

15 분
조정
누락된 단계

A guide on how to replace the volume and power buttons on a Motorola Droid MAXX 2 smartphone.

필요한 것

도구

  • T4 Torx Screwdriver
    T4 Torx Screwdriver
  • Spudger
    Spudger
  1. Motorola Droid MAXX 2 Button Assembly Replacement, Battery: 1 단계, 이미지 1개 중 1개
    • Insert a small pointed object into the hole on the sim card tray to eject the tray from the phone.

  2. Motorola Droid MAXX 2 Button Assembly Replacement: 2 단계, 이미지 1개 중 1개
    • Pull the sim card tray up out of the phone

  3. Motorola Droid MAXX 2 Button Assembly Replacement: 3 단계, 이미지 2개 중 1개 Motorola Droid MAXX 2 Button Assembly Replacement: 3 단계, 이미지 2개 중 2개
    • Wedge your thumb into the indent located on the bottom left corner of the back cover and pull up to remove the back cover.

  4. Motorola Droid MAXX 2 Button Assembly Replacement: 4 단계, 이미지 1개 중 1개
    • Remove the seventeen 3.2mm Torx T4 screws from the mid-frame.

    • These may be T3 screws. If you are having trouble unscrewing these, stop and try a T3 bit.

  5. Motorola Droid MAXX 2 Button Assembly Replacement: 5 단계, 이미지 1개 중 1개
    • Pull the mid-frame off of the phone.

    • Keep track of the on/off and volume buttons when you take the phone apart because they are likely to fall out when the halves are separated.

  6. Motorola Droid MAXX 2 Button Assembly Replacement: 6 단계, 이미지 3개 중 1개 Motorola Droid MAXX 2 Button Assembly Replacement: 6 단계, 이미지 3개 중 2개 Motorola Droid MAXX 2 Button Assembly Replacement: 6 단계, 이미지 3개 중 3개
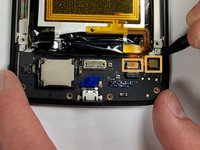
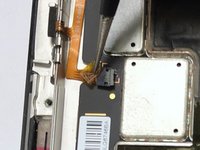
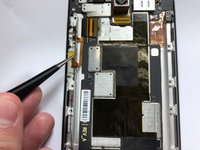
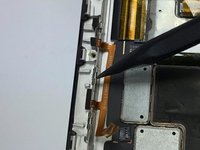
    • Remove the static tape covering the two connectors.

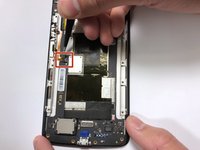
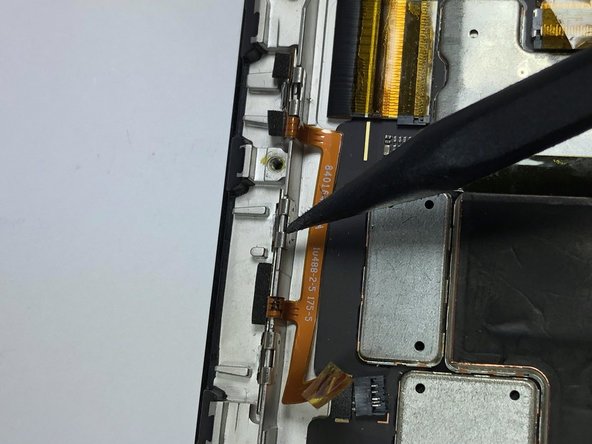
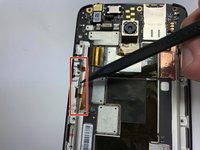
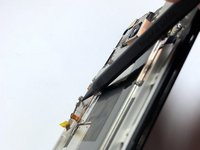
    • Use a spudger to disconnect the battery cables from the motherboard.

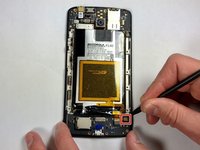
    • If battery has adhesive, use heat gun for one to two minutes to loosen it. Be careful of the points outlined in red when prying it up. Use guitar picks or a spudger to gently lift the battery and separate the adhesive.

  7. Motorola Droid MAXX 2 Button Assembly Replacement: 7 단계, 이미지 1개 중 1개
    • Remove the disconnected battery from the phone.

  8. Motorola Droid MAXX 2 Button Assembly Replacement, Button Assembly: 8 단계, 이미지 2개 중 1개 Motorola Droid MAXX 2 Button Assembly Replacement, Button Assembly: 8 단계, 이미지 2개 중 2개
    • Peel back the orange adhesive covering the ZIF connector.

  9. Motorola Droid MAXX 2 Button Assembly Replacement: 9 단계, 이미지 2개 중 1개 Motorola Droid MAXX 2 Button Assembly Replacement: 9 단계, 이미지 2개 중 2개
    • Lift the black tab on the ZIF connector up.

    • Pull the ribbon cable out of the ZIF connector.

  10. Motorola Droid MAXX 2 Button Assembly Replacement: 10 단계, 이미지 3개 중 1개 Motorola Droid MAXX 2 Button Assembly Replacement: 10 단계, 이미지 3개 중 2개 Motorola Droid MAXX 2 Button Assembly Replacement: 10 단계, 이미지 3개 중 3개
    • Use the plastic spudger to loosen the metal prongs that hold the button assembly onto the phone.

  11. Motorola Droid MAXX 2 Button Assembly Replacement: 11 단계, 이미지 1개 중 1개
    • Pull the button assembly up and out of the phone.

결론

To reassemble your device, follow these instructions in reverse order.

작성자

3다른 기여자 명과 함께

Burke Seggerman

회원 가입일: 03/18/18

704 평판

안내서 5개를 작성함

Baylor, Team S3-G4, Williams Spring 2018 Baylor, Team S3-G4, Williams Spring 2018 회원

BU-WILLIAMS-S18S3G4

3 회원들

안내서 6개를 작성함

댓글 0개

댓글 쓰기

조회 통계:

지난 24시간: 0

지난 7일: 0

지난 30일: 1

전체 시간: 530