소개
Use this guide to replace the motherboard (includes rear camera and speaker).
필요한 것
-
-
Gently insert a plastic opening tool between the rear panel and the inner rear frame near the rear-facing camera.
-
Use your plastic opening tool to pry up the rear case around the perimeter of the Nexus S.
 FixBot에 문의하기
-
-
-
Using the edge of a plastic opening tool, lift the battery from the end closest to the headphone jack.
-
Remove the battery from the Nexus S.
-
-
-
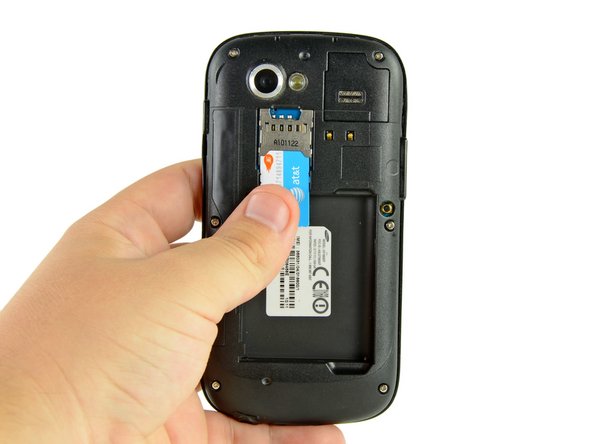
Use your thumb to slide the SIM card downwards from the SIM card slot.
-
Remove the SIM card.
-
-
-
Remove the six Phillips screws securing the rear inner frame to the inner case.
-
-
-
-
Insert the flat edge of a plastic opening tool in between the rear inner frame and the top left corner of the Nexus S.
-
Pry the opening tool upwards to pop the top right corner from the clips securing it to the inner assembly.
-
-
-
Insert the plastic opening tool to the right of the power button.
-
Slide the plastic opening tool downwards along the perimeter of the Nexus S to release the clips on the right side.
-
-
-
In the same manner as previously described, release the bottom clips located near the bottom of the Nexus S.
-
-
-
Insert and pry the plastic opening tool to release the final clip securing the rear inner frame to the inner assembly.
-
-
-
Disconnect the following cables from their respective sockets on the motherboard:
-
Headphone jack cable
-
Digitizer cable connector
-
Camera/SIM board connector
-
-
-
Insert the flat edge of a plastic opening tool underneath the headphone jack connector and pry upwards.
-
Repeat the procedure for the digitizer and rear camera/SIM board connectors.
-
-
-
Remove the three Phillips screws securing the motherboard to the front display assembly.
-
-
-
Wedge the plastic opening tool near the bottom right corner of the motherboard and pry upwards to dislodge it from its recess.
-
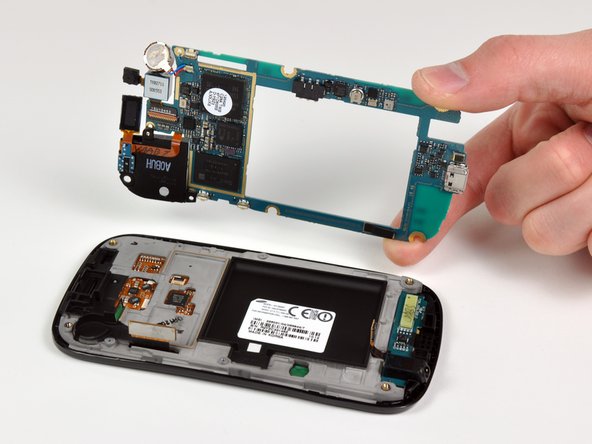
Lift and remove the motherboard.
-








To reassemble your device, follow these instructions in reverse order.
다른 15명이 해당 안내서를 완성하였습니다.

