주요 콘텐츠로 건너뛰기
수리 커뮤니티 가입 - 계정 만들기
Nikon Coolpix L330 Image Sensor Replacement

필요한 것

    1. Nikon Coolpix L330 Image Sensor Replacement, Back Housing: 1 단계, 이미지 3개 중 1개 Nikon Coolpix L330 Image Sensor Replacement, Back Housing: 1 단계, 이미지 3개 중 2개 Nikon Coolpix L330 Image Sensor Replacement, Back Housing: 1 단계, 이미지 3개 중 3개
      • There are six screws attaching the back housing to the camera. Remove the screws from the body with a PH000 screw head.

      • Two 1.5x2.5mm screws on the right side.

      • Two 1.5x2.5mm screws on the underside.

      • Two 1.5x2.5mm screw on the left side.

      댓글 쓰기

    2. Nikon Coolpix L330 Image Sensor Replacement: 2 단계, 이미지 2개 중 1개 Nikon Coolpix L330 Image Sensor Replacement: 2 단계, 이미지 2개 중 2개
      • After removing the screws, use a metal spudger or plastic opening tool to push the back cover out.

      • The metal spudger can damage the plastic housing, so use caution when applying any pressure to it. Use a plastic opening tool to reduce the risk of damage to the housing.

      • Remove the back housing of the camera by lifting it directly up.

      • The back cover may be slightly tight, therefore more force may be needed to lift it up.

      댓글 쓰기

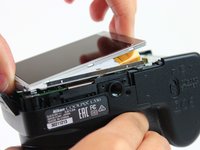
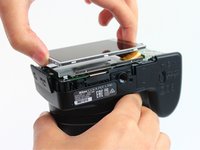
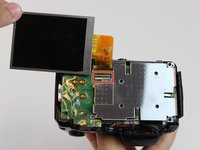
    1. Nikon Coolpix L330 Image Sensor Replacement, LCD Screen: 3 단계, 이미지 2개 중 1개 Nikon Coolpix L330 Image Sensor Replacement, LCD Screen: 3 단계, 이미지 2개 중 2개
      • Insert the tips of your fingers into the space between the screen and back-plate.

      • Gently lift the screen up and out of the frame.

      • The screen is still held by a flexible display cable, therefore only lift the screen 0.5'' out of the back-plate.

      댓글 쓰기

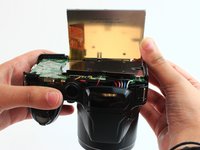
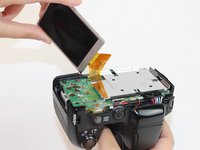
    2. Nikon Coolpix L330 Image Sensor Replacement: 4 단계, 이미지 2개 중 1개 Nikon Coolpix L330 Image Sensor Replacement: 4 단계, 이미지 2개 중 2개
      • Tilt the screen so that the display cable forms a hinge with the backplate.

      • Rotate the display 180 degrees so that it faces you.

      댓글 쓰기

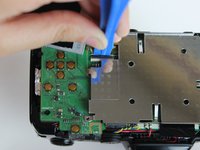
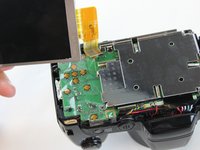
    3. Nikon Coolpix L330 Image Sensor Replacement: 5 단계, 이미지 3개 중 1개 Nikon Coolpix L330 Image Sensor Replacement: 5 단계, 이미지 3개 중 2개 Nikon Coolpix L330 Image Sensor Replacement: 5 단계, 이미지 3개 중 3개
      • The display cable has a ZIF (zero insertion force) connector on the end. This has a tab that has to be pushed out before the cable can be safely removed.

      • Using a plastic opening tool or fingernail, pop up the black clip holding the display cable. This will release the cable.

      • Slide the display cable out of the connector.

      • The display cable can be damaged due to excessive bending, therefore avoid putting unnecessary strain on it.

      댓글 쓰기

    1. Nikon Coolpix L330 Image Sensor Replacement, Motherboard: 6 단계, 이미지 1개 중 1개
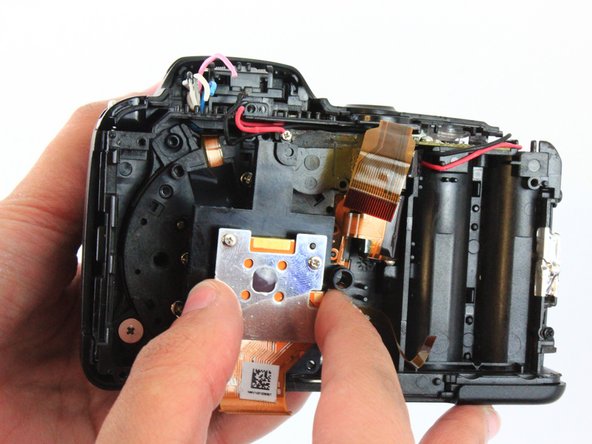
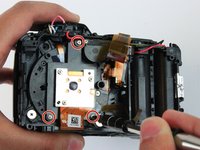
      • Remove the screws from the silver back-plate with a PH000 screw head.

      • Two 1.5x2.5mm screws on the left side.

      • One 1.5x2.5mm screw on the right side.

      댓글 쓰기

    2. Nikon Coolpix L330 Image Sensor Replacement: 7 단계, 이미지 1개 중 1개
      • The marked red box contains a highly charged capacitor. Check the charge using a voltmeter and discharge it first before continuing. Discharge capacitor guide.

      • Remove the screws holding the motherboard with a PH000 screw head.

      • Two 1.5x2.5mm screws on the right side.

      댓글 쓰기

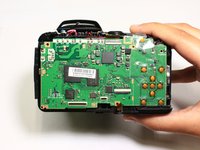
    3. Nikon Coolpix L330 Image Sensor Replacement: 8 단계, 이미지 1개 중 1개
      • Using a plastic opening tool or fingernail, pop up the black clips holding the ribbon cables. This will release the cables.

      • Slide the ribbon cables out of the connectors.

      댓글 쓰기

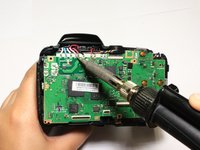
    4. Nikon Coolpix L330 Image Sensor Replacement: 9 단계, 이미지 3개 중 1개 Nikon Coolpix L330 Image Sensor Replacement: 9 단계, 이미지 3개 중 2개 Nikon Coolpix L330 Image Sensor Replacement: 9 단계, 이미지 3개 중 3개
      • Remove the black sticker covering the electrical connections.

      • Desolder the eight wires from the motherboard.

      댓글 쓰기

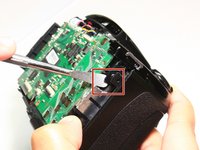
    5. Nikon Coolpix L330 Image Sensor Replacement: 10 단계, 이미지 3개 중 1개 Nikon Coolpix L330 Image Sensor Replacement: 10 단계, 이미지 3개 중 2개 Nikon Coolpix L330 Image Sensor Replacement: 10 단계, 이미지 3개 중 3개
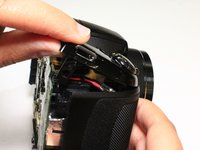
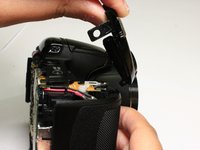
      • Insert a plastic opening tool into the marked position. Push the tool towards the right to release the clip.

      • Using a thumb and forefinger, push the plastic cover up until it is at a 45 degree angle.

      • Pull the cover back and up to release it.

      댓글 쓰기

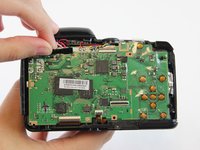
    6. Nikon Coolpix L330 Image Sensor Replacement: 11 단계, 이미지 2개 중 1개 Nikon Coolpix L330 Image Sensor Replacement: 11 단계, 이미지 2개 중 2개
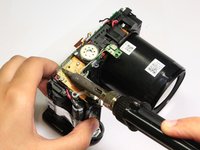
      • The motherboard is still held in place by soldered connections.

      • Carefully desolder the connections .

      • The front cover has been removed in this picture, however the procedure is still the same.

      댓글 쓰기

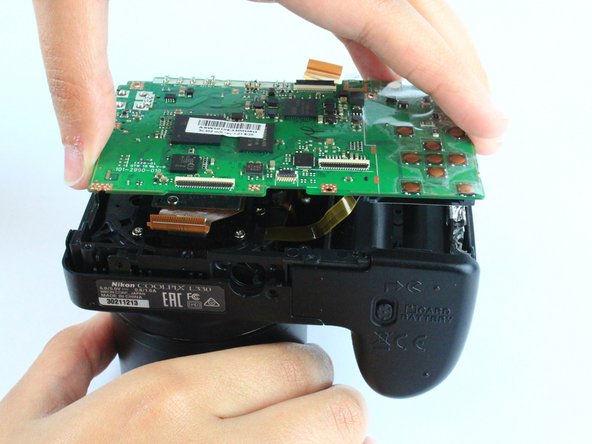
    7. Nikon Coolpix L330 Image Sensor Replacement: 12 단계, 이미지 1개 중 1개
      • Remove the motherboard by lifting it directly up.

      댓글 쓰기

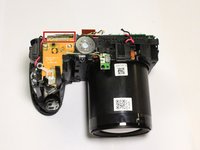
    1. Nikon Coolpix L330 Image Sensor Replacement, Image Sensor: 13 단계, 이미지 2개 중 1개 Nikon Coolpix L330 Image Sensor Replacement, Image Sensor: 13 단계, 이미지 2개 중 2개
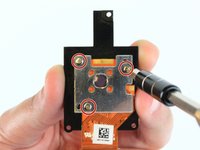
      • Remove the three 1.5x2.5mm screws using a PH000 screw head.

      댓글 쓰기

    2. Nikon Coolpix L330 Image Sensor Replacement: 14 단계, 이미지 2개 중 1개 Nikon Coolpix L330 Image Sensor Replacement: 14 단계, 이미지 2개 중 2개
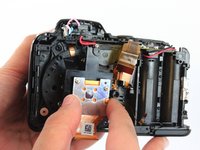
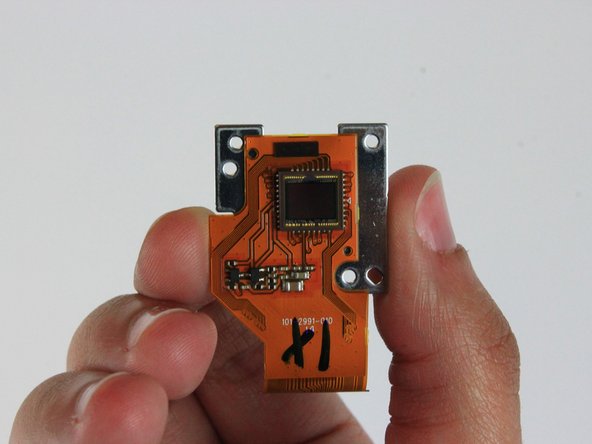
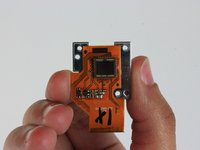
      • Remove the three 1.5x1.75mm screws holding the lens in place using a PH000 screw head.

      • Lift the image sensor up and out of the bracket.

      댓글 쓰기

결론

To reassemble your device, follow these instructions in reverse order.

취소: 해당 안내서를 완성하지 않았습니다.

작성자

1다른 기여자 명과 함께

Rajeev

회원 가입일: 02/09/16

623 평판

안내서 4개를 작성함

USF Tampa, Team 2-10, Cagle Spring 2016 USF Tampa, Team 2-10, Cagle Spring 2016 회원

USFT-CAGLE-S16S2G10

4 회원들

안내서 14개를 작성함

1가이드 댓글

In Step 11, there is one board right? I need that board. May I know where to purchase that board?

CJ Ramki - 답글 공유
댓글 쓰기

조회 통계:

지난 24시간: 4

지난 7일: 7

지난 30일: 30

전체 시간: 1,253