주요 콘텐츠로 건너뛰기

Nintendo Switch Pro Controller Trigger Button Replacement

필요한 것

  1. Nintendo Switch Pro Controller Trigger Button  Replacement, Remove the screws: 1 단계, 이미지 1/1
    • Flip the controller over so the model stickers face the ceiling.

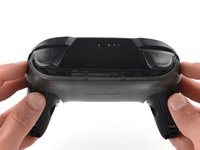
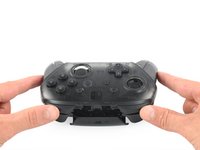
    • Use a JIS #00 screwdriver to remove the two black 8.4 mm screws that secure the handles, located at the ends of the handles.

  2. Nintendo Switch Pro Controller Trigger Button  Replacement, Remove the handle covers: 2 단계, 이미지 1/3 Nintendo Switch Pro Controller Trigger Button  Replacement, Remove the handle covers: 2 단계, 이미지 2/3 Nintendo Switch Pro Controller Trigger Button  Replacement, Remove the handle covers: 2 단계, 이미지 3/3
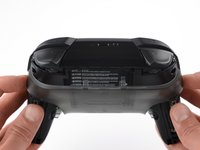
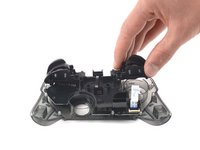
    • Carefully remove the handle covers by pulling them away from the main body.

  3. Nintendo Switch Pro Controller Trigger Button  Replacement, Remove the screws: 3 단계, 이미지 1/1
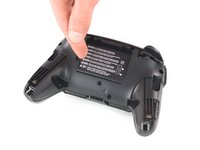
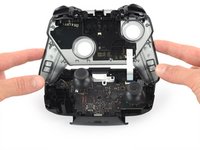
    • Use a JIS #00 screwdriver to remove the four silver 6.8 mm screws that secure the clear back plastic cover.

  4. Nintendo Switch Pro Controller Trigger Button  Replacement, Unclip the plastic cover: 4 단계, 이미지 1/3 Nintendo Switch Pro Controller Trigger Button  Replacement, Unclip the plastic cover: 4 단계, 이미지 2/3 Nintendo Switch Pro Controller Trigger Button  Replacement, Unclip the plastic cover: 4 단계, 이미지 3/3
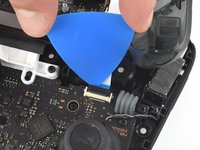
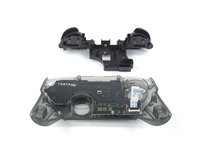
    • Carefully pry away the clear plastic cover using your fingernail.

  5. Nintendo Switch Pro Controller Trigger Button  Replacement, Remove the clear plastic cover: 5 단계, 이미지 1/1
    • Remove the clear plastic cover.

  6. Nintendo Switch Pro Controller Trigger Button  Replacement, Remove the battery: 6 단계, 이미지 1/3 Nintendo Switch Pro Controller Trigger Button  Replacement, Remove the battery: 6 단계, 이미지 2/3 Nintendo Switch Pro Controller Trigger Button  Replacement, Remove the battery: 6 단계, 이미지 3/3
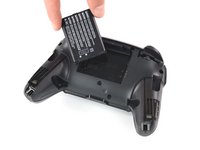
    • Remove the lithium-ion battery by using a fingernail or plastic opening tool to pry it up on the left side.

    • Only a small amount of force is needed.

  7. Nintendo Switch Pro Controller Trigger Button  Replacement, Remove the screws: 7 단계, 이미지 1/3 Nintendo Switch Pro Controller Trigger Button  Replacement, Remove the screws: 7 단계, 이미지 2/3 Nintendo Switch Pro Controller Trigger Button  Replacement, Remove the screws: 7 단계, 이미지 3/3
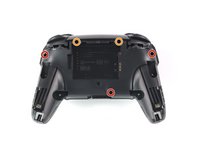
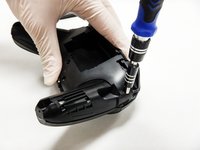
    • Use a Phillips #1 screwdriver to remove the five 5 mm screws from the back of the controller.

    • The two case screws above the handgrips and the single case screw below the battery bay have a shallow seat. These three screws can be easily removed.

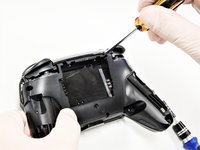
    • The two case screws adjacent to the ZR and ZL shoulder buttons have a deep seat. Use an extension or a Phillips screwdriver with a longer shaft to reach these screws.

  8. Nintendo Switch Pro Controller Trigger Button  Replacement: 8 단계, 이미지 1/3 Nintendo Switch Pro Controller Trigger Button  Replacement: 8 단계, 이미지 2/3 Nintendo Switch Pro Controller Trigger Button  Replacement: 8 단계, 이미지 3/3
    • Delicately take off the plastic cover from the controller.

    • Do not completely remove the front cover just yet, as it is still attached to the motherboard via a white ribbon cable.

  9. Nintendo Switch Pro Controller Trigger Button  Replacement, Open the flap: 9 단계, 이미지 1/2 Nintendo Switch Pro Controller Trigger Button  Replacement, Open the flap: 9 단계, 이미지 2/2
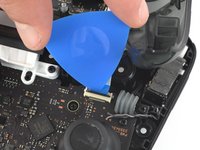
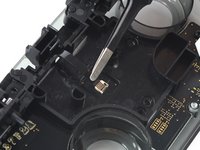
    • Use the tip of an opening pick to open the black flap of the ZIF connector by pushing it upwards.

  10. Nintendo Switch Pro Controller Trigger Button  Replacement, Disconnect the interconnect cable: 10 단계, 이미지 1/2 Nintendo Switch Pro Controller Trigger Button  Replacement, Disconnect the interconnect cable: 10 단계, 이미지 2/2
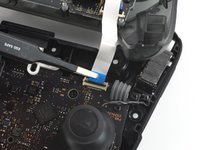
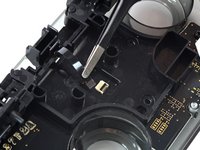
    • Use your fingers or a pair of blunt nose tweezers to disconnect the interconnect cable from its connector.

  11. Nintendo Switch Pro Controller Trigger Button  Replacement, Remove the front case: 11 단계, 이미지 1/1
    • Remove the front case.

  12. Nintendo Switch Pro Controller Trigger Button  Replacement, Remove the screws: 12 단계, 이미지 1/1
    • Remove the two 6.8 mm-long screws on the top circuit board using a Phillips screwdriver.

  13. Nintendo Switch Pro Controller Trigger Button  Replacement, Open the ZIF connector: 13 단계, 이미지 1/2 Nintendo Switch Pro Controller Trigger Button  Replacement, Open the ZIF connector: 13 단계, 이미지 2/2
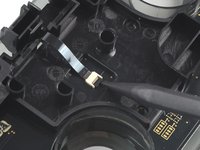
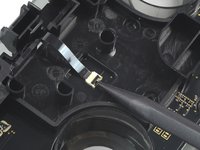
    • Use a spudger to flip up the locking tab on the ZIF connector.

  14. Nintendo Switch Pro Controller Trigger Button  Replacement: 14 단계, 이미지 1/2 Nintendo Switch Pro Controller Trigger Button  Replacement: 14 단계, 이미지 2/2
    • Remove the black ribbon cable from its connector.

    • Only a small amount of force should be needed to remove the ribbon cable.

  15. Nintendo Switch Pro Controller Trigger Button  Replacement: 15 단계, 이미지 1/2 Nintendo Switch Pro Controller Trigger Button  Replacement: 15 단계, 이미지 2/2
    • Remove the trigger buttons from the plastic cover.

결론

To reassemble your device, follow these instructions in reverse order.

다른 12명이 해당 안내서를 완성하였습니다.

Simon Lin

회원 가입일: 10/10/19

364 평판

안내서 1개 작성함

Cal Poly, Team S11-G2, Regan Fall 2019 Cal Poly, Team S11-G2, Regan Fall 2019 회원

CPSU-REGAN-F19S11G2

5 회원들

안내서 42개 작성하였습니다

댓글 5개

This guide does show how to remove the trigger/bumper casing and board from the controller but does not show how to remove the triggers/bumpers from the casing they are in.

Boushi Adams - 답글

Yeah, this is a pretty big point to be missing, especially with the Flex Cable for the shoulder button inputs being right beside the post you need to pull out to remove the ZL and ZR buttons. Guidance on how to remove the post safely without damaging the cable would be great.

Alex Crocker -

Used the guide to repair a shattered right shoulder button successfully. Thanks!

Christian - 답글

After reinstalling the shoulder buttons I have found them to stop working, all four, I checked my ribbon cable from the buttons to the board and even replaced it. I also confirmed the ribbon cable connector on the main board is working as well. Can anyone make any further troubleshooting suggestions?

David - 답글

댓글 쓰기

조회 통계:

24 시간 전: 11

7일 전: 96

30일 전: 641

전체 시간: 32,138