주요 콘텐츠로 건너뛰기

NuVision TM800A510L Screen Replacement

필요한 것

  1. NuVision TM800A510L Screen Replacement, Screen: 1 단계, 이미지 1/2 NuVision TM800A510L Screen Replacement, Screen: 1 단계, 이미지 2/2
    • Use a Heat Gun to heat the sides of the device and loosen the adhesive.

    • Heat the adhesive/device to just barely too hot to touch.

    • Pry up the the back of the device.

    • This process works best if you go one side at a time.

  2. NuVision TM800A510L Screen Replacement: 2 단계, 이미지 1/1
  3. NuVision TM800A510L Screen Replacement: 3 단계, 이미지 1/1
    • Peel this connector off the device.

    • This is basically just a sticker, but go slow so you don't tear the connector.

  4. NuVision TM800A510L Screen Replacement: 4 단계, 이미지 1/1
    • Slowly pull the speaker out of its bed.

    • The speaker piece is glued down.

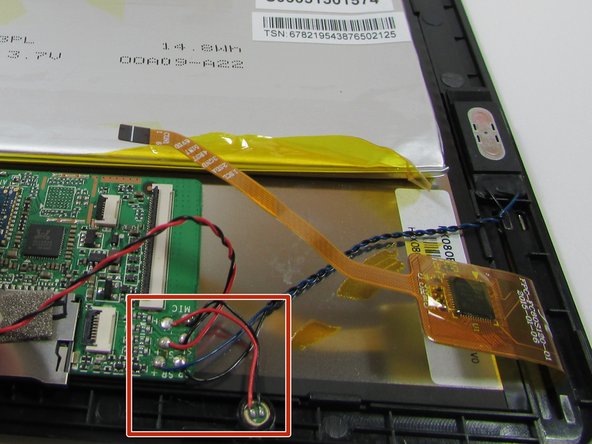
  5. NuVision TM800A510L Screen Replacement: 5 단계, 이미지 1/2 NuVision TM800A510L Screen Replacement: 5 단계, 이미지 2/2
    • If you have not done so already, de-solder the boards from the device.

    • De-soldering the wires right now makes sure none of the wires are damaged or broken when we move the components.

  6. NuVision TM800A510L Screen Replacement: 6 단계, 이미지 1/1
    • The touch screen should lift right out of the device.

  7. NuVision TM800A510L Screen Replacement: 7 단계, 이미지 1/1
    • Use the Heat Gun to heat the adhesive between the screen and edge protector.

    • Pry the two pieces apart.

    • Be careful of the circuit ribbon for the touch screen when prying the two pieces apart. The ribbon threads through both pieces.

    • Remember: Heating the device to 'almost to hot to touch' makes the process easier to work with.

    • Tip: Try the heating & prying process on one side of the device at a time.

결론

To reassemble your device, follow these instructions in reverse order.

다른 한 분이 해당 안내서를 완성하였습니다.

Kelsey Riggs

회원 가입일: 01/25/17

486 평판

안내서 5개 작성하였습니다

댓글 0개

댓글 쓰기

조회 통계:

24 시간 전: 0

7일 전: 0

30일 전: 4

전체 시간: 2,381